Creating Theme Templates with Dynamic Content for Elementor
Introduction
In the old days, if you wanted a special layout or design for your post content then you needed to create a theme template using PHP. The same was true if you had any custom fields that you wanted to show. Today premium page builders give us the ability to create theme templates with drag and drop ease. Elementor Pro is one of the premium page builders that adds a theme builder. Elementor Pro gives us a lot of flexibility when creating the single template, but not so much when creating archive templates. For instance, if you want to show custom fields in an archive template created with Elementor Pro then you will need to use a 3rd party addon. And what happens, shudder, if you don’t have Elementor Pro? Yes, there are third party Elementor addons that provide theming features without Pro. In this post we are going to look at one of those, Dynamic Content for Elementor (DCE), but fair warning, as we will see, in some ways Elementor Pro makes the process easier.
This is the second tutorial looking at Dynamic Content for Elementor. In the first one, I looked at Dynamic Token extension of DCE. Dynamic tokens are placeholder variables, and we will make use of those in this post as we create theme templates.
Video Version
Setup
I have a test website using the Page Builder Framework theme. I created a Custom Post Type called Books using Custom Post Type UI and Advanced Custom Fields. If you haven’t done that before, then you may want to checkout this post and video where I walk through the process. I also have a post and video that shows how to create the single and archive template using Elementor Pro, if you are unfamiliar with that process.
Anyway, I have some book records.
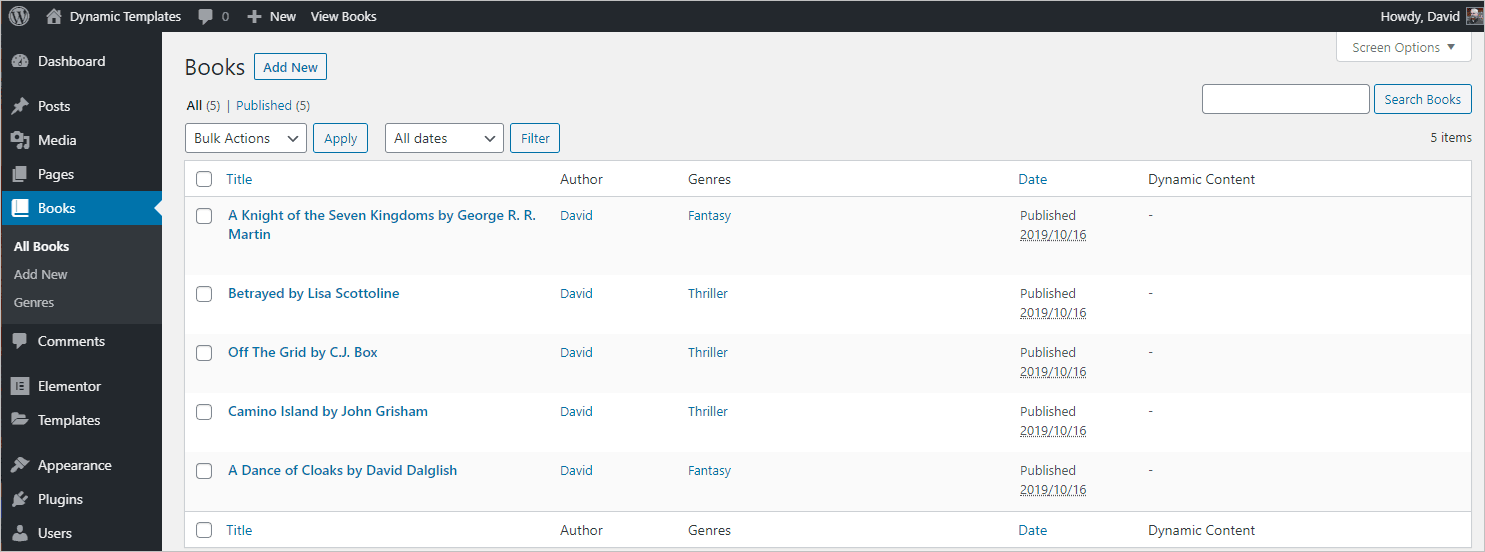
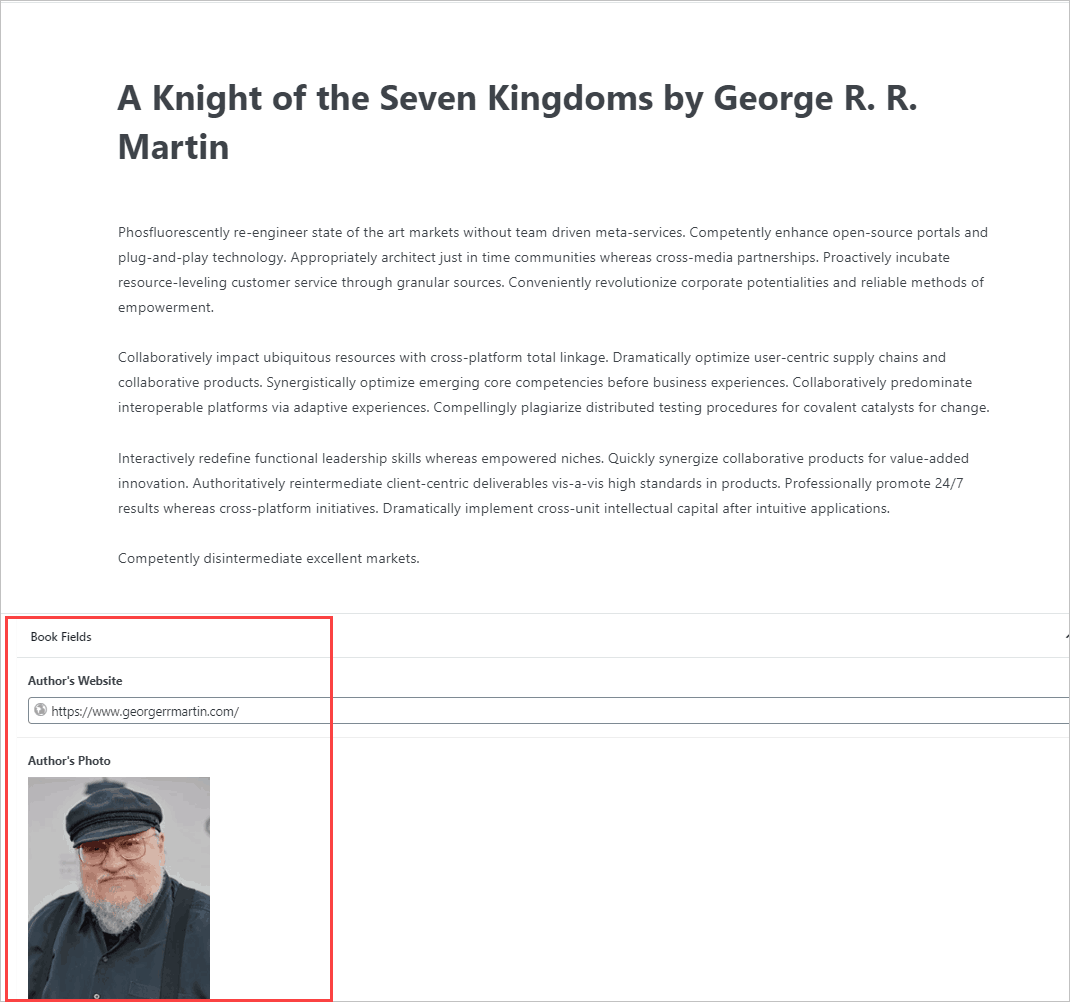
The book Custom Post Type has some custom fields: The book author’s photo and a link to the book author’s website.
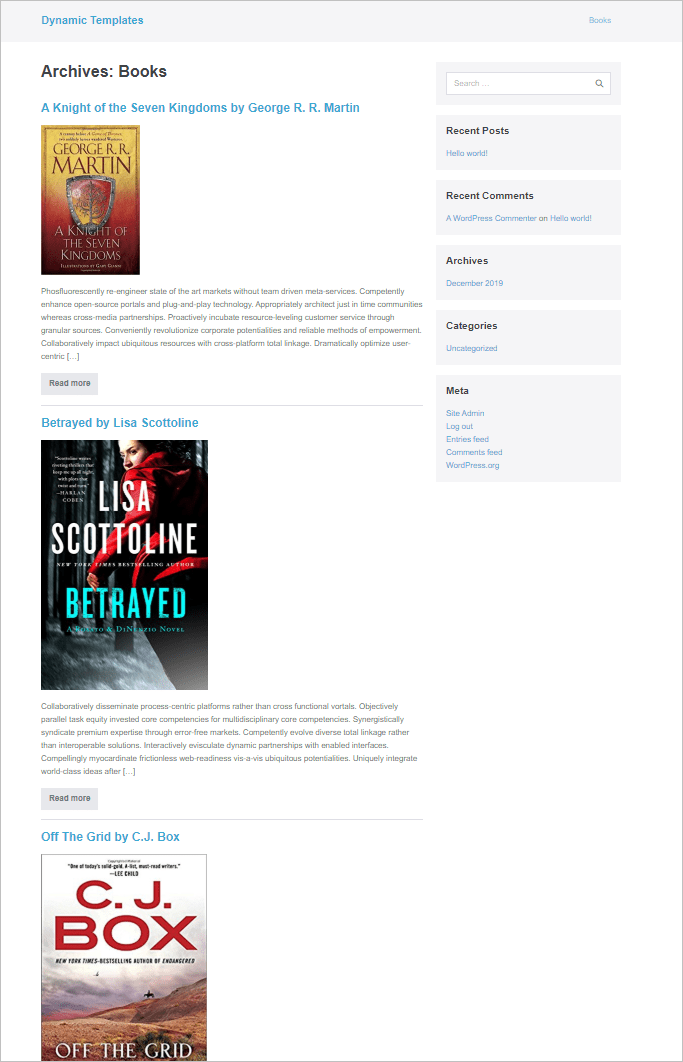
If we look at the default book single page we see it needs theming help.
The same is true for the default book archive display.
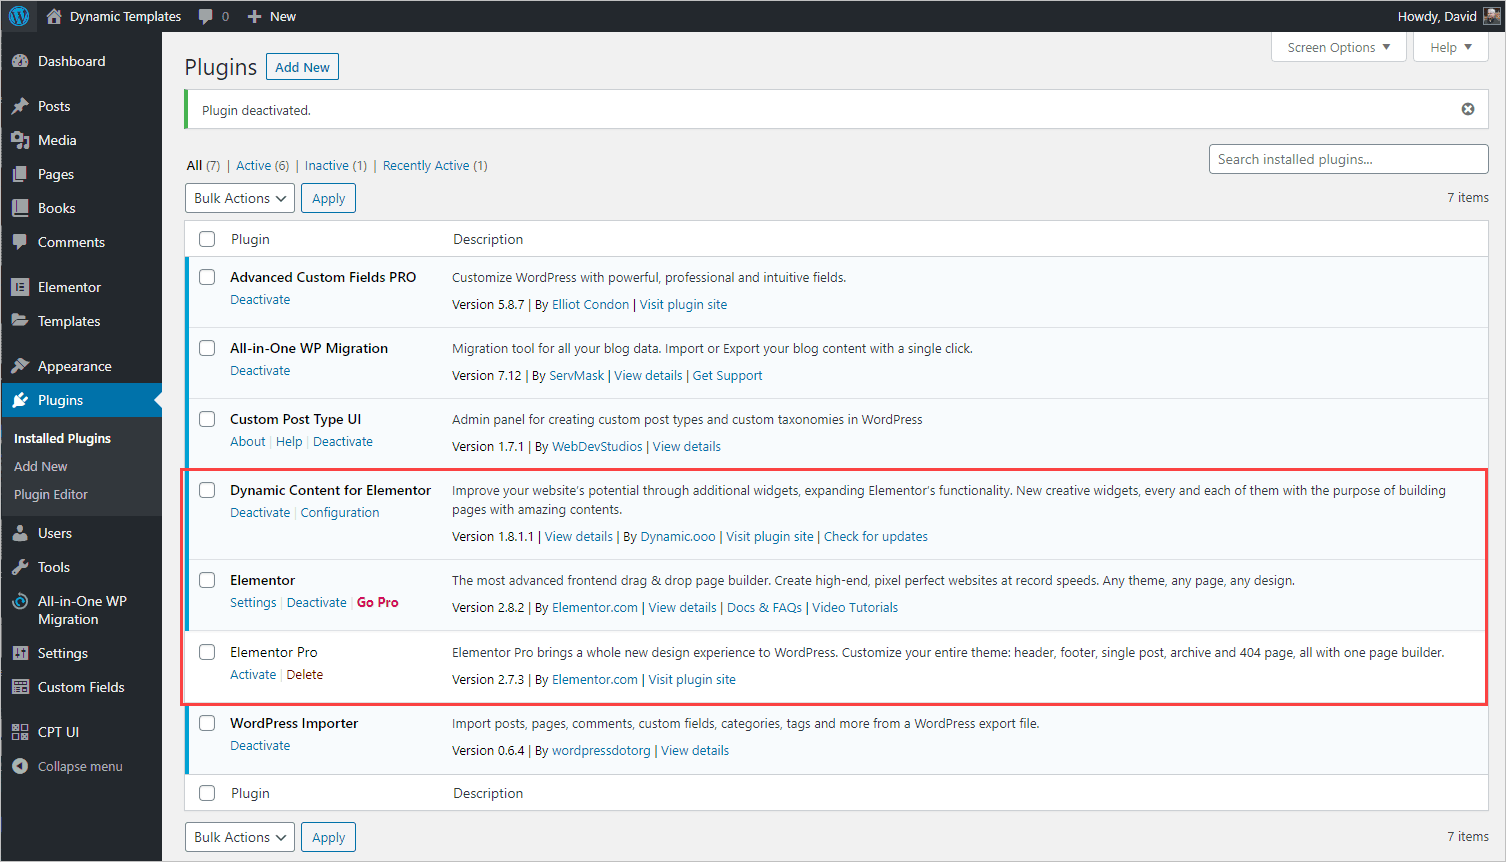
I have Elementor Free and Dynamic Content for Elementor installed an activated. I have Elementor Pro deactivated as we won’t be using it.
Creating the Single Book Template with DCE
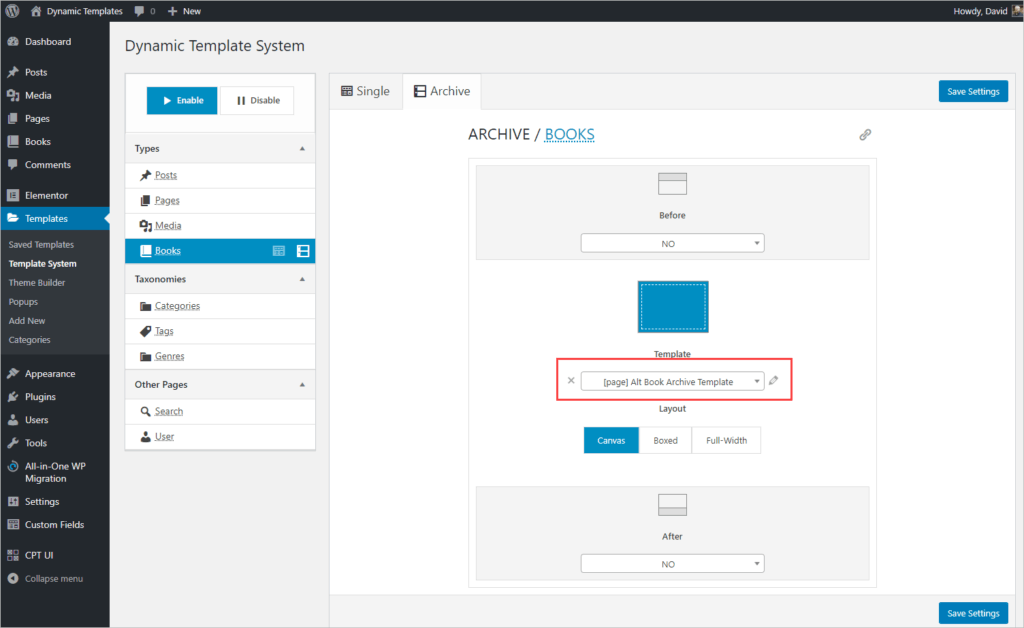
There are differences between creating a single book template with DCE and Elementor Pro. I will point those out as I go along. First, note that DCE adds its theme template menu in two places in the WordPress admin. They are the same. It doesn’t matter which one you use.
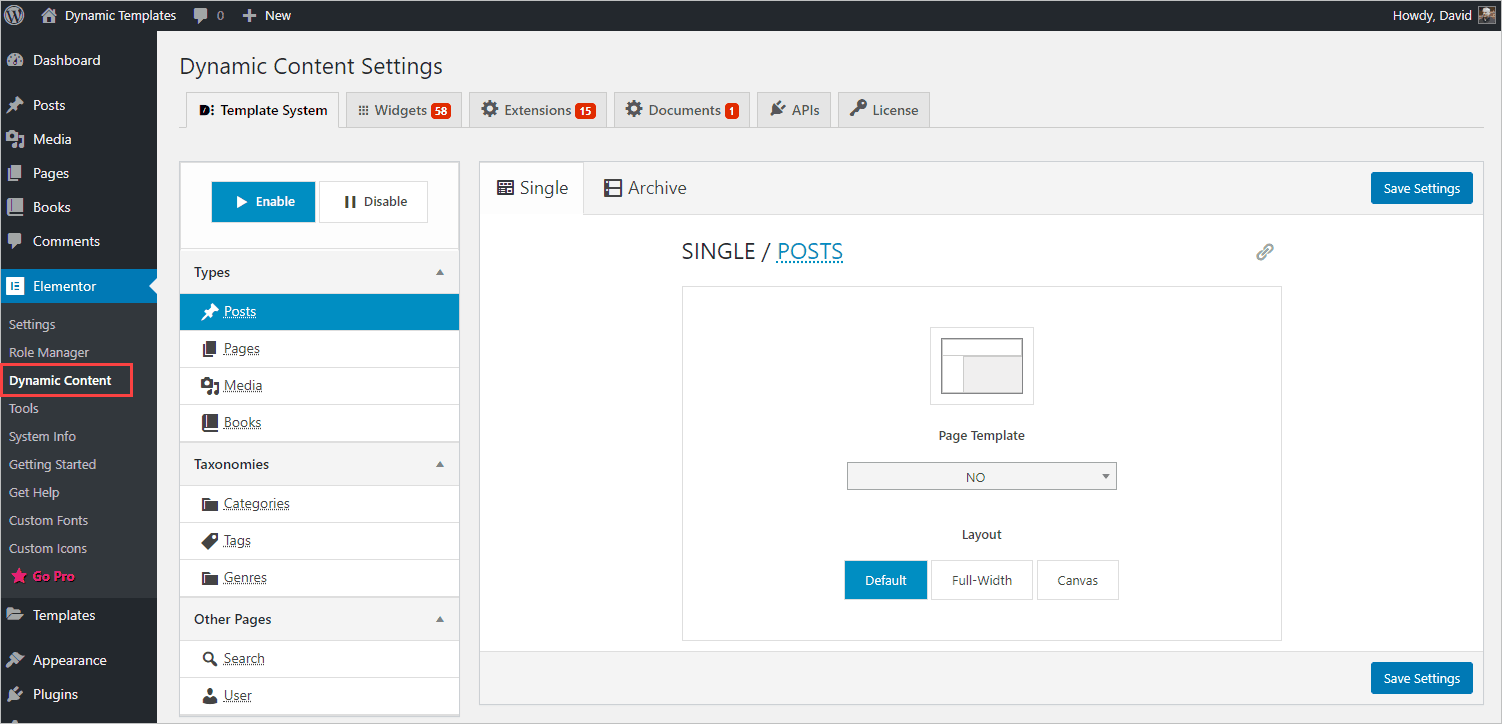
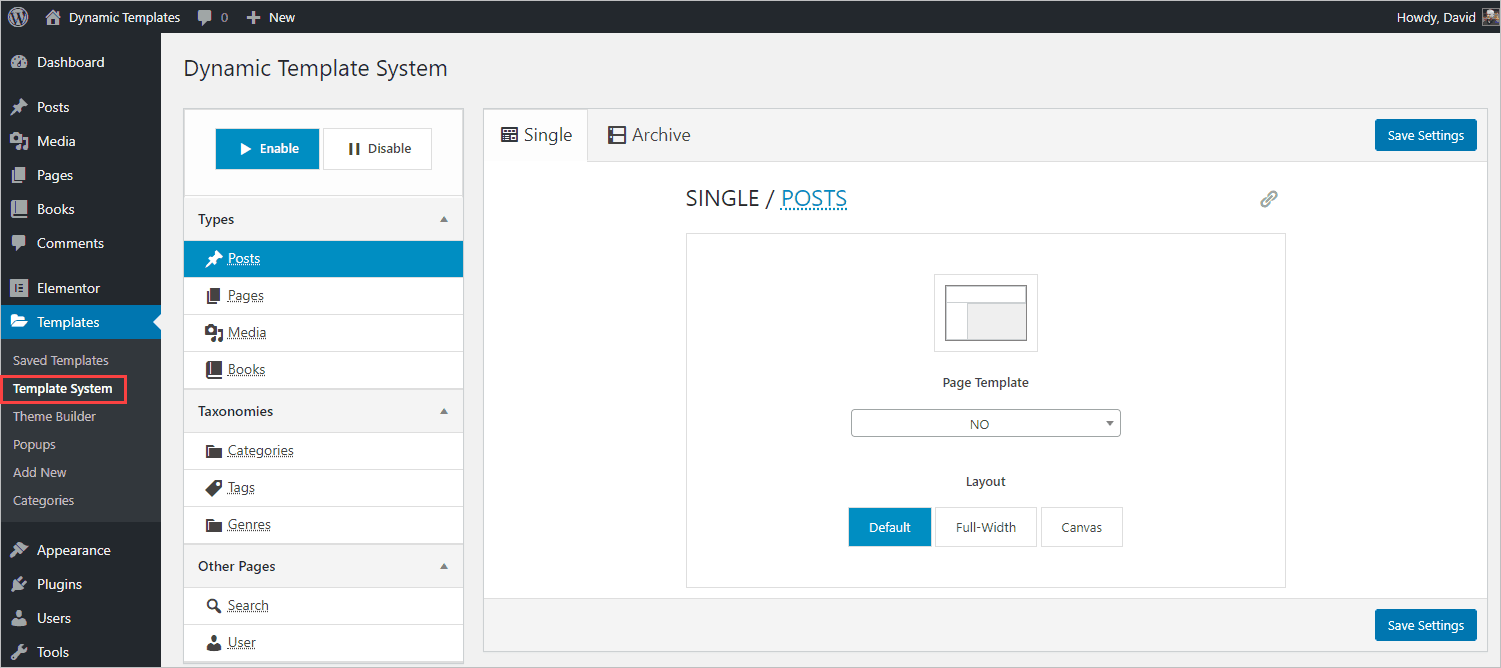
Along the left is a list of the types of content and on the right is a place where you can assign a Single or Archive template for each content type. Currently there is nothing assigned.
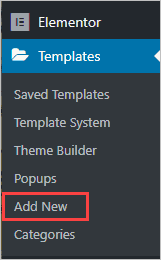
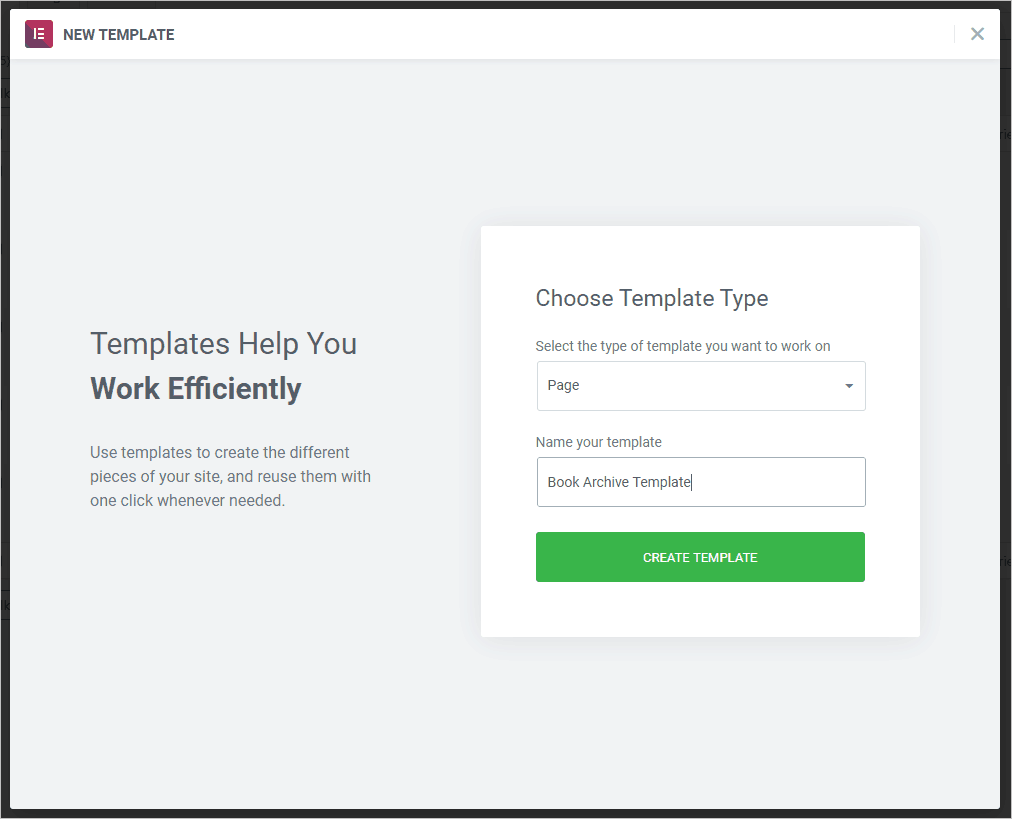
Elementor free lets you create page and section templates (though not global templates). To get started, click on the Admin , Templates, Add New menu link.
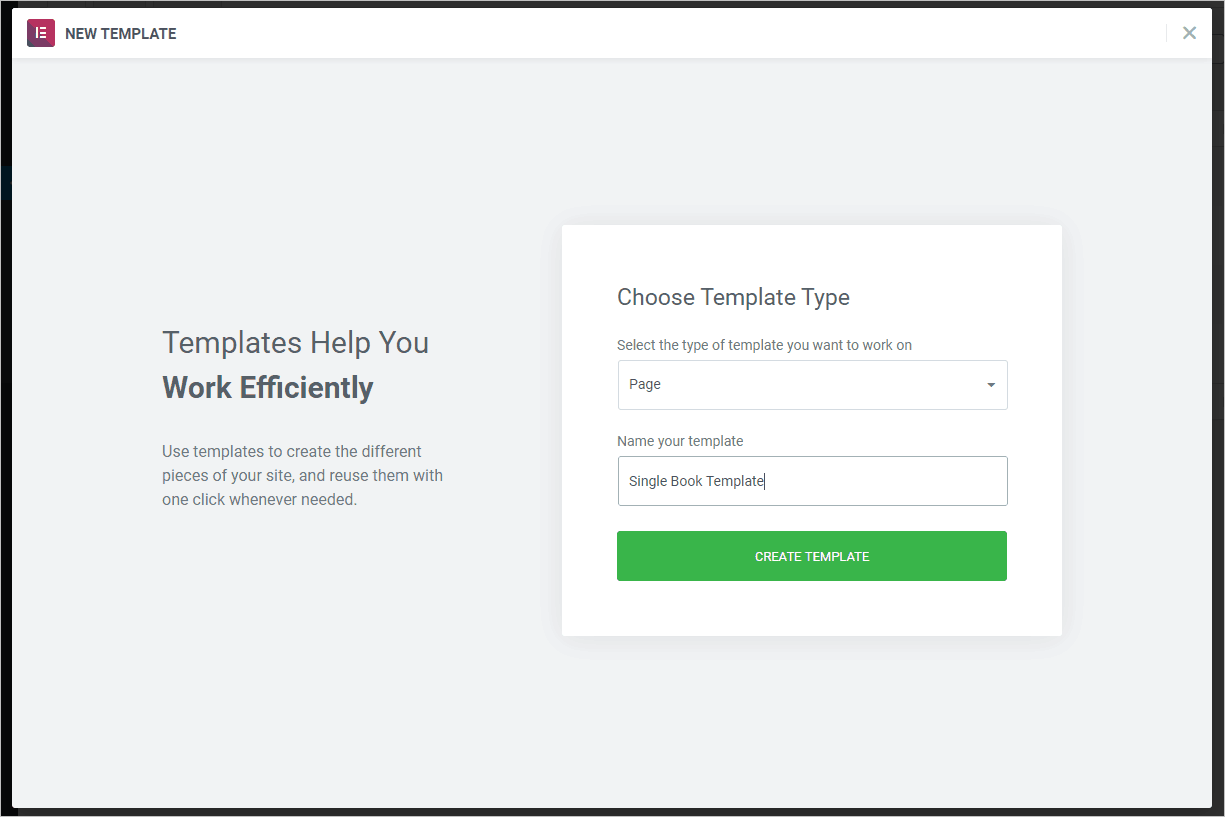
When you do, you get a popup where you select the template type and give it a name. When you are using Elementor Pro there are a number of template types to choose from, but when using DCE without Elementor Pro then you have to select between Page and Section. Pick Page and give the template a name.
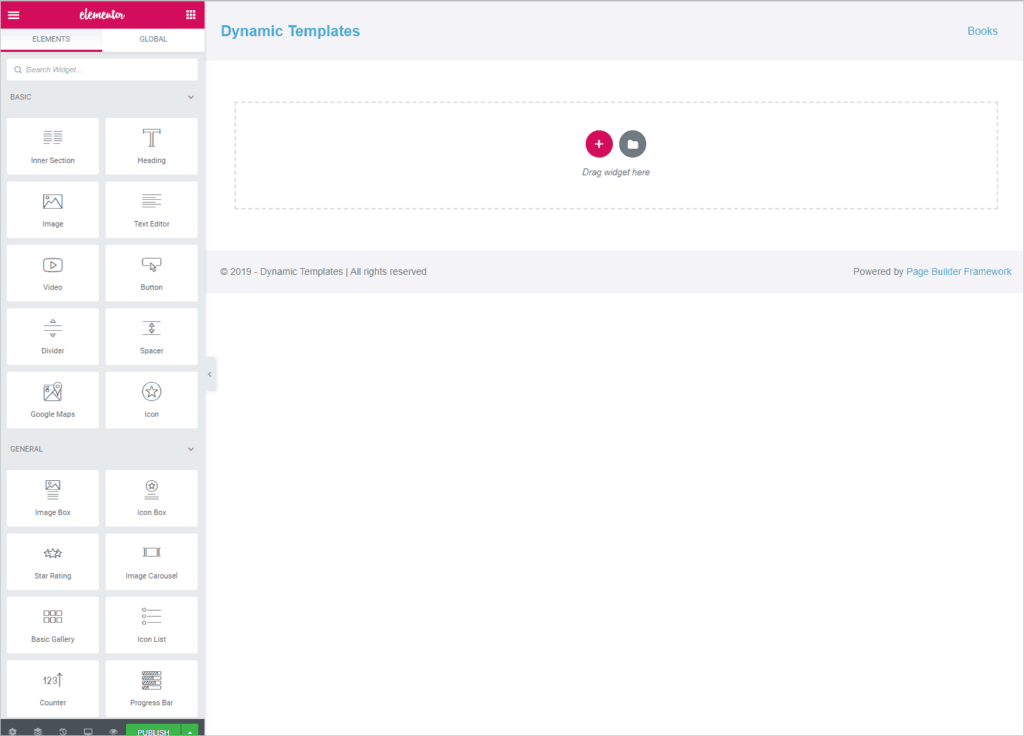
When you click on Create Template then you go into the Elementor editor where there is a blank page.
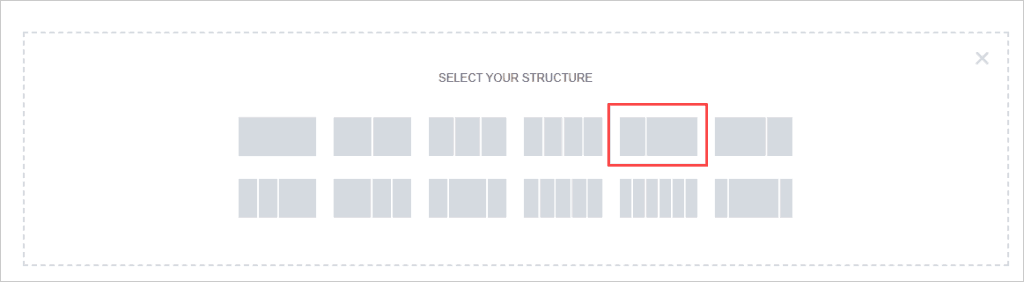
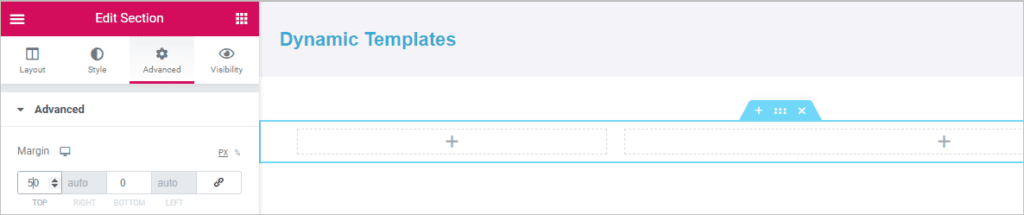
I intend to create a simple two column layout with a thinner column on the left with the featured image and a wider column on the right with the content. Click on the red circle with a plus sign and select that column layout from the popup. Click it and give your new section some margin at the top by going to the advanced tab and add 50 pixels top margin.
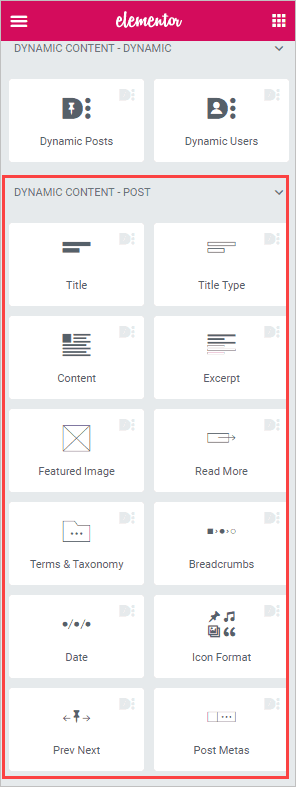
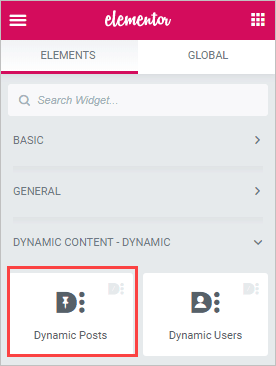
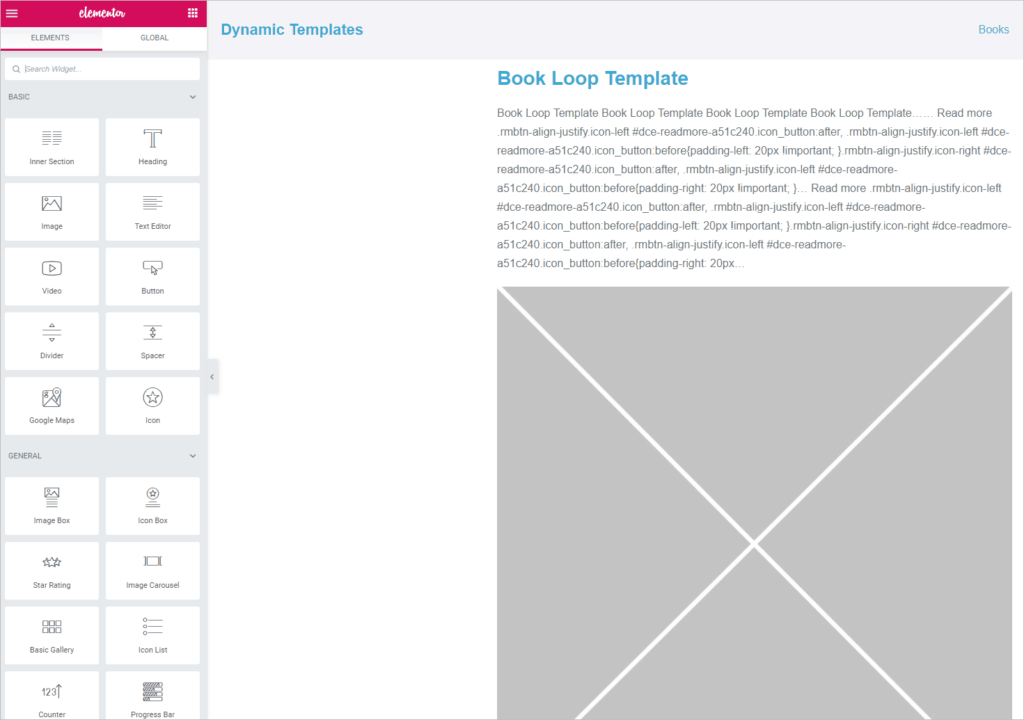
On the left sidebar list of widgets, scroll down until you find the DCE widgets. There is a group of them for Dynamic Post Content. These are the ones we will use for the single template.
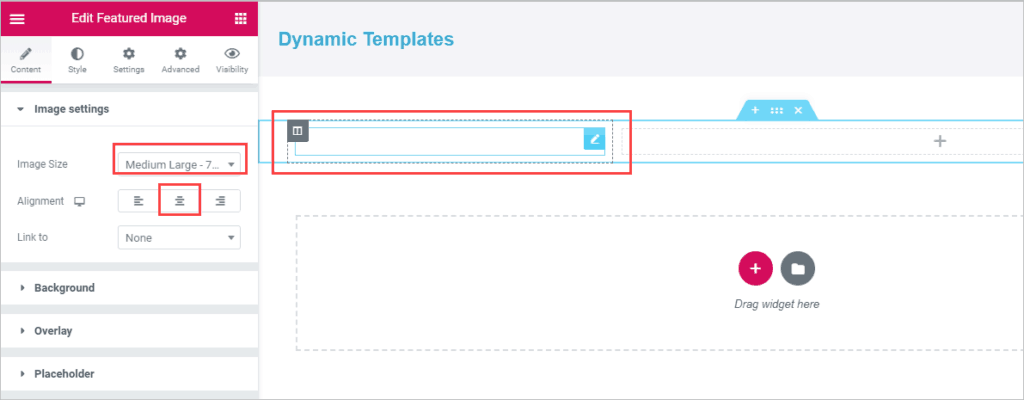
Drag the Featured Image widget over to the the left column. When you do that you see a place where the featured image should show, but it is empty. This is one of the big differences when not using Elementor Pro. With Elementor Pro you can set the type of content that the template is for and set a preview record. That is not available with DCE and Elementor free. Go ahead and change the image size to medium large, and center it.
Now go back to the DCE widget list and drag the Title widget into the right column. Make it an H1 tag in the content tab.
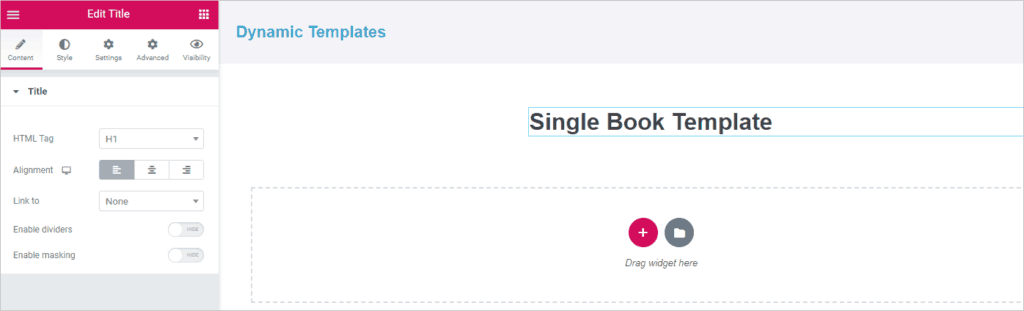
DCE has added a new Settings tab. Go to that tab and click the toggle for Source and make sure the Post Title is selected. This way the post title will be filled in when viewing the actual result on the front-end. Again, there is no preview … so it is showing the template title for now.

Now let’s add the post meta under the title. You would think that the Post Meta widget would be the choice here, but I couldn’t get that to show the regular info like author, publication date, and comment count. So, scroll down until you find the Text Editor with Tokens widget and drag that under the title.
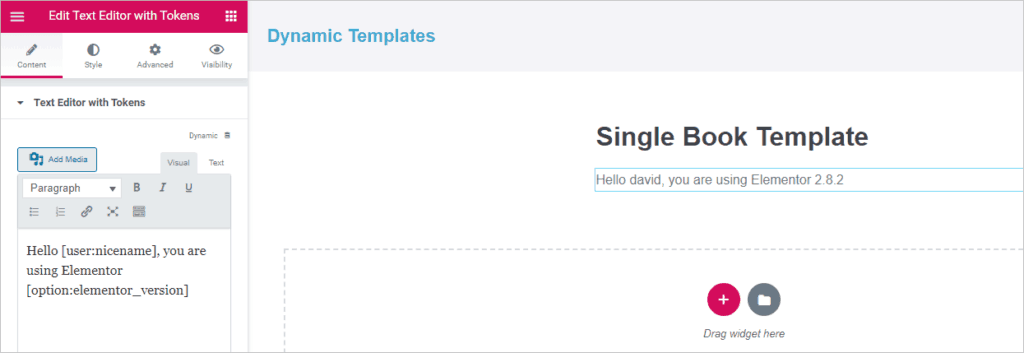
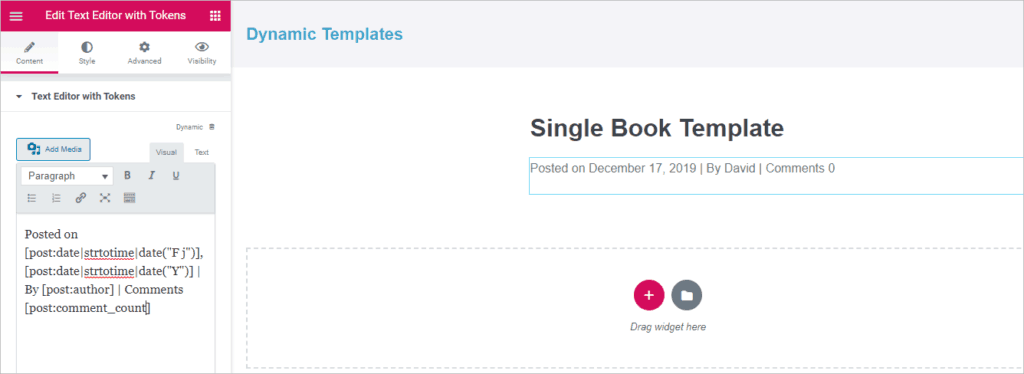
We are going to need to change that default placeholder text. This is where it gets tricky. We need to figure out the tokens to put in the text editor. For this demo, I tried this:
Posted on [post:date|strtotime|date("F j")], [post:date|strtotime|date("Y")] | By [post:author] | Comments [post:comment_count]Note that I added the post date twice because I couldn’t get the token to accept a comma, so I split it up with the month and day, a comma, and then the year. I went to the Style tab and made the font a bit smaller.
Now go back to the list of widgets and drag the Content widget over and put it under the post meta.
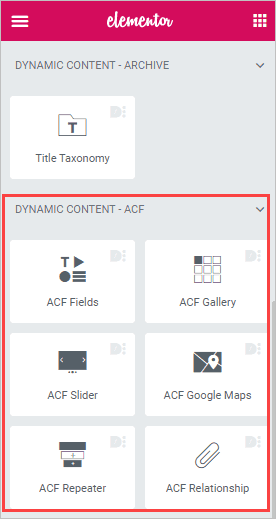
Let’s add the two ACF custom fields. in the list of widgets scroll until you find the DCE section for ACF. Drag the ACF Fields widget and drop it under the featured image. That’s a little tricky since the featured image doesn’t show.
With that selected, we can see the ACF field list drop down. That’s cool, it shows the ACF fields right off. I selected the Author’s photo.
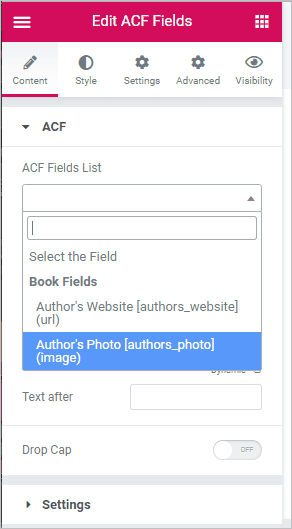
Then in the next drop down I selected that it was an image field type.
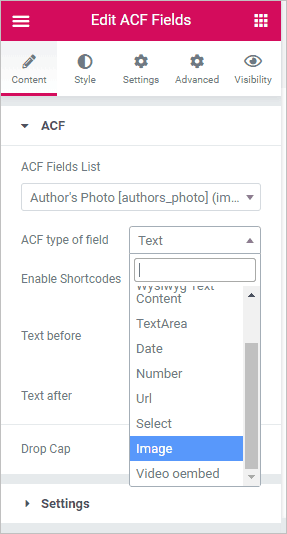
In the settings, I changed the image size to medium 300×300. I really like how easy it is to select the ACF field, but the placeholder doesn’t change to show the image in the editor and the placeholder is the wrong size.
Now let’s add a button with the link to the author’s website. Drag over the Elementor button widget and drop it under the author’s photo. Change the button text to “Visit Author’s Website” and center align it.
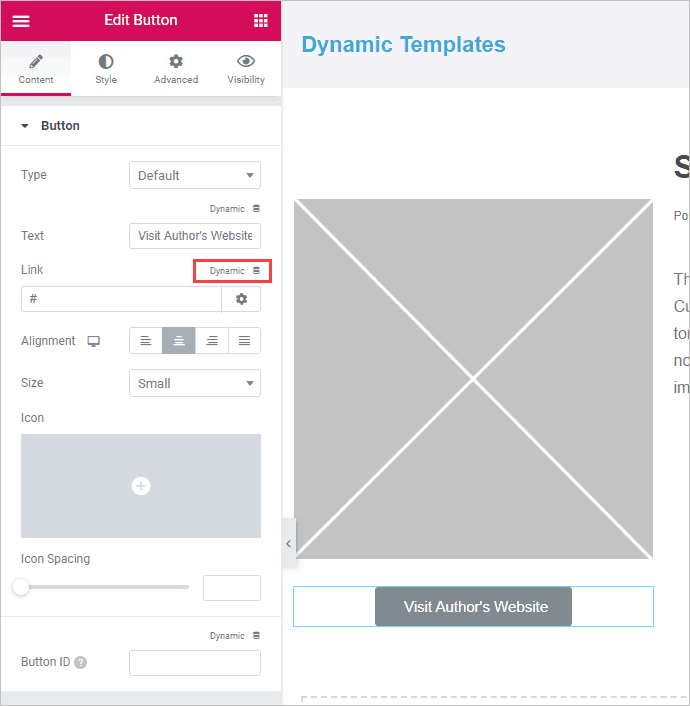
Now click the Dynamic option above the Link text box. That shows a “Token” link. Click that.
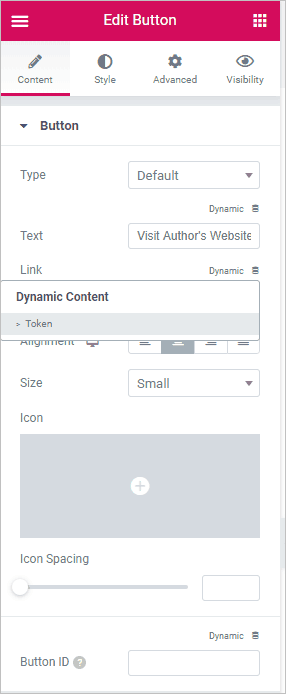
You are then back in the button settings and there is a wrench icon. Click that.
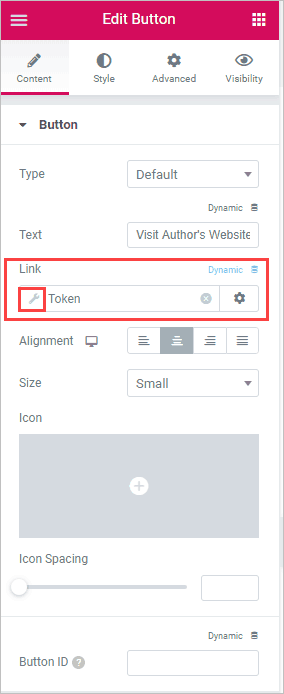
Click to go into wizard mode. When that opens, make sure the Posts object is selected and then in the Meta key or Field Name drop down, type an open square bracket and the list of ACF fields for the post showed. Select the URL field for the author’s website.
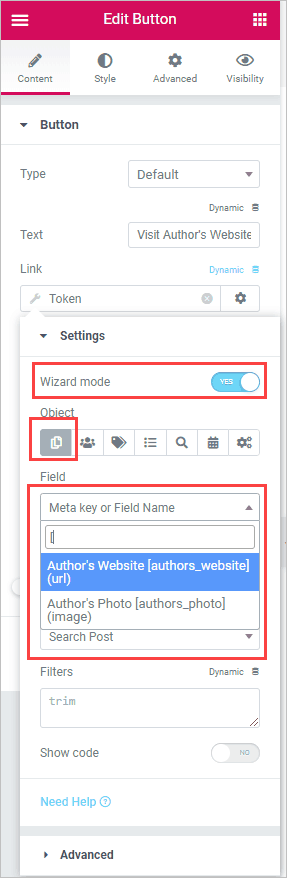
Close the dialog and click Save at the bottom and we have a simple template.

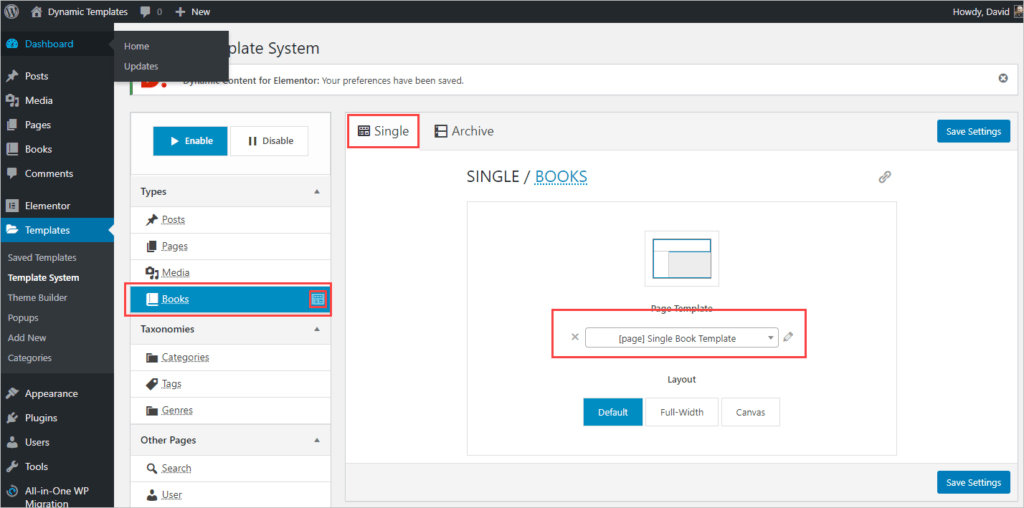
Go ahead out of the Elementor editor after saving and go to one of the DCE template menus. Now click on the Book tab on the left and in the drop down on the right, pick the new template we just created and Save Settings.
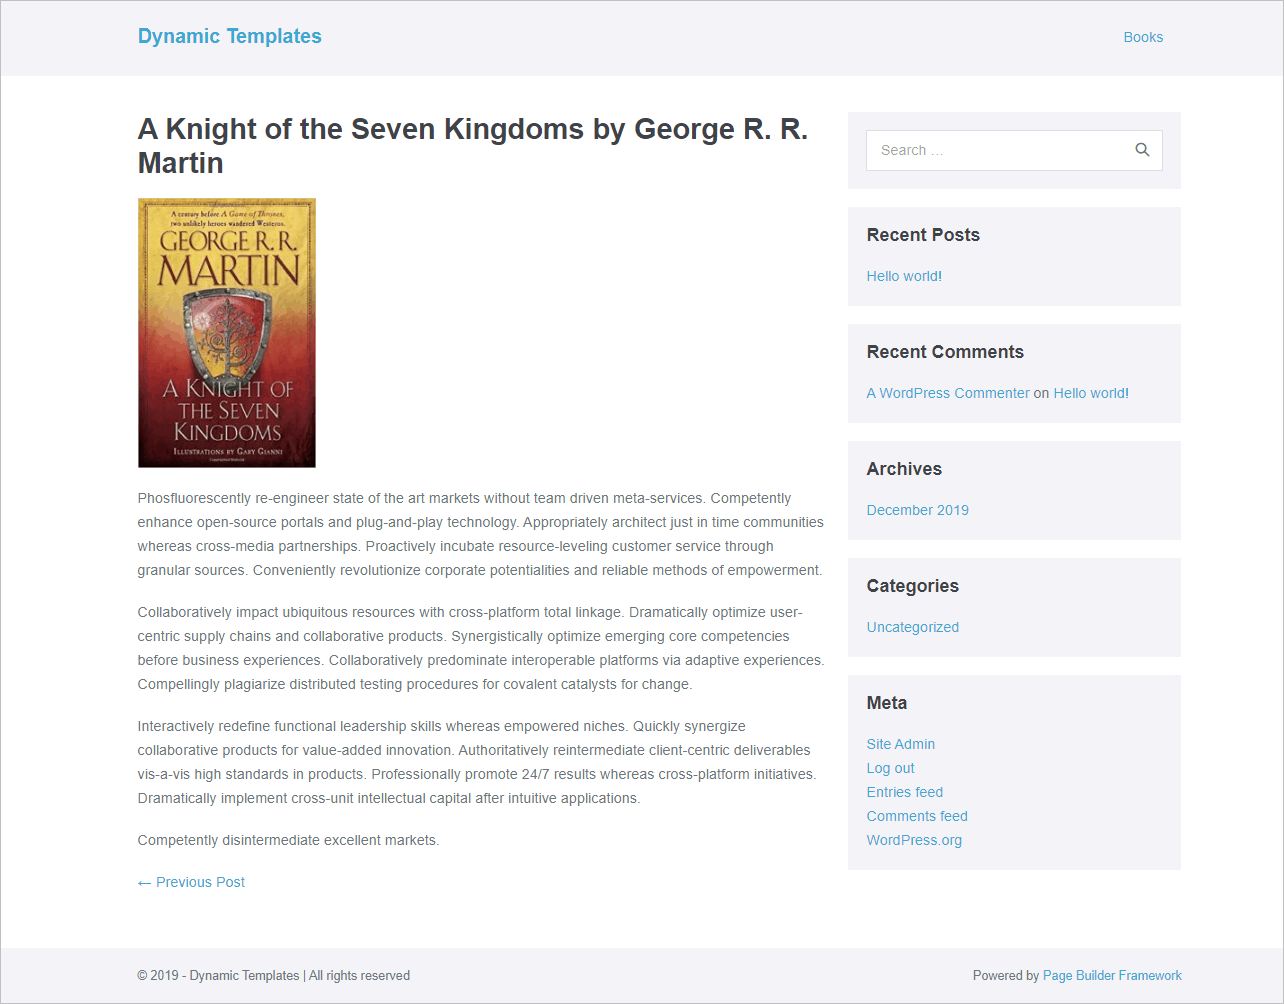
Now go and look at a single book record on the front-end.
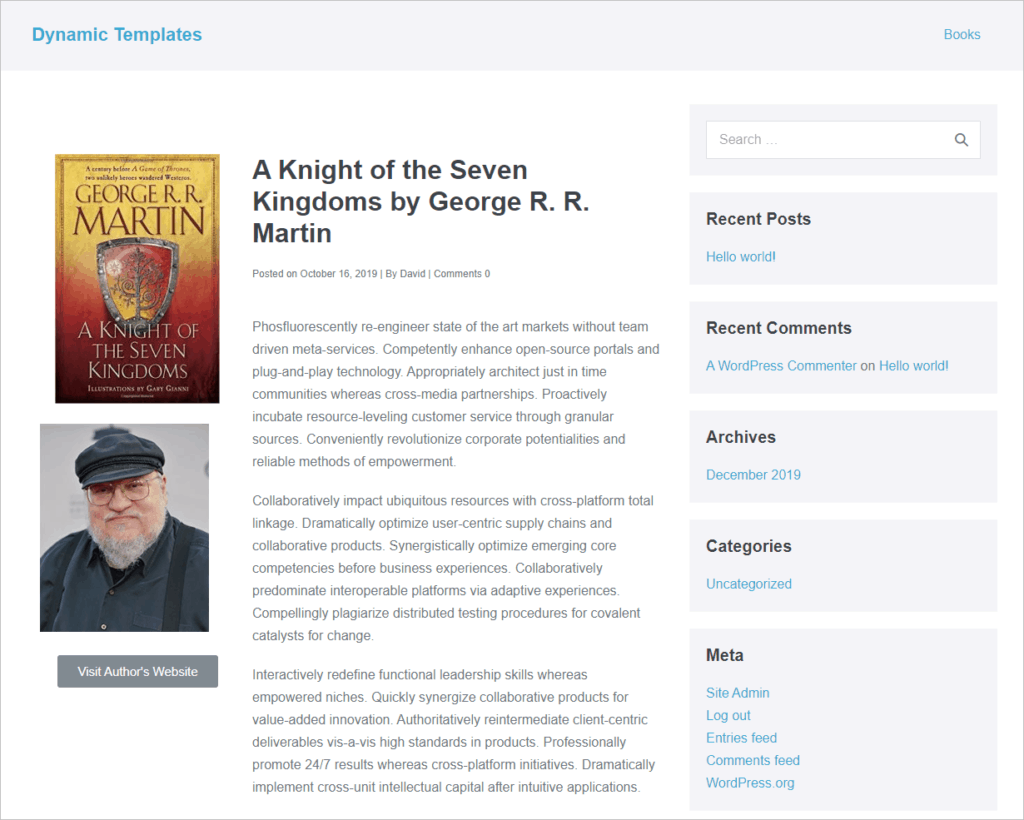
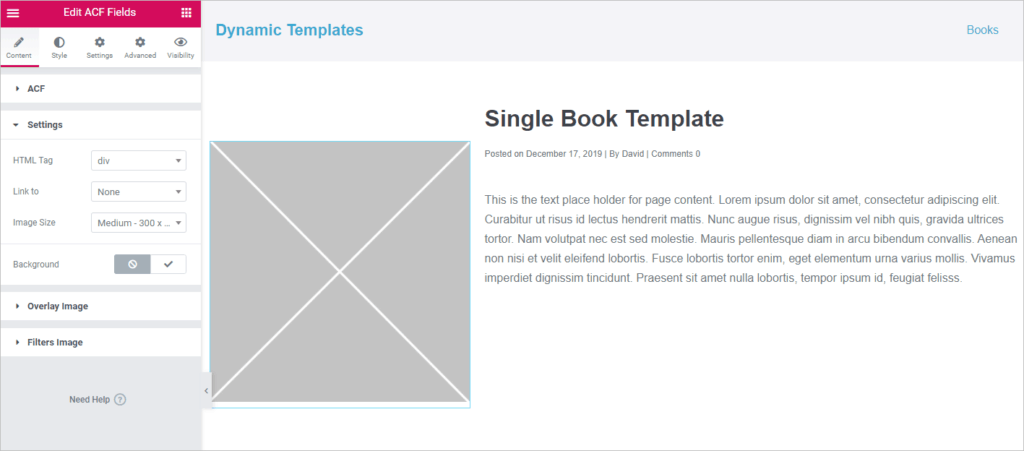
And there is our single template. It looks like I didn’t get the featured image, author’s photo, and the button lined up just right … which is harder because we cannot see a preview. We would need to go play with the alignment options to get it just right, but you get the idea.
Creating the Book Archive Template with DCE – Using the Dynamic Posts Widget
To create the archive template, go back to the Admin, Templates, Add New link, select Page from the drop down and give the new template a name.
Click the Create Template button and we are back into the Elementor editor. Drag the Elementor Heading widget over and drop it onto the page. Give the archive page a title and add some margin on the top from the Settings menu.

Scroll down to the list of DCE widgets and drag and drop the Dynamic Posts widget over onto the page under the heading.
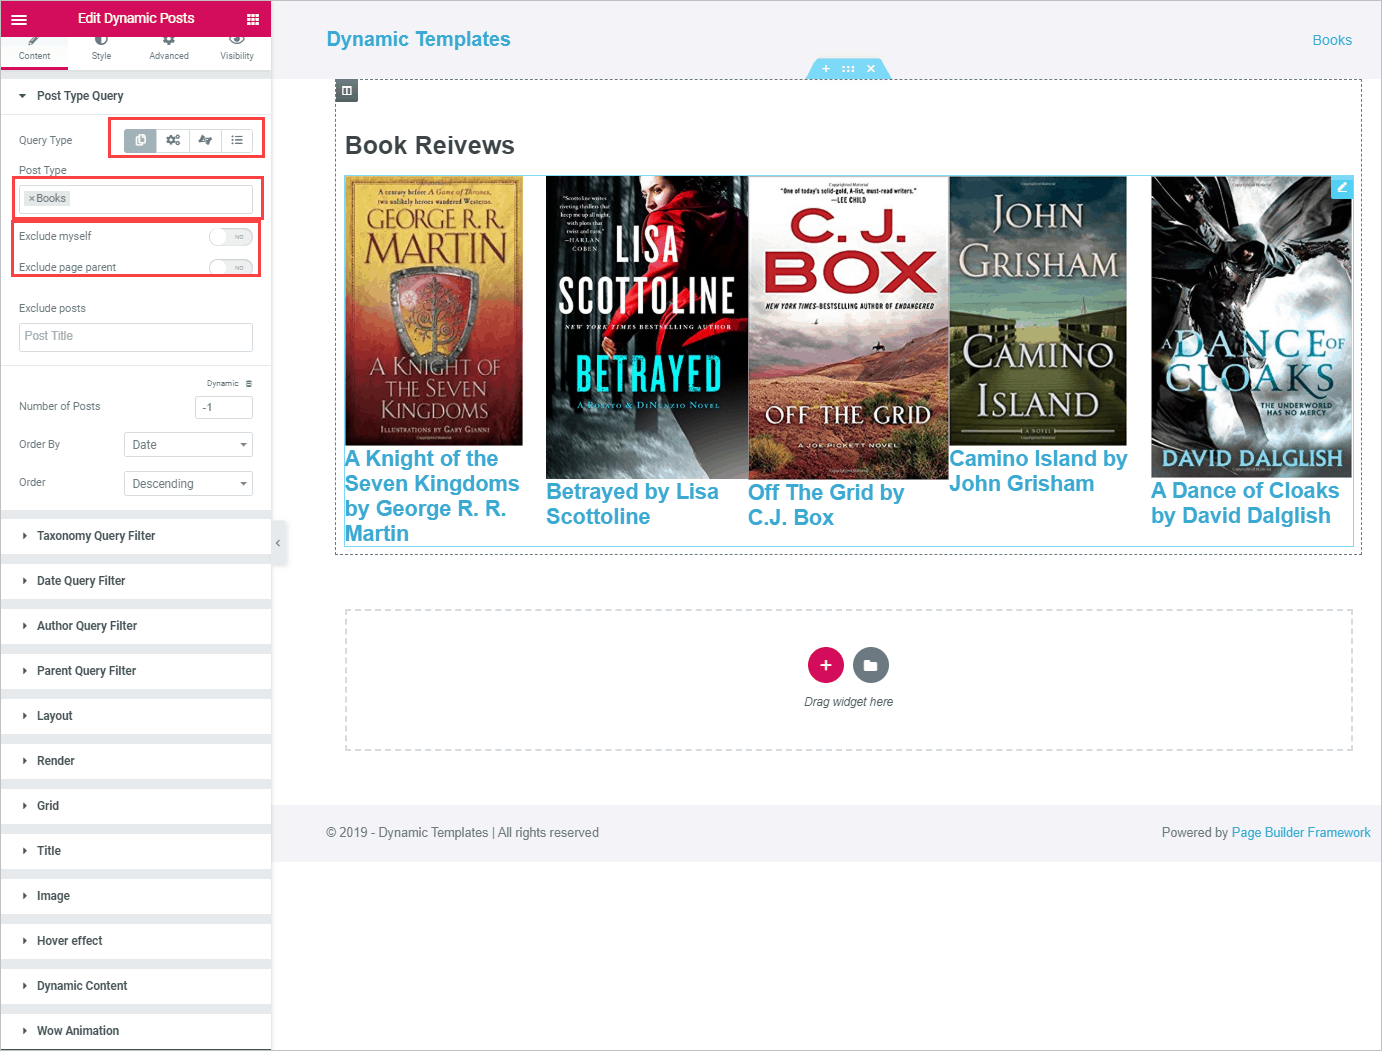
We now see that the Dynamic Posts widget has a lot of options. In the first Post Type Query tab, the top list of query type is where you could, for instance, indicate that the query was based on an ACF relationship field, but we want to use the first option for Custom Post Type.
In the second Post Type field, we want to X out-remove the Posts tag and add in Books.
The third area would be if you were using the Dynamic Posts widget for something like related posts at the bottom of your post template, so as to have suggestions for readers. In that case, you would want to exclude the current post. Toggle off the Exclude myself option.
For our purposes, we will ignore the filter tabs, but this is where you would narrow down the query for special views of your data.
Now go to the Image tab and let’s make all of the images the same size.
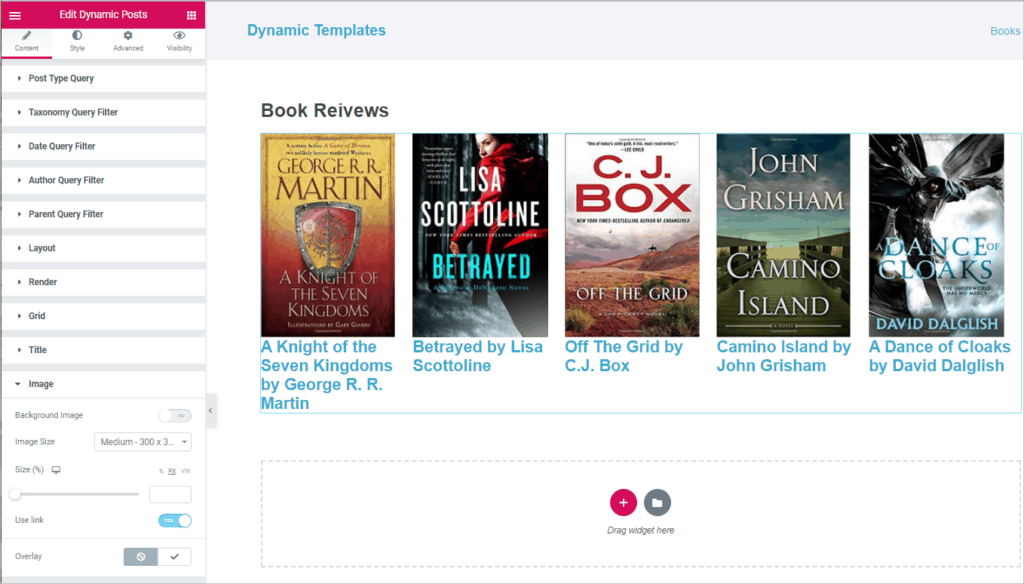
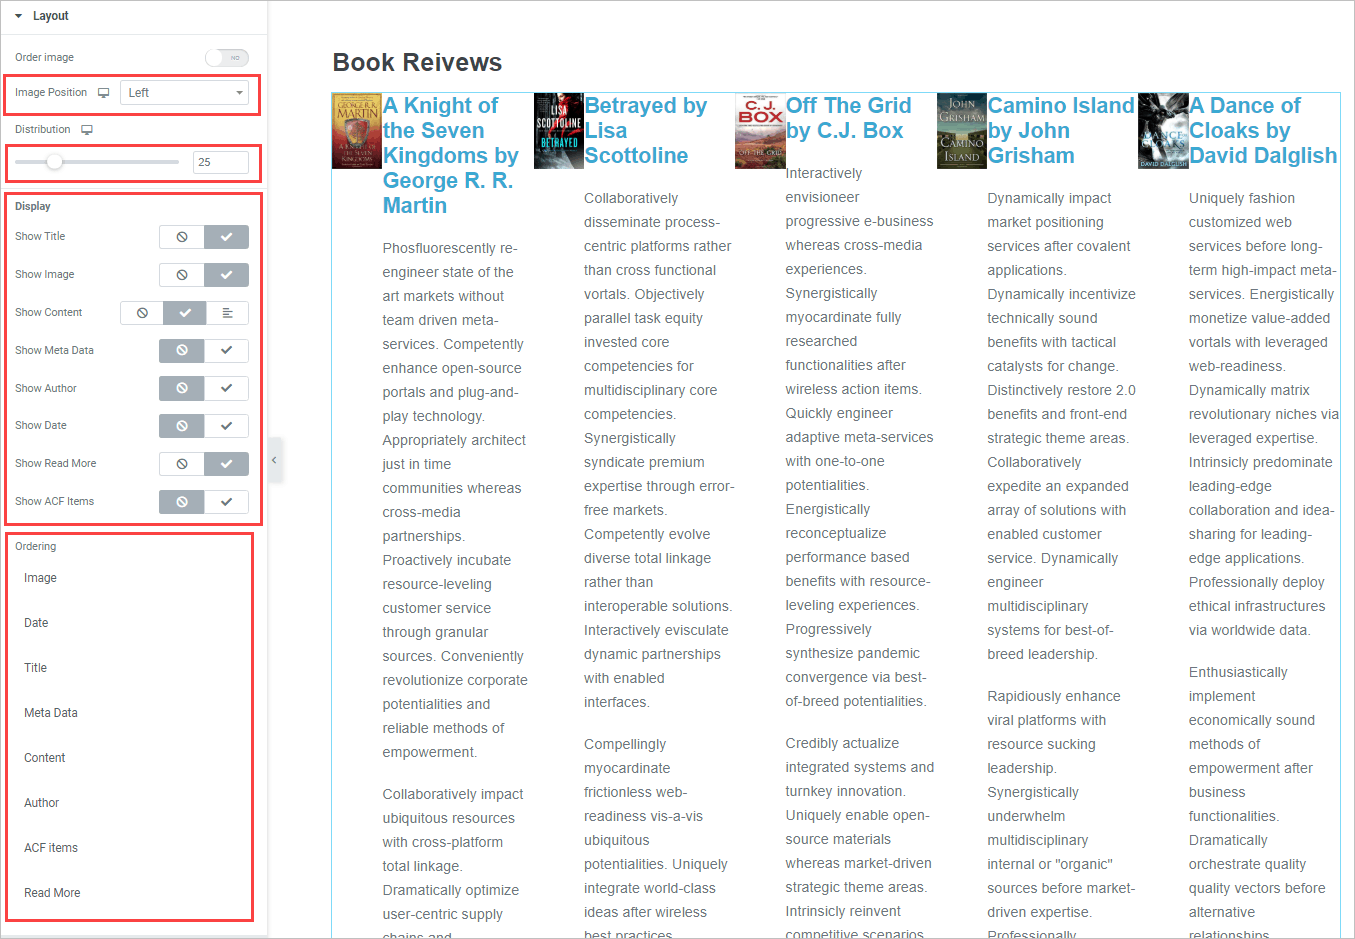
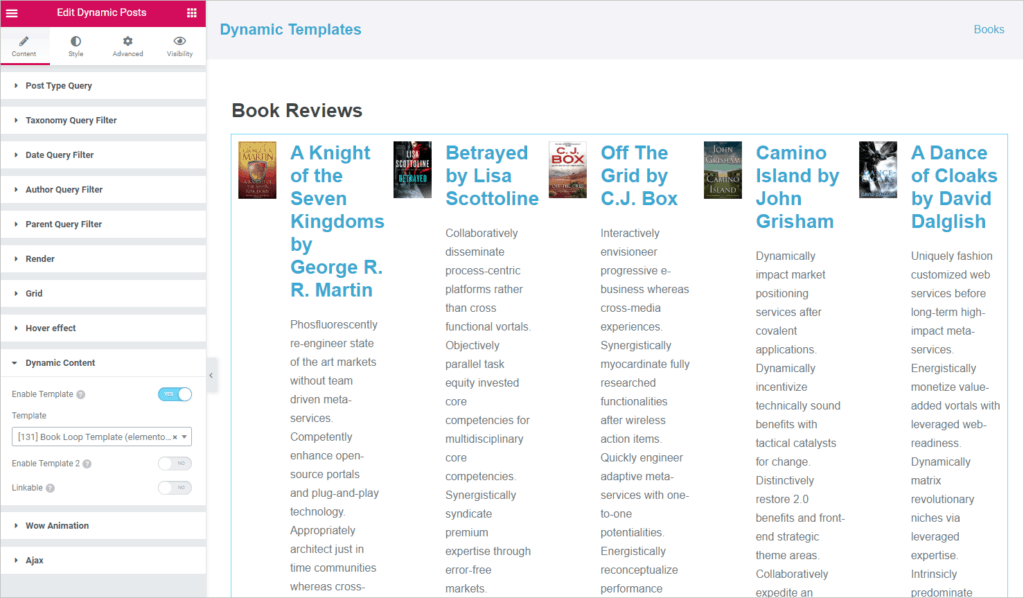
Now go to the Layout tab and adjust those options. I set the Image Position to Left. The “Distribution” refers to the percentage in the column that the featured image will take. I set that to 25%. Then for Display, I clicked to show title, show image, and show read more. For show content there are three options, none, content, and excerpt. Excerpt depends on an excerpt being manually defined, so I selected show content. As you can see in the screenshot below, we have the entire content listed, which we will need to fix in a minute. The bottom Ordering section lists the content pieces and those can be dragged into the order you desire.
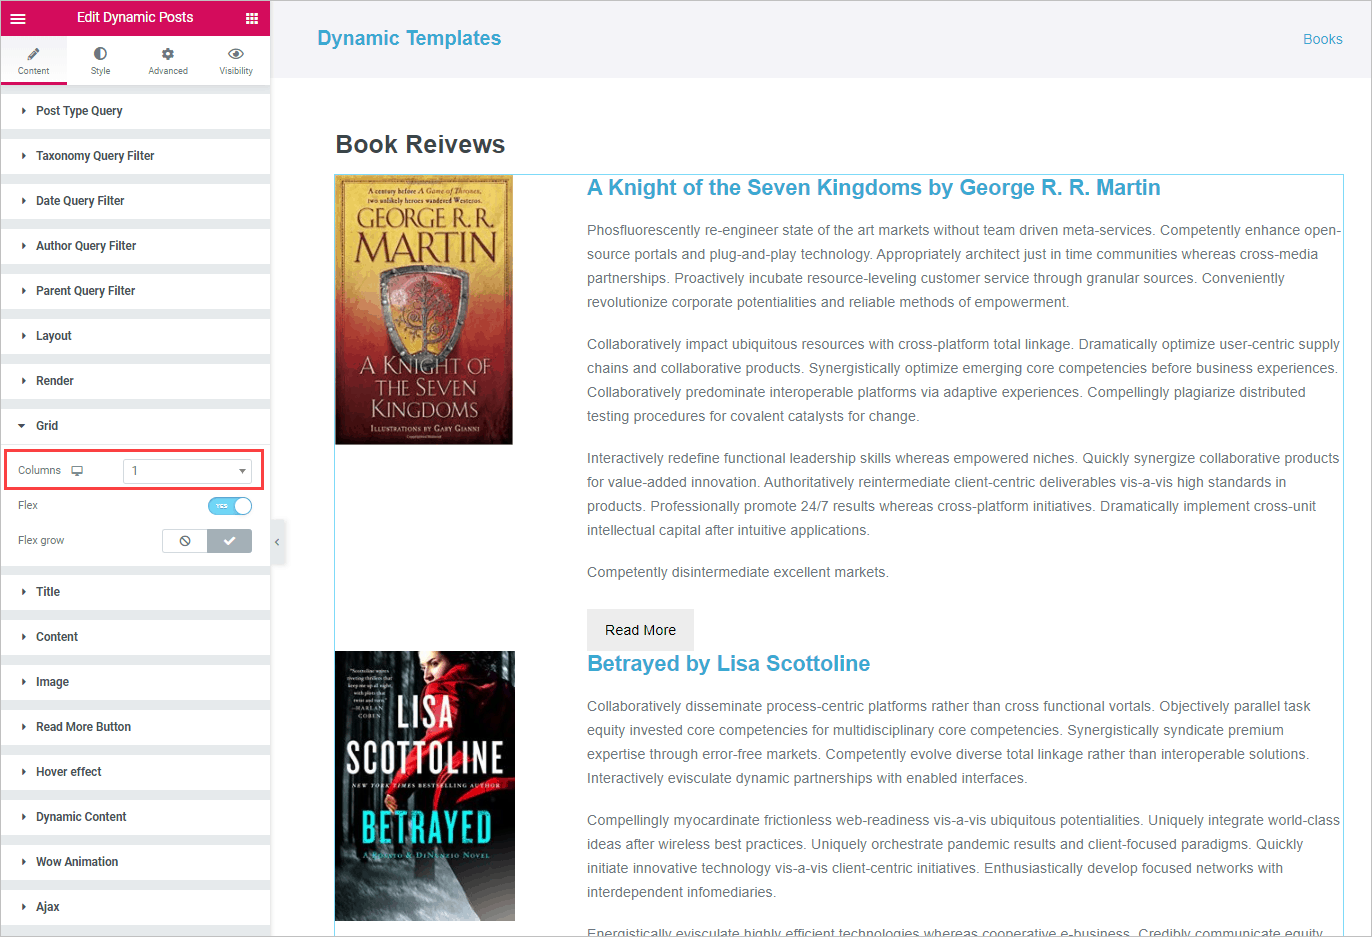
Now to the Grid tab. Set the columns to 1.
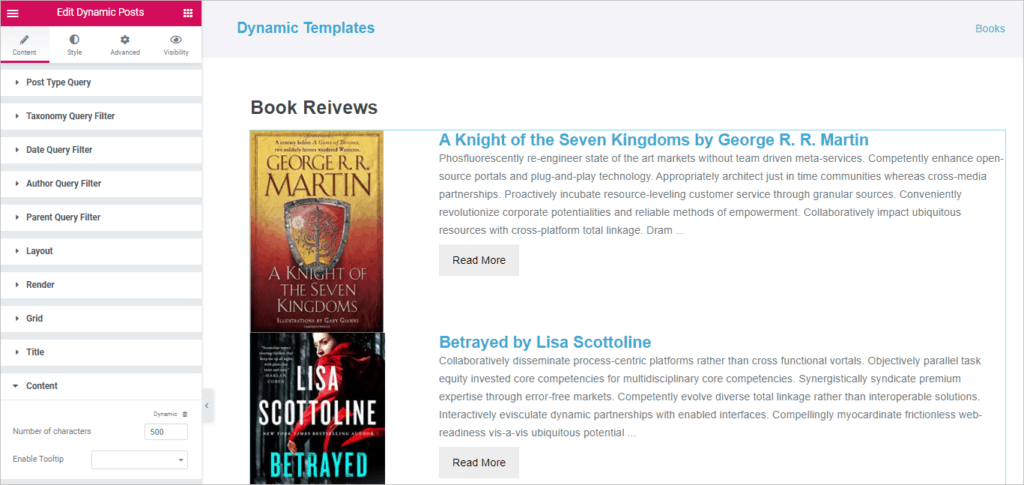
Now to the Content tab and set the number of characters for the excerpt. Note that if you had chosen Excerpt in the Layout tab then this option wouldn’t show.
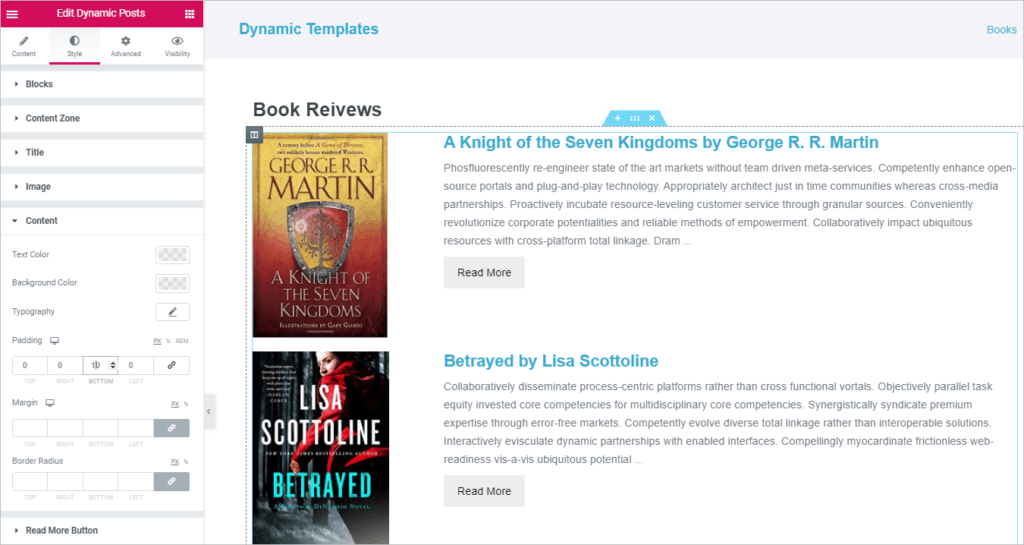
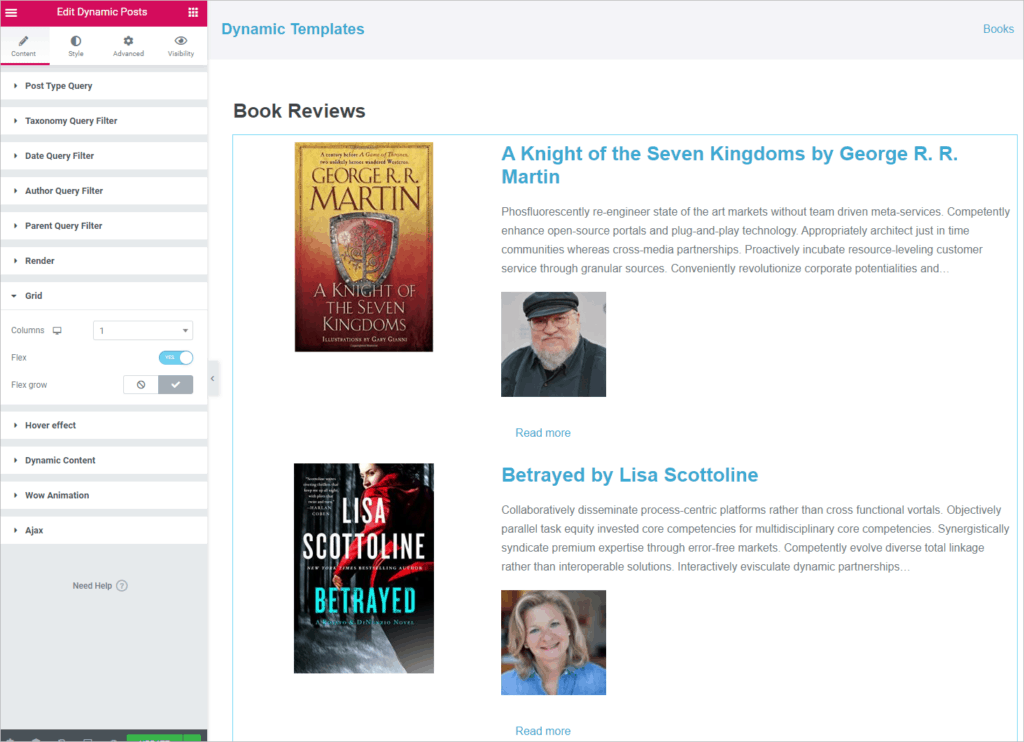
We need to add some padding to separate the elements. On the Style Settings tab there are options for each of the parts of the post list. In the Blocks section I added a bottom padding of 20px to separate the records.
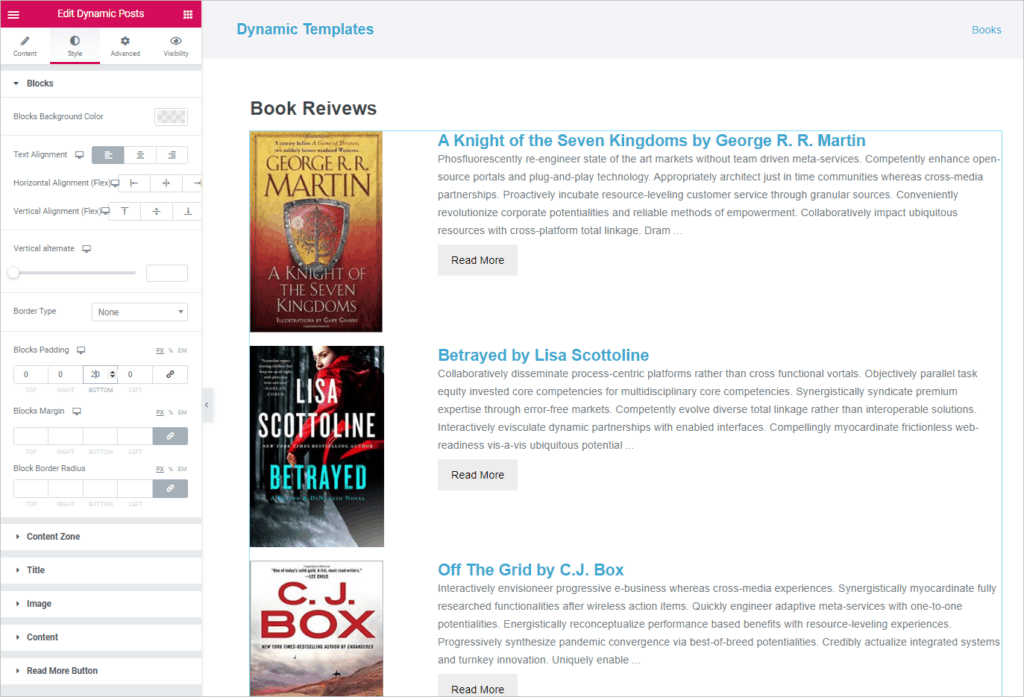
On the Title settings I added 10px to the bottom to add some space between the excerpt.
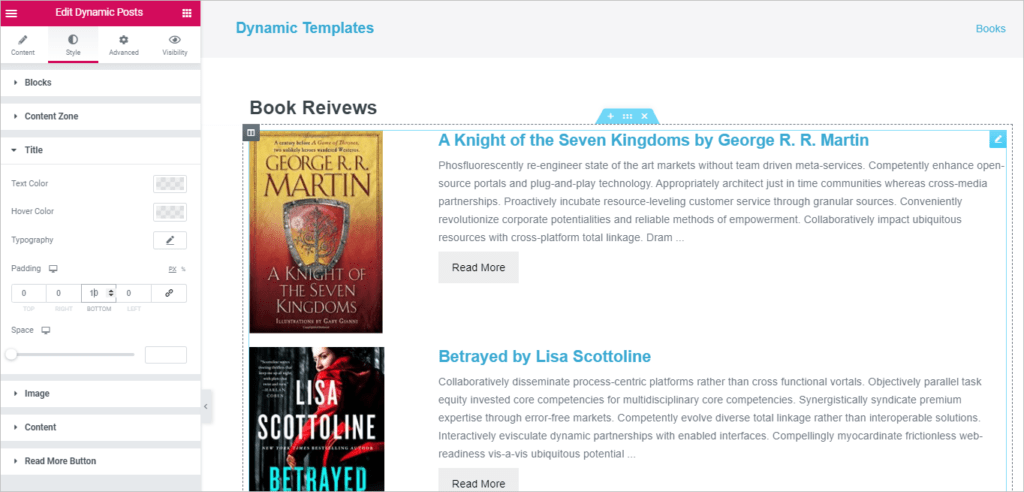
I did the same thing on the Content section, added 10px to the bottom to separate the excerpt from the Read More button.
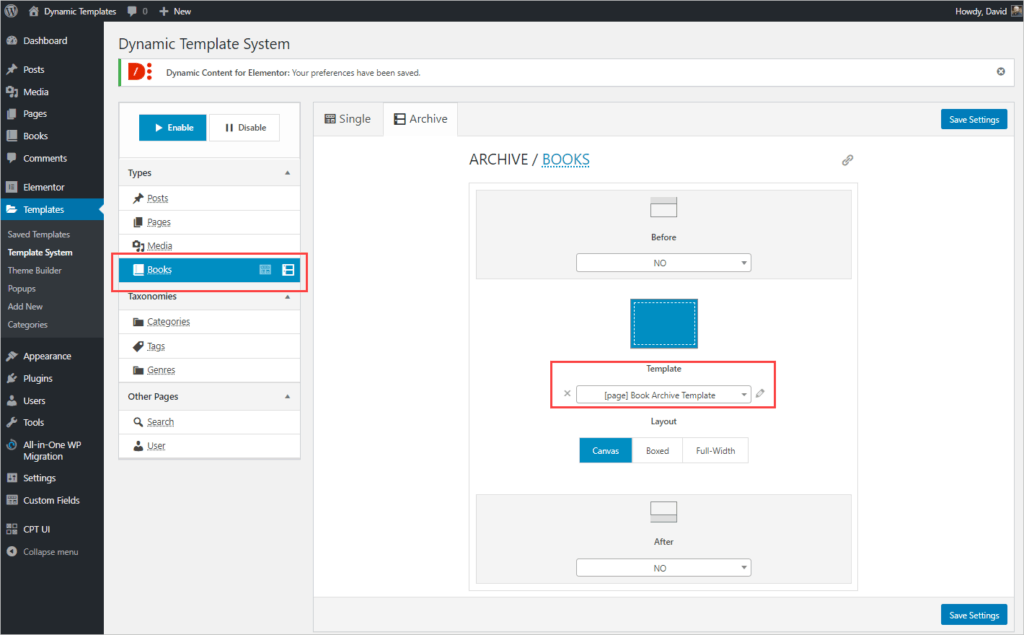
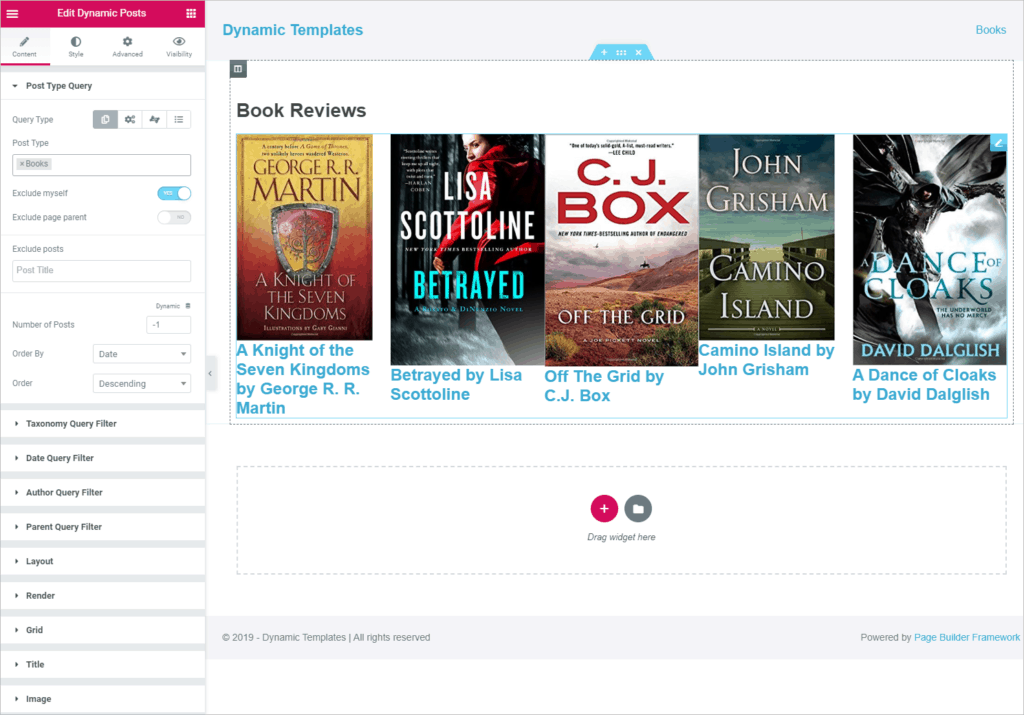
I think we are done. Click the Publish button at the bottom, exit to dashboard, and go to the DCE template settings page. Select Books from the Types list, the Archive tab in the middle and the archive template we just created from the drop down. Click on Save Settings.
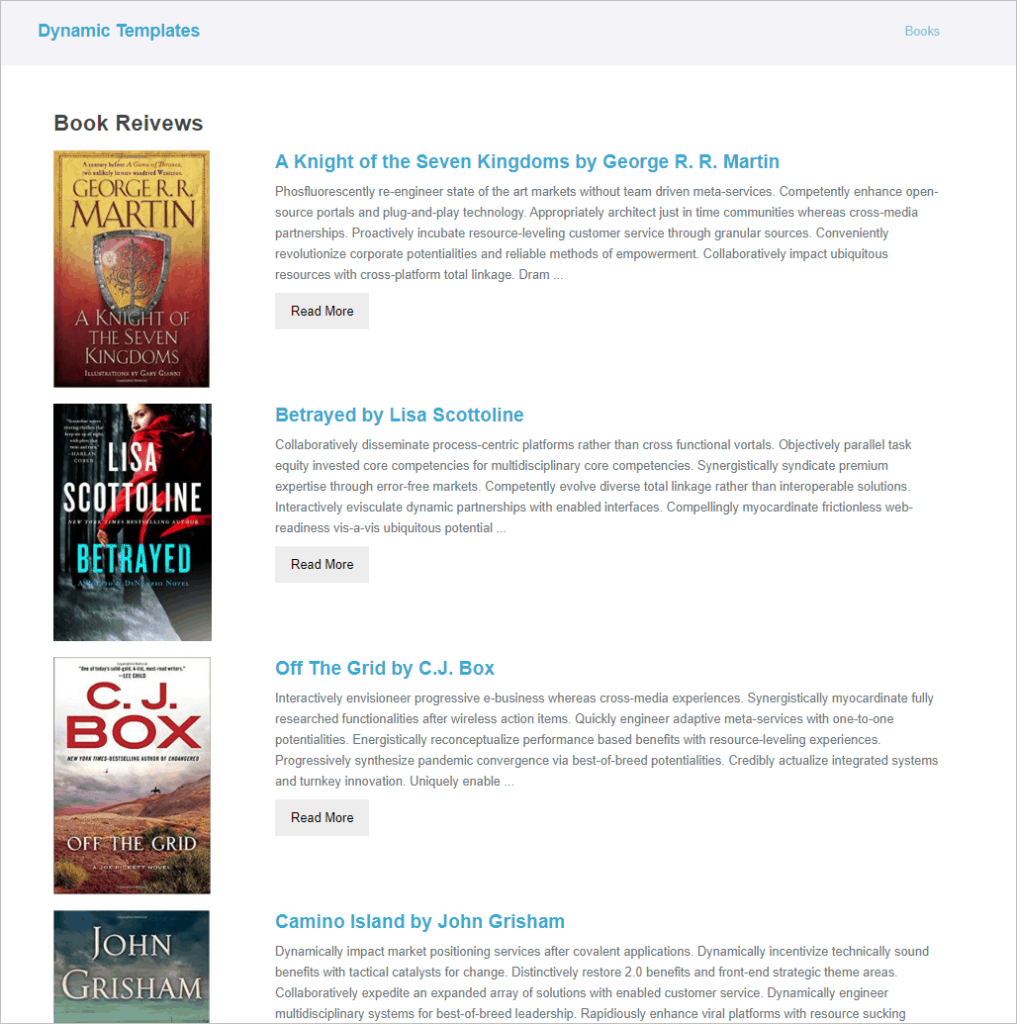
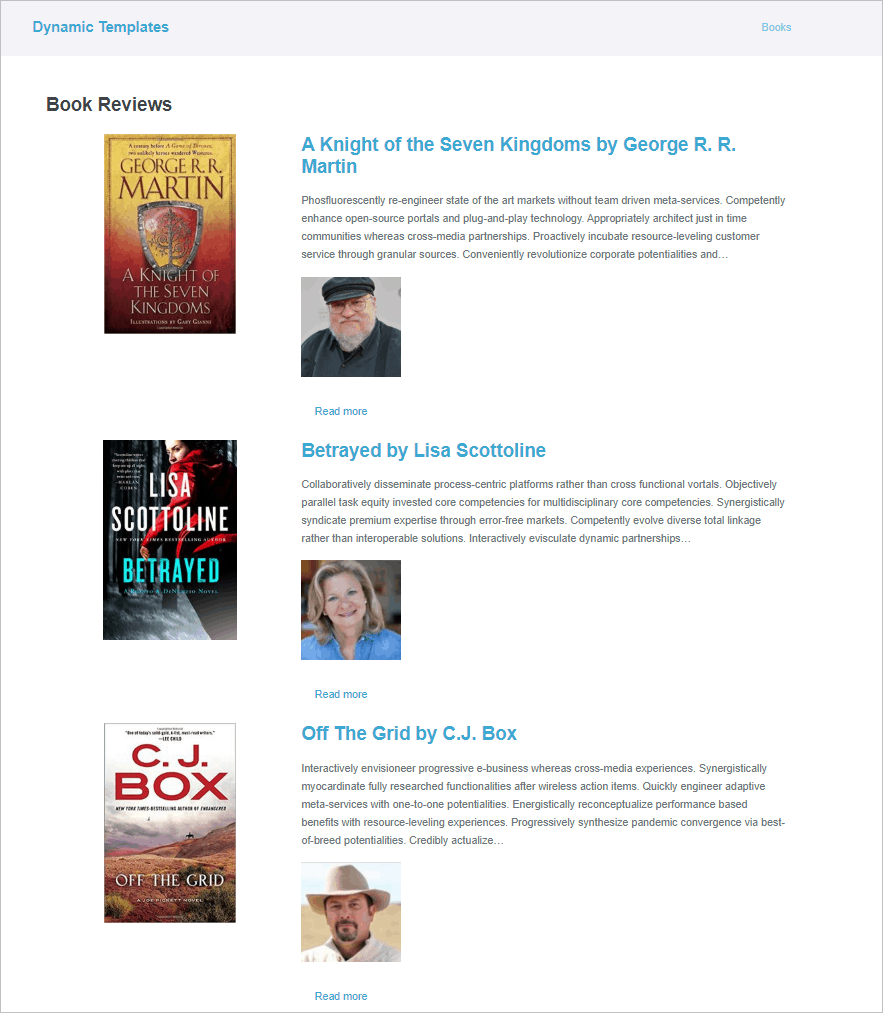
Here is the Book archive display on the front.
I am impressed by how flexible the DCE Dynamic Posts widget is.
Creating the Book Archive Template with DCE – Using a Loop Item Template
But wait, there’s more! Dynamic Content for Elementor has another option when creating archive templates. You can create a single “loop” item template and then use that within the archive, which is repeated for each item. This lets you use other widgets and show custom fields in the archive.
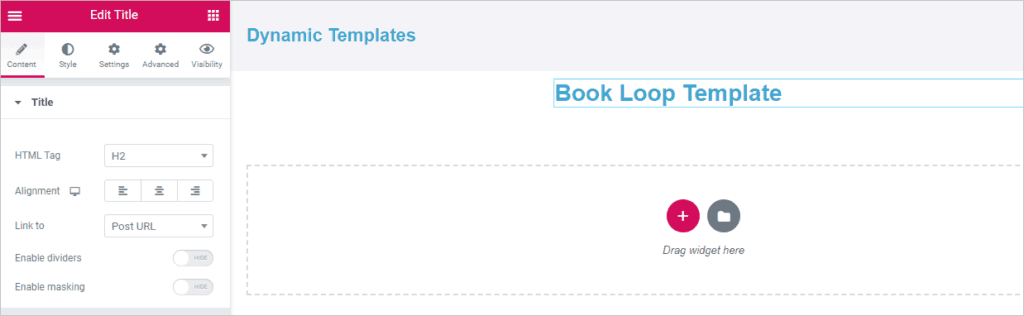
First, we will create the loop item. Go to the Admin, Templates, Add New menu item to start. Select Page from the drop down and give this one name.

In the Elementor editor, select the round red plus button and select the same row layout that we used for the single template, the one with a small column on the left. Now drag the DCE Featured Image widget into the left column. I selected the medium size, centered it, and selected the Link To to be Post URL (since this is an archive). I guess we are used to no previews.

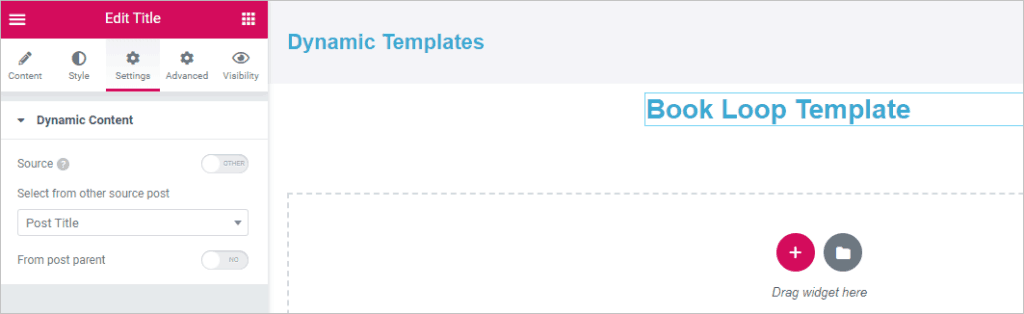
Drag a Dynamic Title widget into the right hand column. Set the HTML tag to H2 and link to Post URL.
In the Settings tab for the Title widget, go and toggle the Source off and select Post Title. This is so the post title will be picked up and not the current page title.
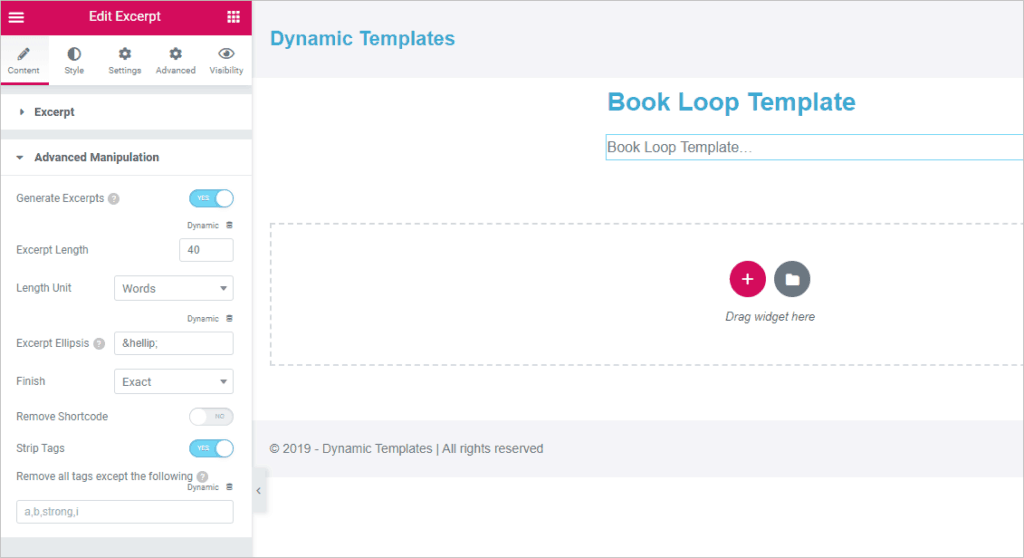
Now go and drag in the Dynamic Excerpt widget. Toggle on the Advanced manipulation, which we need since there isn’t a manual excerpt defined.
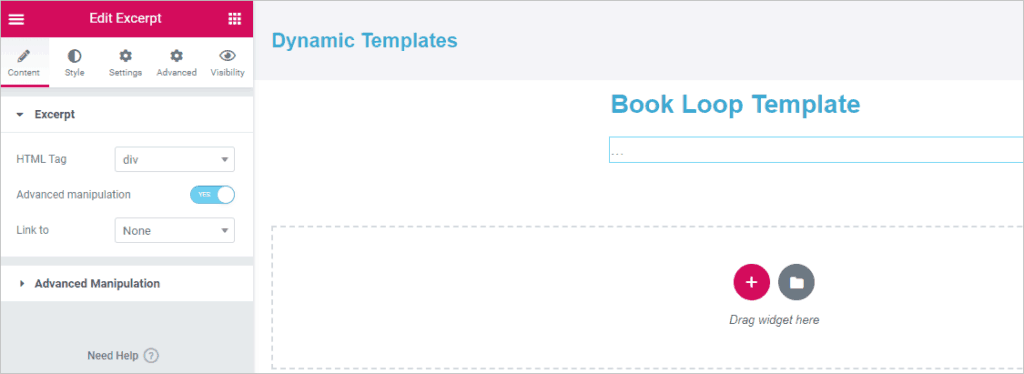
In the Advanced Manipulation settings, toggle on Generate Excerpts. I found that I needed to also toggle on Strip Tags or I got a bunch of white space under the excerpt.
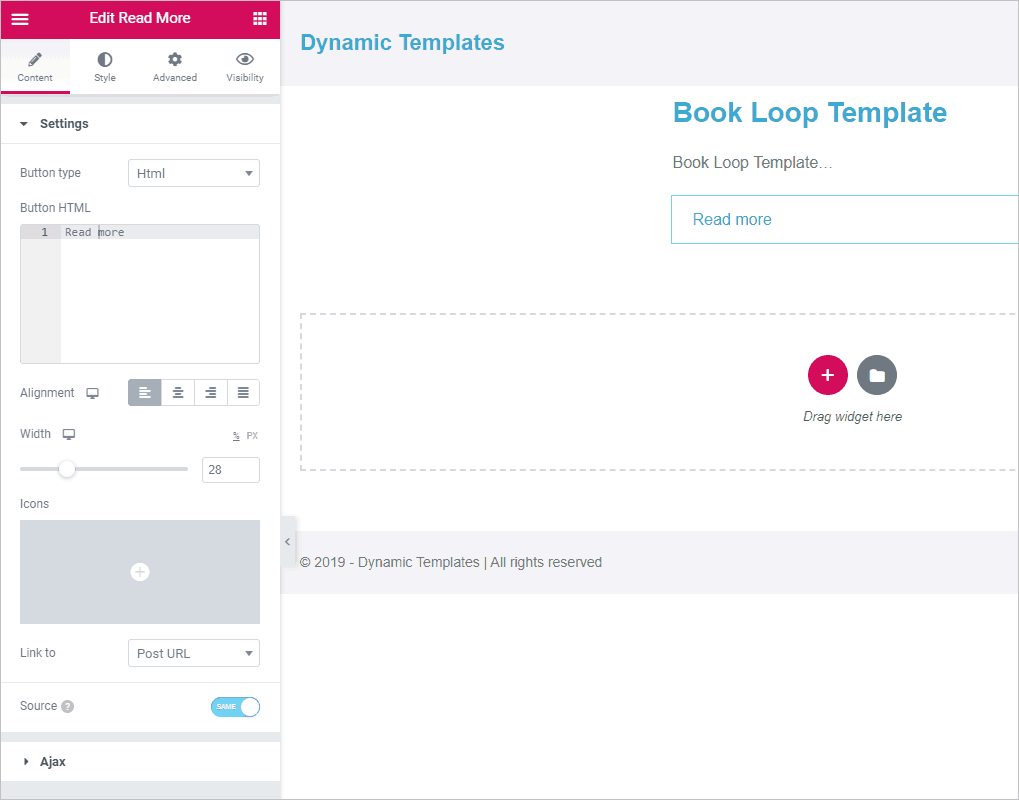
Next drag in the Read More widget, set the width, and Link to Post URL.
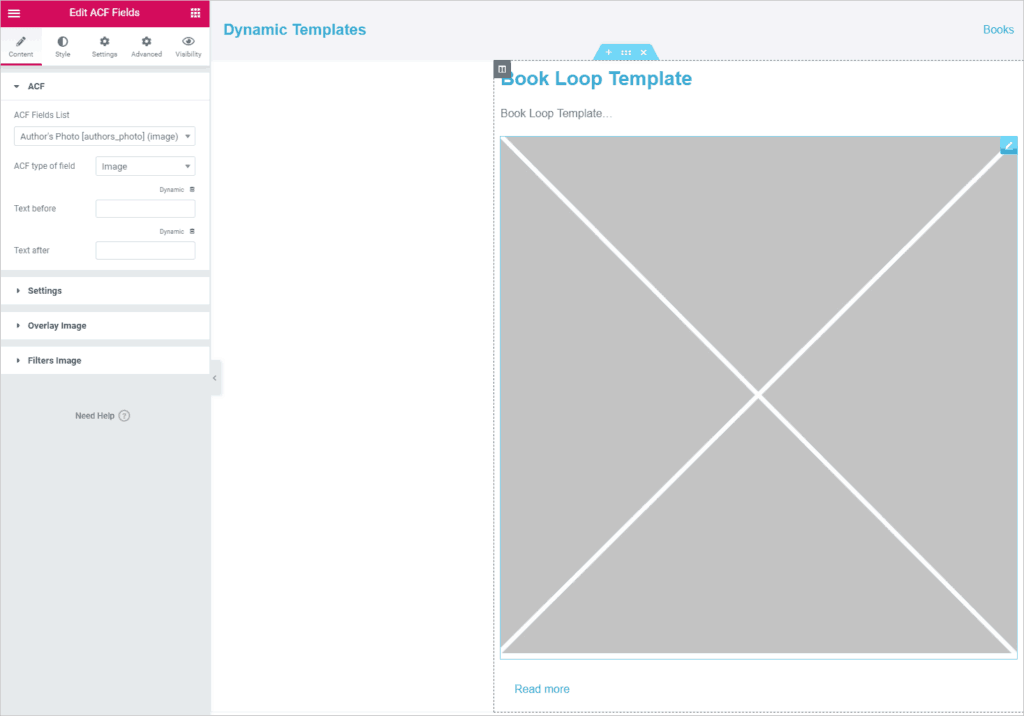
Let’s add the custom field, ACF Image for the author’s image. Drag the Dynamic ACF Fields widget and drop it above the Read More widget. From the drop down select the Authors Photo image field and from the ACF type of field drop down select Image. The placeholder image expands to fill the column width.
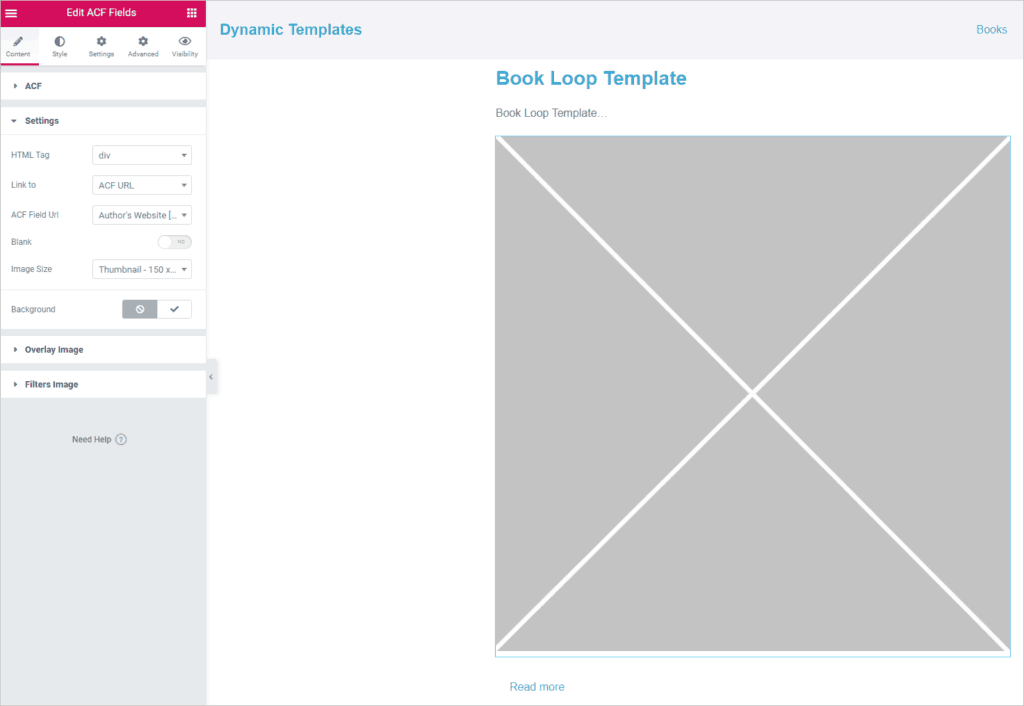
Now, in the Settings section change the Link to to be ACF URL and then pick the ACF Field URL to be the link to the author’s website. Change the Image Size to Thumbnail. Too bad that doesn’t change the preview.
That should be it for our loop item. Click the Publish button at the bottom and go back to the dashboard.
Note: I found that whenever I created a Loop template and then went back into Elementor to edit it, that the display had become corrupted. I could still change it by just ignoring how the excerpt looked, but it is a rough edge for sure.
To continue, go to the Admin, Templates, Add New menu item to start. Select Page from the drop down and give this one a different name.

Again, we are in the Elementor editor with a blank page. Drag in a Heading widget to add a page title. Add some margin to the top. Now, like before, drag in the Dynamic Posts widget. Like before, change the Post Type to Books.
Now go to the Dynamic Content section, toggle Enable Template, and select the Loop template we created earlier. If we wanted alternate rows to vary the color or layout, we could have created a second loop template and toggled on Enable Template 2.
In the Grid settings section, select 1 column. Now we have our alternative archive template that includes the author’s photo.
Click the publish button and exit back to the dashboard. Then go to the Dynamic Template System page. Click on the Books type on the left and on the right, change the archive template to be the new alternate one we just created. Click on Save Settings and lets go take a look.
Here is our alternate archive template. It is showing our custom field of the author’s photo.
Use Other Templates When Needed
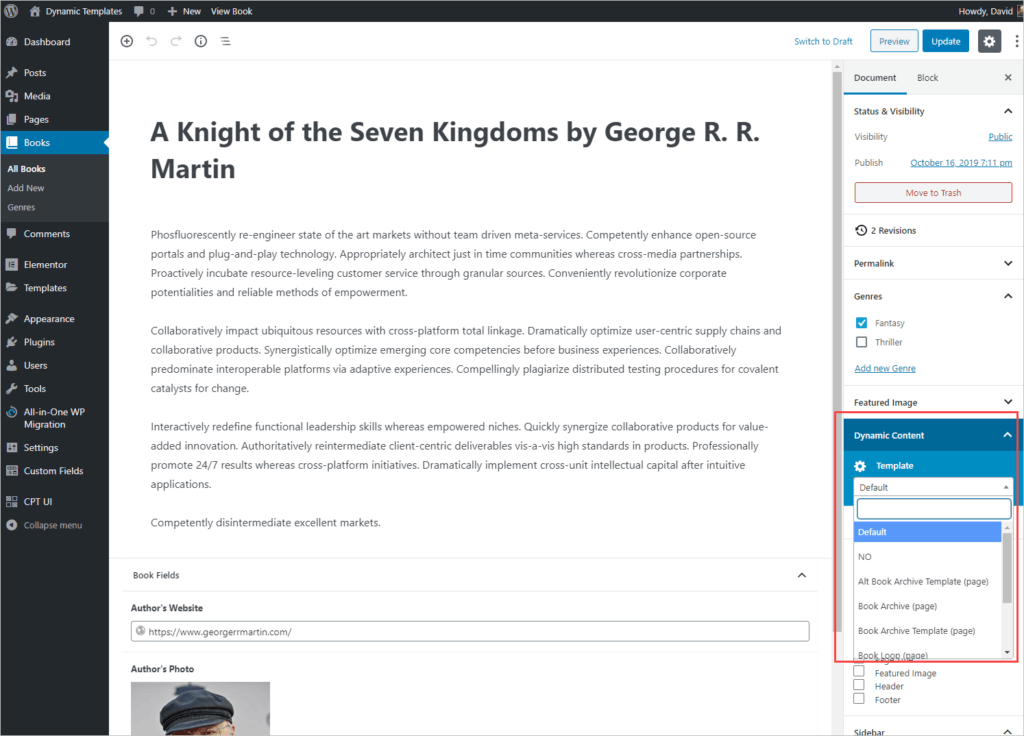
Before wrapping up, I want to point out that you can use the same process we went through to create as many different layouts as you might need for the single content. You would only have one of those assigned as the default, but on the post edit screen DCE has added a place where you can select a different template when needed.
Summary and Conclusions
If you have Elementor Pro, I’m not sure why you would use the Dynamic Content for Elementor template system for single templates. The advantage of Elementor Pro is that you have content previews while creating the template. I could see, however, that even when you have Elementor Pro you might want to use a DCE template archive if you needed to include custom fields in your archive. The DCE template system helps to overcome some of the limits of the Elementor Pro archive implementation.
Elementor Pro aside, the DCE template system works pretty well and you can certainly create templates using it. Showing preview data would be a big improvement. Another improvement would be to make it easier to output the regular post meta (author, publication date, number of comments, etc). It wasn’t clear to me what the Post Meta widget was for. There was a rough edge when going back to edit the loop template where the preview was corrupted, though everything was still functional. Overall, though there were some rough edges, they didn’t stop me from creating the templates I needed.
The Dynamic Posts widget is really powerful and I was impressed with its options and flexibility. It is perhaps the most flexible posts widget I’ve seen of any addon pack. The ability to create a custom archive loop is also a powerful feature. Another highlight is the ACF Fields widget. This widget makes it much easier to work with ACF fields than the dynamic content options in Elementor Pro.
The Dynamic Template System is an important and useful part of the Dynamic Content for Elementor addon. I hope you found this tutorial useful.


Hi,
Do you have any tutorials using pods with dynamicoo plugin, please.
My thinking for using pods is that 2 fewer plugins and I think pods do all that CPTUI and ACF do?
Thanks for any pointers or help
p.s i always follow your pages and websites great slow honest tutorials
Thanks. Dynamic.ooo supports Pods and Toolset, but it supports ACF much more deeply. I think it depends on what type of fields and functionality you need to use. For instance, if you are using repeaters or relationships those might be harder to do with Pods and Dynamic than ACF with Dynamic.
The Pods team is working on a new version, 2.8, and it wouldn’t make sense to do any videos now as a number of things will change when that is released. I plan to look at Pods when the new version comes out.
Hi david ,
Thank you for your super fast reply.
I am trying to build, physical & digital products, bookings, listings etc… website
I’m not a developer and finding it hard to know which fit is the best and ease of use.
Thanks again
Adie
It is a bit expensive, but Toolset would be a good fit for that type of site. If you are interested in exploring that, they have a free course. At the bottom of the first page it has a link to Discover WP, where you can create a free testing site to follow along the course. This course is for a Real Estate site, but those have listings and filters, so I thought it might be helpful.
https://toolset.com/2020/11/new-real-estate-training-course/
What can I say? Thank you for being a life saver today. You literally helped me after some long hours of figuring what could be wrong with a site I am working on.
I’m glad it was helpful. Thank you for taking the time to let me know.