
Extend Elementor Pro Forms with Dynamic Content for Elementor
The Pro version of Elementor comes with a Form Builder. It is great for creating basic contact forms or when creating a popup to capture emails for a newsletter. However, the Form Builder lacks some of the more advanced features that users often need. Fortunately, the Dynamic Content for Elementor (DCE) addon fills in the gaps with some powerful extensions. To follow along, you will need Elementor Pro and the Dynamic Content for Elementor addon.
Video Version
Introduction
If you take a look on the Dynamic Content for Elementor website you can see all of the features. Here we see the ways in which DCE extends Elementor Pro forms:
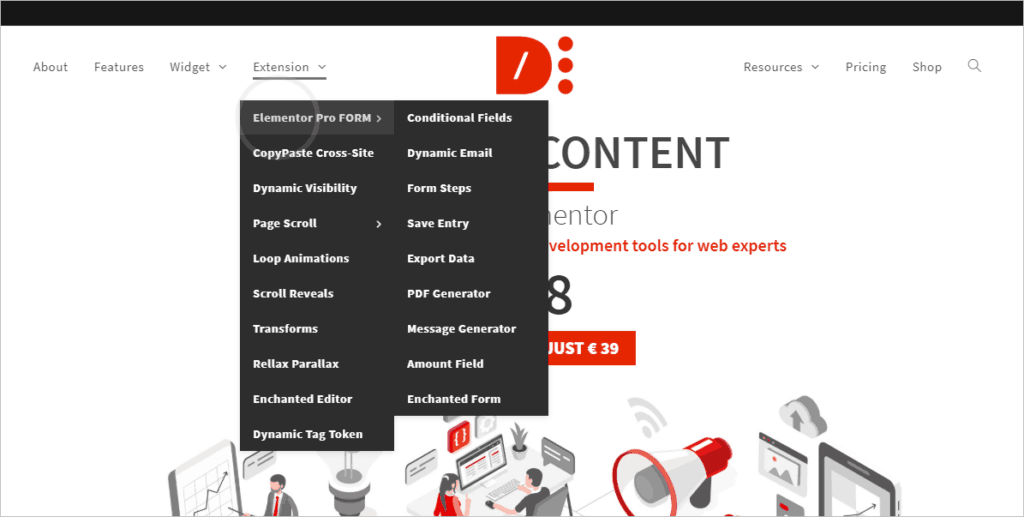
The DCE plugin adds options for the Conditional Display of Form Fields, a Dynamic Email option, Form Steps, the ability to Save Entries, Export Data, Generate a PDF from the form entries, show more sophisticated messages to the user, an Amount Field for generating calculations, and an Enchanted Form feature for taking more control of the form appearance.
In this tutorial, I want to use several of these features to solve some common problems. We will imagine that we work for a company that sells the Awesome Plugin.
- Conditional Fields: There is a free Lite version of the plugin in the WordPress plugin directory and a premium version on the company’s website. The first problem is that we are getting support requests for the free plugin being sent to the premium support team. We only want to show the form to the Pro customers.
- Dynamic Email: The second problem is that customers are sending in not only support requests, but also accounting issues and sales questions. The support team is tired of dealing with those and we want to send the messages to the correct department.
- Save Entry: Also, a few customers said they requested a refund within the first 30 days, but the Accounting department doesn’t have any copy of that. Up to now, all of the customer requests have been handled by the email form on the website, but to solve this third problem, we want to start saving the messages in the database so there is a record.
We will also be using two free plugins available from the WordPress plugin directory. CPT-UI is a plugin for creating Custom Post Types and Advanced Custom Fields (ACF) is a plugin for adding custom fields. We will use these to create a place to save the form entries. Dynamic Content for Elementor has great support for ACF, so this is a good chance to see how easy it is to use.
I’m going to go through this quickly. If you want a more in-depth step-by-step tutorial, I have a tutorial on my other site that shows the process in more detail.
Creating the Contact Post Type
First, we need to create a place to save our form submissions. I’ve installed an activated CPT-UI and clicked on the “Add/Edit Post Type” menu item. I filled in the Basic Settings for the Contact post type.
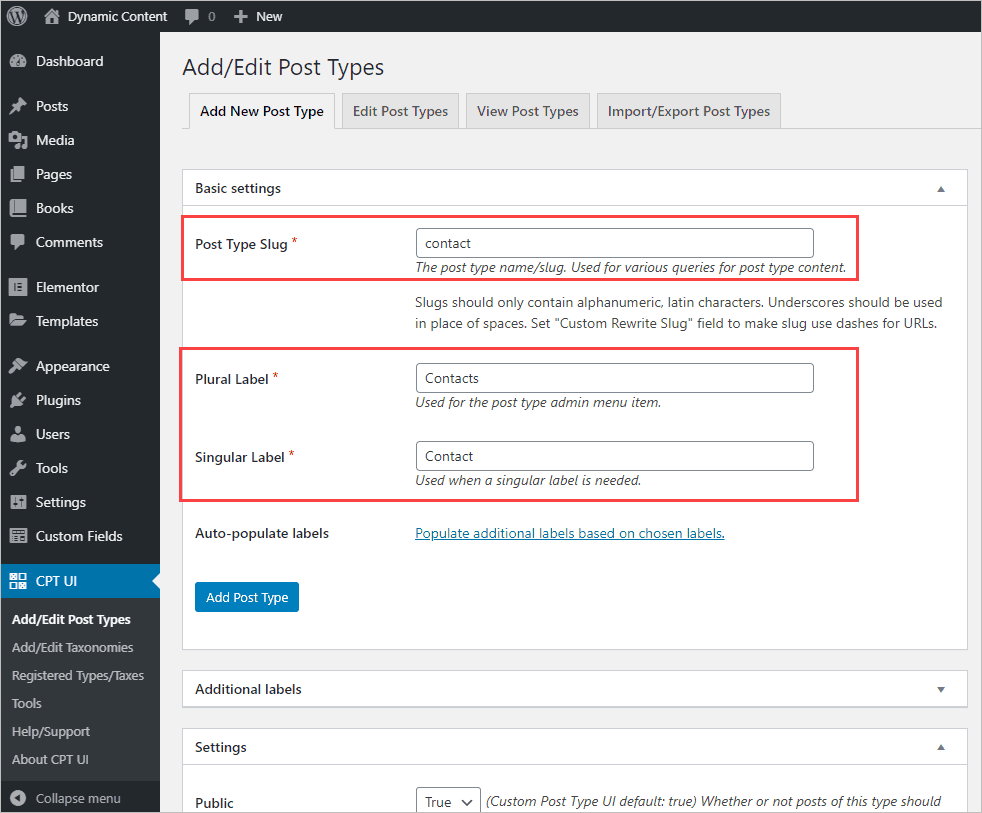
It is fine to leave the Additional Labels at their defaults. For the last panel, the Settings, we will change:
- Has Archive = True (so we could create a listing later if we need to)
- Exclude From Search = True (so customers don’t see Contact form submissions in the site search)
- Menu Position = 20 (Show after Pages)
- Dash Icon = dashicons-email-alt (Show an email icon in the Admin UI)
- Post Type Options
- Uncheck Featured Image
- Check Revisions
Click the button “Add Post Type” and we are done.
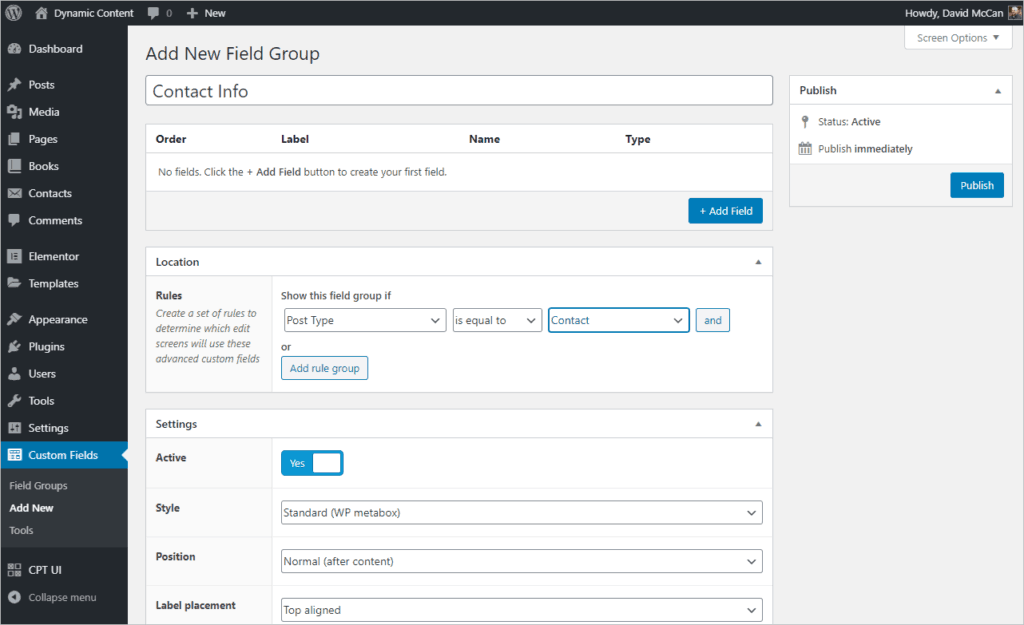
Now, let’s add the fields we want to save. Go to the ACF menu, “Custom Fields” and click on the “Add New” link. Name the Field Group “Contact Info” and for the Location setting change Post Type to “is equal to” Contact.
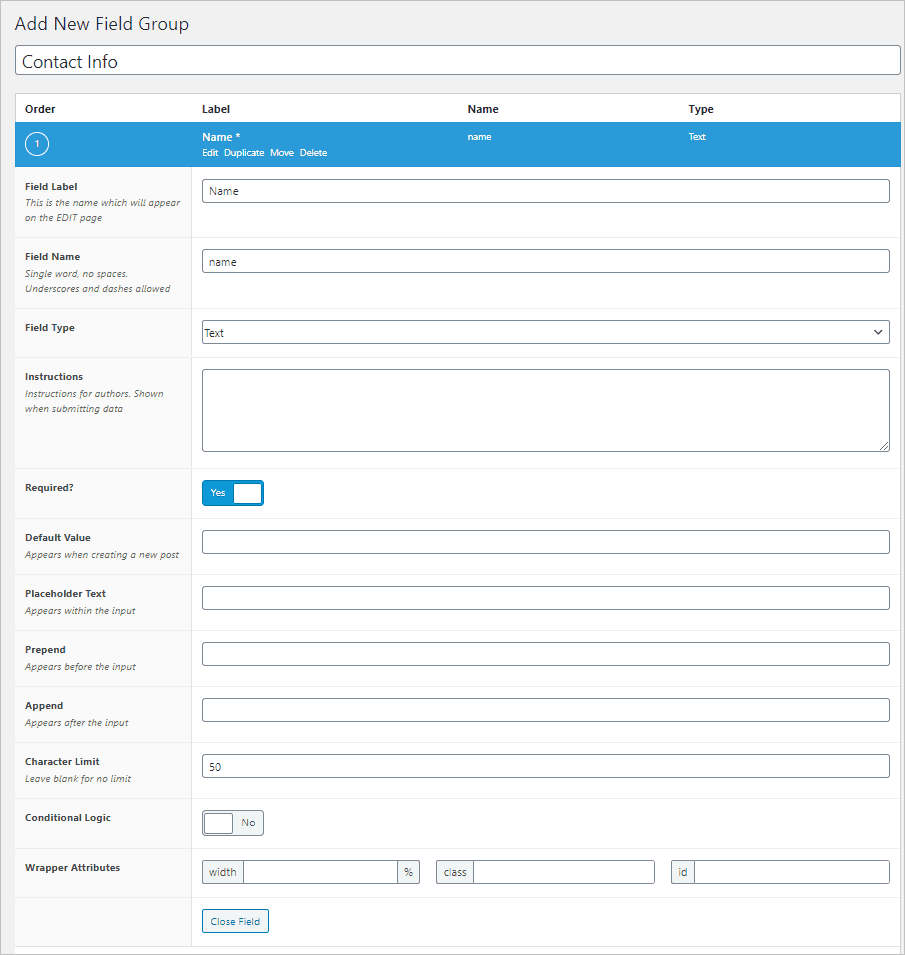
Now we need to add the fields. Click the “+ Add Field” button. Add a Text field with a Label of “Name” and a name of “name” and make it required.
Add another field, an Email field, and give it the Label of “Email” with a Name of “email” and mark it as required also.

Finally, add another field and give this a Label of “Department” with a name of “department.” Make this one a Text field.
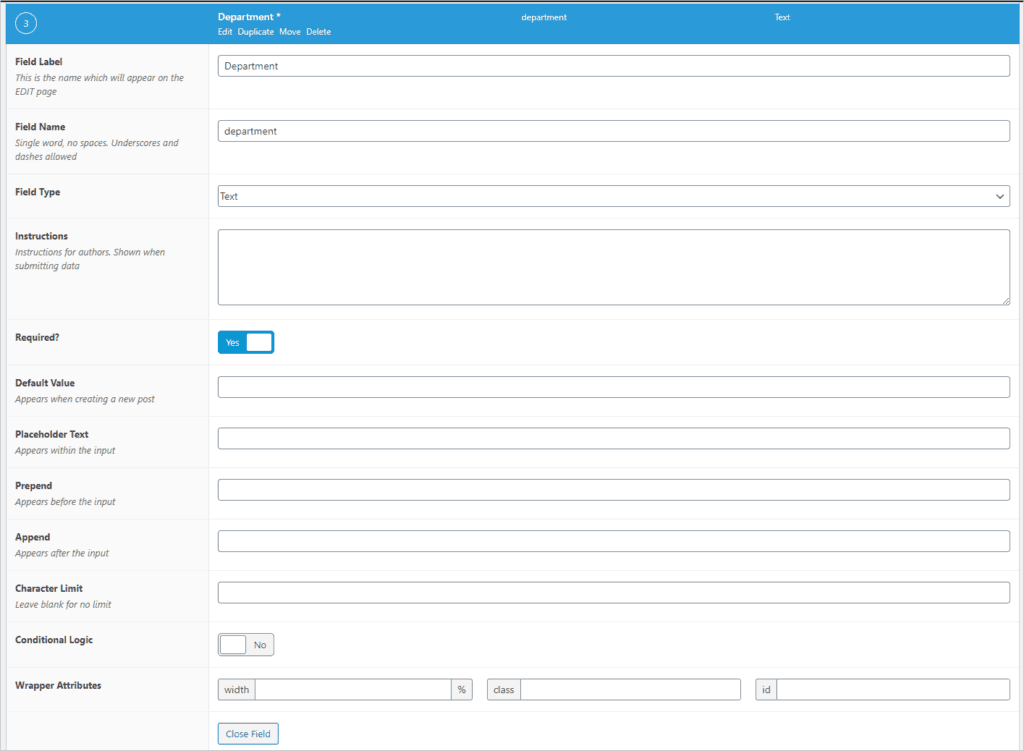
Mark Department as required also and click the Publish button. That’s it, we have created a Custom Post Type to hold our form submissions. You can look at the Contacts post type in the Admin menu under Pages.
Creating the Contact Form
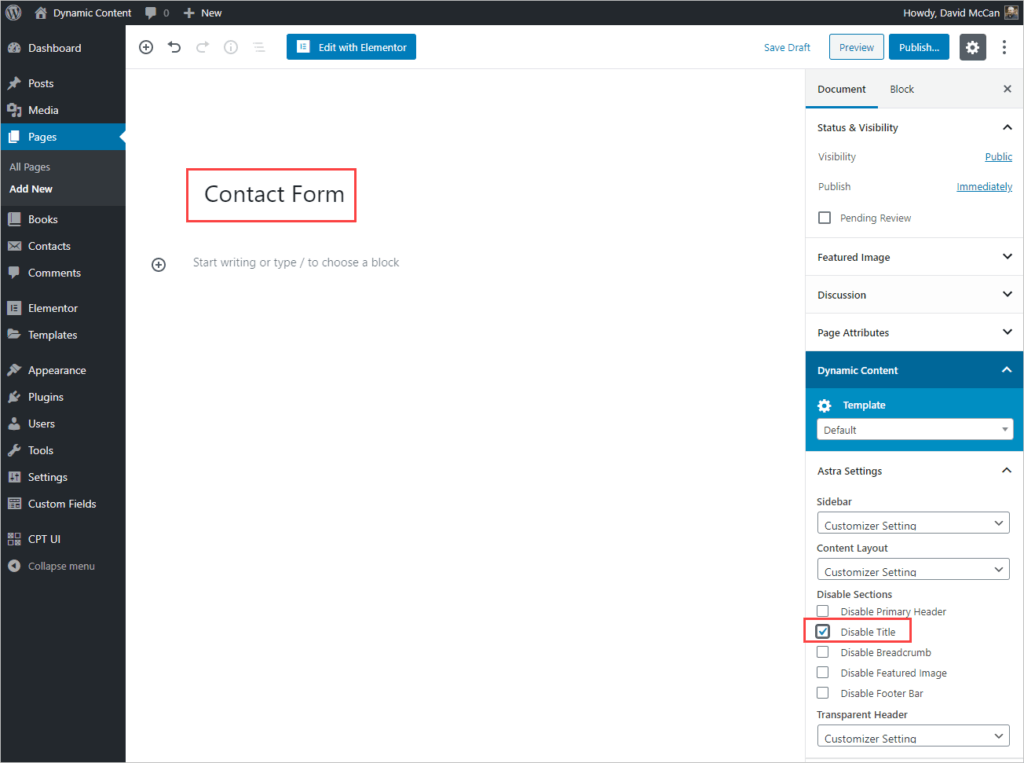
To create the form, go to Pages, Add New and give the page a name like “Contact Form.” We don’t intend to show the Title on the front-end. If your theme gives you to the option to disable the Title then do that. If not we can disable it in Elementor. Now click the Publish button and then Edit with Elementor to go into the Elementor editor.
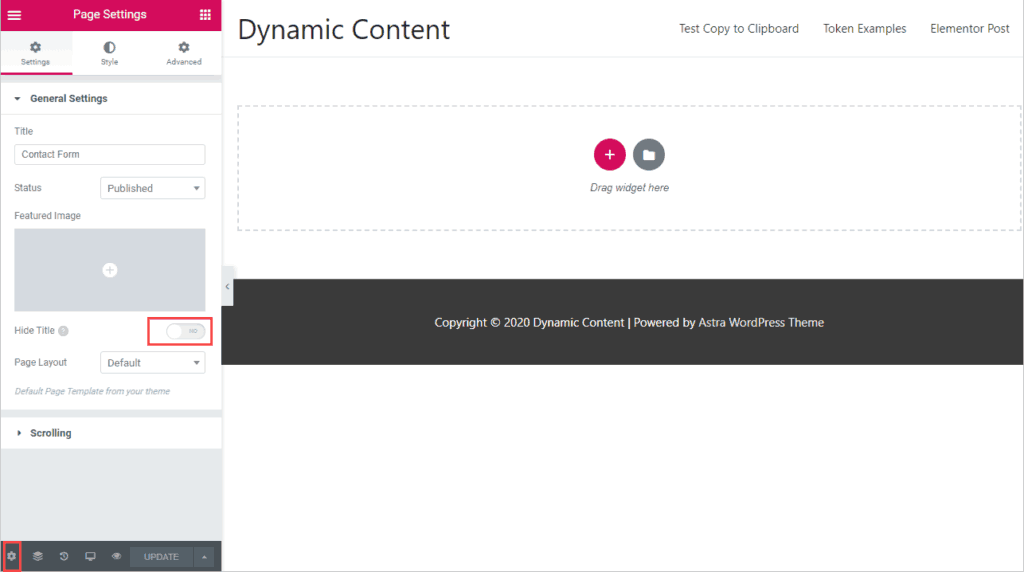
If your theme didn’t have the option to disable the Title then in the Elementor editor, click on the gear icon in the lower left corner and then toggle the Hide Title option.
Now click on the red plus icon in the middle of the page and select a single column layout.

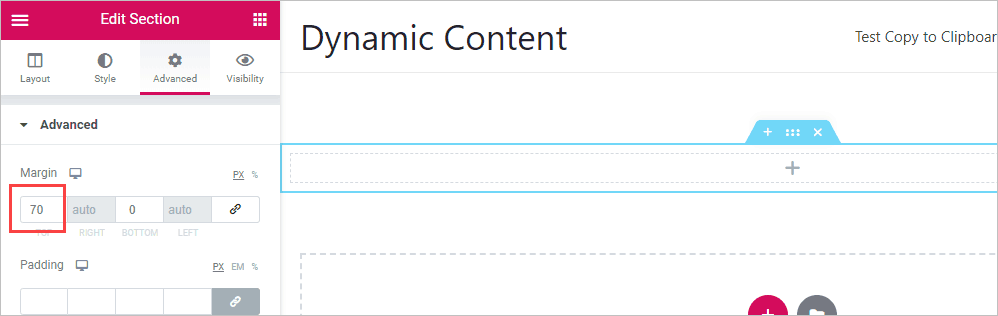
Add 70 pixels of top margin to the Section that is inserted so that the page content has some room below the header.
Click on the plus icon in the section and add a Heading widget and give the page a title.

Now the fun begins. Click on the red plus icon again and add another single column row. Now click on the plus sign and this time add a form widget. Elementor adds in a basic contact form.
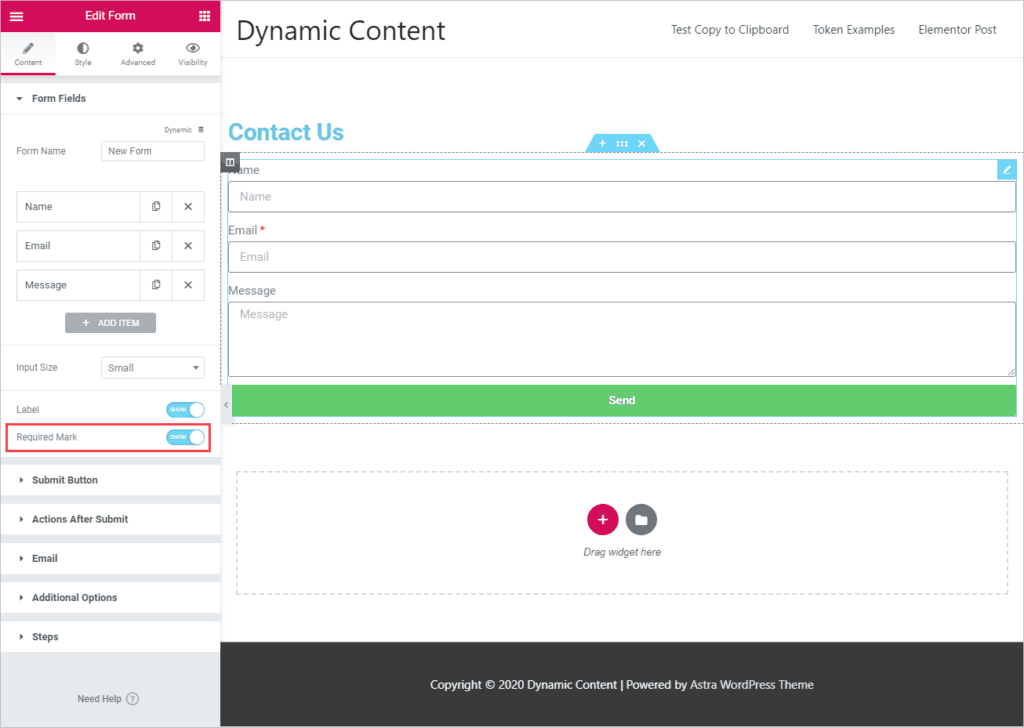
Note the “Require Mark” toggle and turn that on. Email is already required, but go into the Name and Message fields and mark them required also.

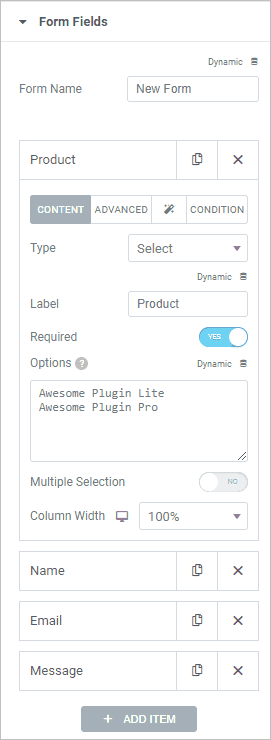
Now click on the “+ Add Item” button to add another form field. Label this one “Product,” make it a Select field, mark it as required, and add the options of “Awesome Plugin Lite” and “Awesome Plugin Pro” on separate lines. Drag this field to the top of the list of fields.
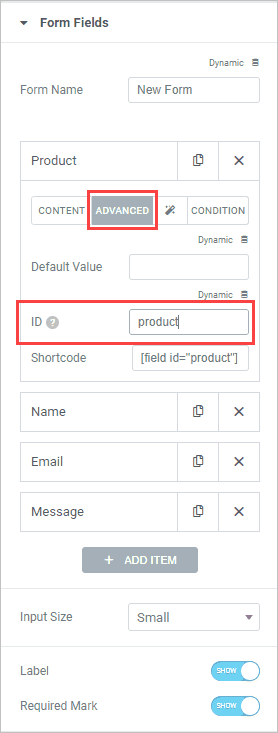
Click on the “Advanced” tab on for the Product field and give it an ID of “product.” We want to use the same names for the field IDs as we used for our Custom Post Type fields. If we do, then the values will get saved automatically (when we get to that point).
Click on the “+ Add Item” button again and set the Label to Department, again make it a Select field, toggle required, and add in the department list values (Accounting, Customer Support, Sales).
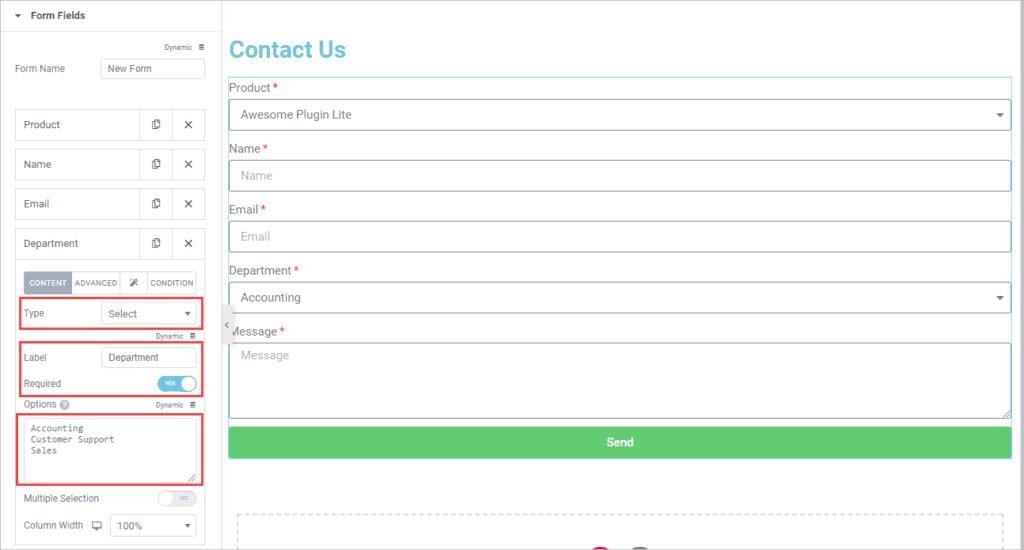
Click on the Advanced tab and set the ID to “department” like we did for the Product field. Our form is complete.

Conditional Display of Form Fields
The first thing we will do is to only show the form fields for the Pro version of the plugin. Add a text widget above the form and let people know that they should go to WordPress.org for the free plugin.
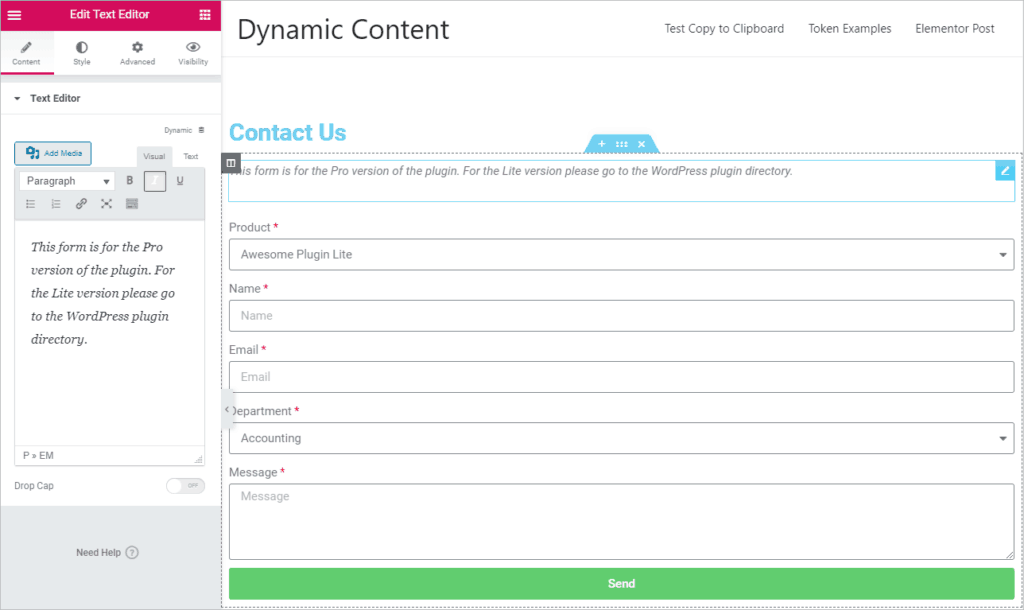
To add the conditional display settings, go to the form field options. Start with the Name field and click on the “Condition” tab. Click on the eye icon for showing, toggle Multiple Conditions on, and select under Field IDs the “product” field. Set the operator to “equals to” and add in the value from the Product select list for the Pro version of the plugin.
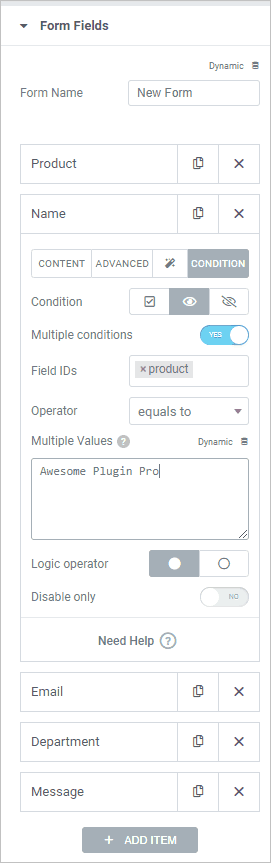
Do the same thing for the Email, Department, and Message fields – set the Field IDs to the “product” field and adjust the settings as we did for the Name field. Do the same thing now for the Submit Button.

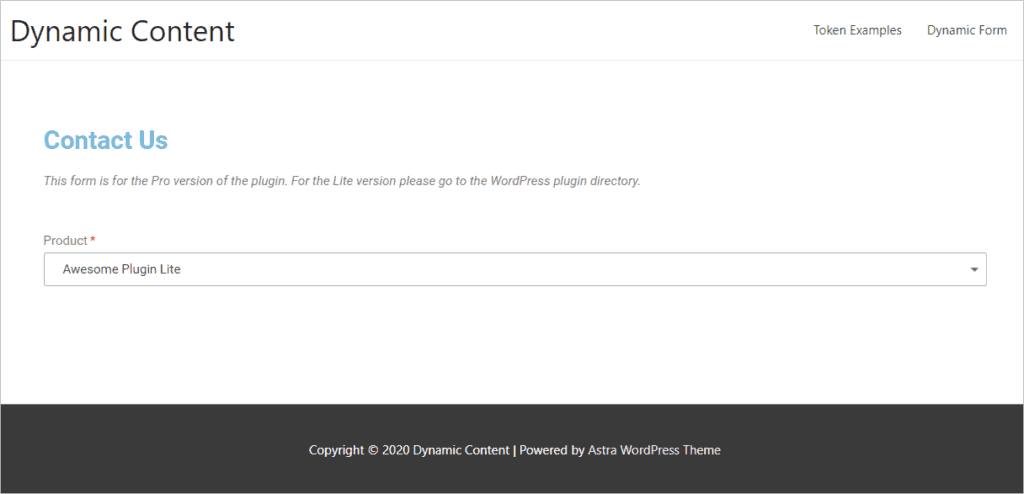
Let’s test this out by clicking the Green Update button on the bottom left and then the eye icon to preview. You should see the form with only the Product option showing and no other fields.
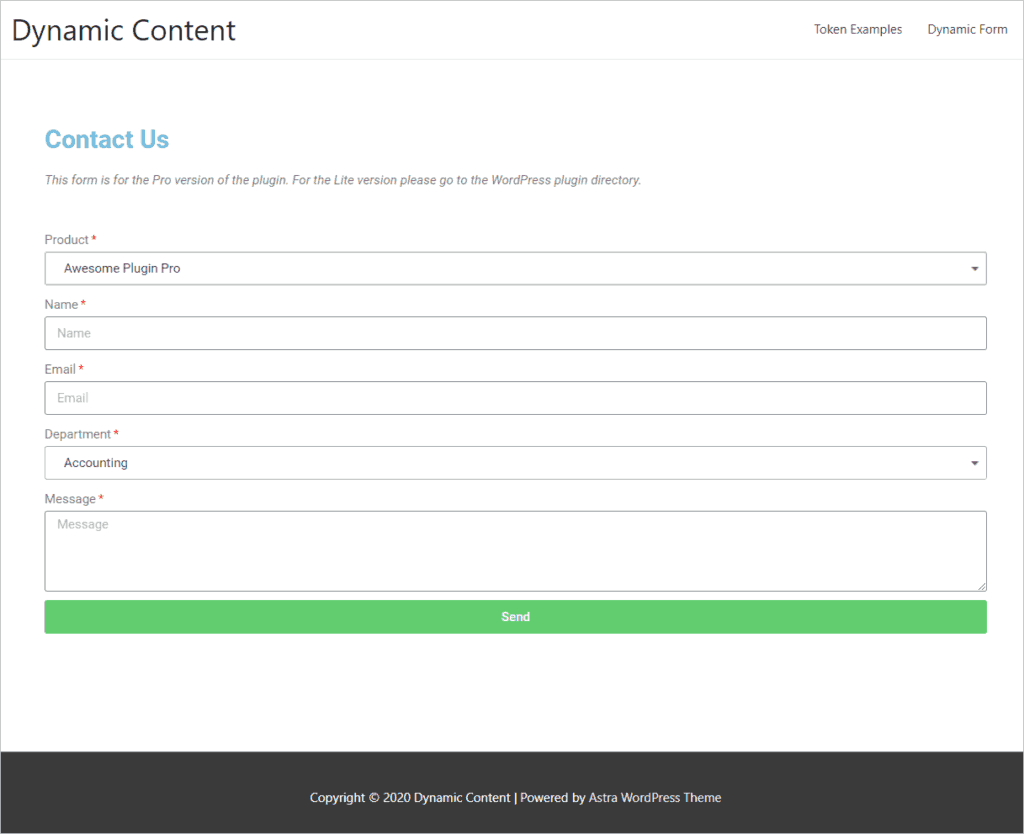
In the Product select list now choose the Pro version and you should see all of the fields and the Submit button show.
Dynamic Email – Change the Email Based on the Department Selection
By default, the Elementor form is going to be emailed to the website administrator. Elementor allows you to change that, but doesn’t provide a way to dynamically pick the email to send to. For the second task, we want to send to the correct department depending on the customer choice.
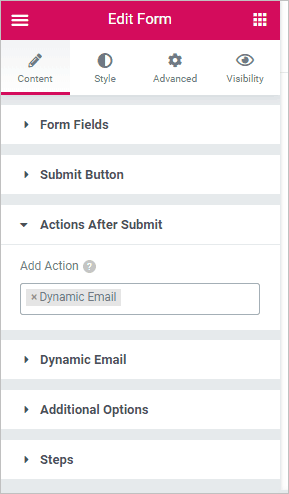
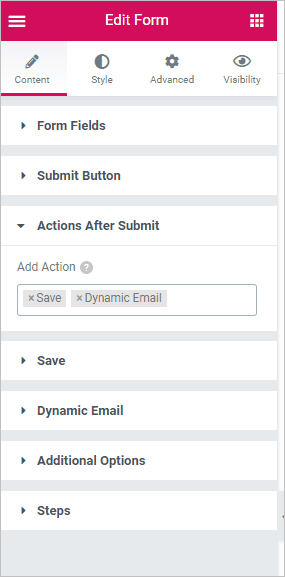
Go back to editing the form. Under the Form Fields and Submit Button, open the accordion for Actions After Submit. This is what will happen when the Submit button is clicked. By default it has “email” in the Actions list, but we want to use the Dynamic Email option. Remove “Email” and from the list select Dynamic Email. When you do that a new accordion appears underneath called Dynamic Email. Open that.
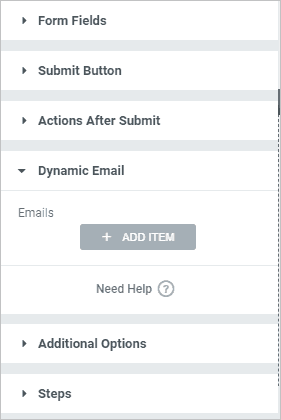
On the Dynamic Email accordion, click the “Add Item” button.
Then set the first condition. Change the “Condition” to the field name “department.” Click the Condition Status button for matches and in the Condition Value field type in the department name “Accounting” and tweak the Subject to add the department name also. Add in the email address for the accounting department. I used “accounting@awesome.com” but if you want to test it you can use “plus” addressing for your email address. That would be, for example, “yourname+accounting@gmail.com”.

Do the same thing for each department. Click the Add Item button and add a condition for the department. Note that I’ve seen a glitch where sometimes the Condition drop down doesn’t show any values. In this case “department”. I’ve found that if I go back to the fields and view them, that then when I come back here the values show. I’m not sure why that happens.
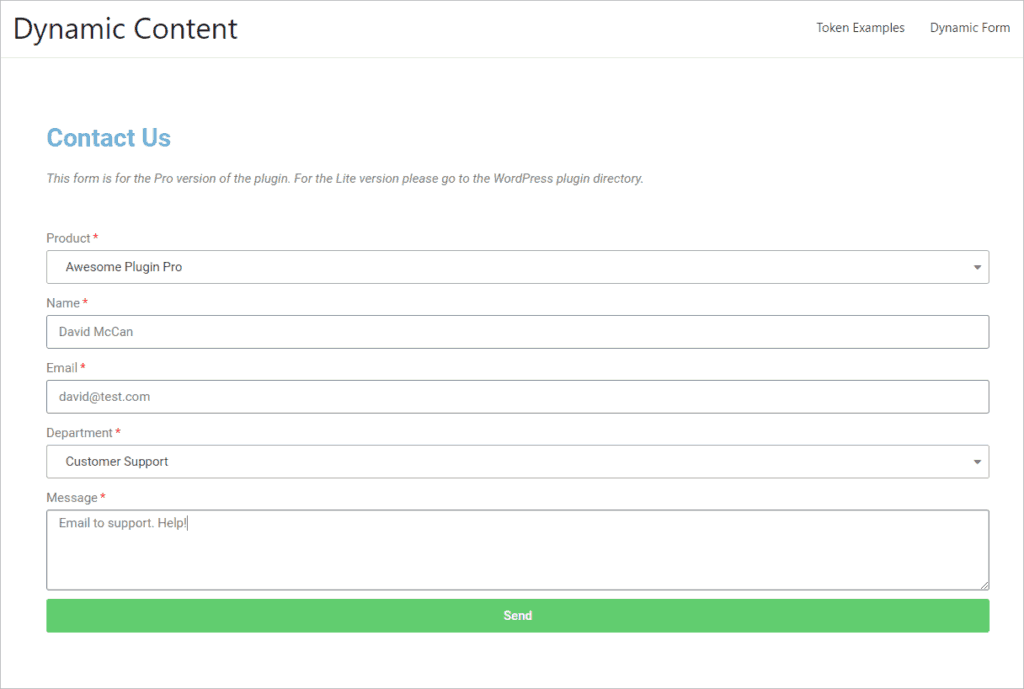
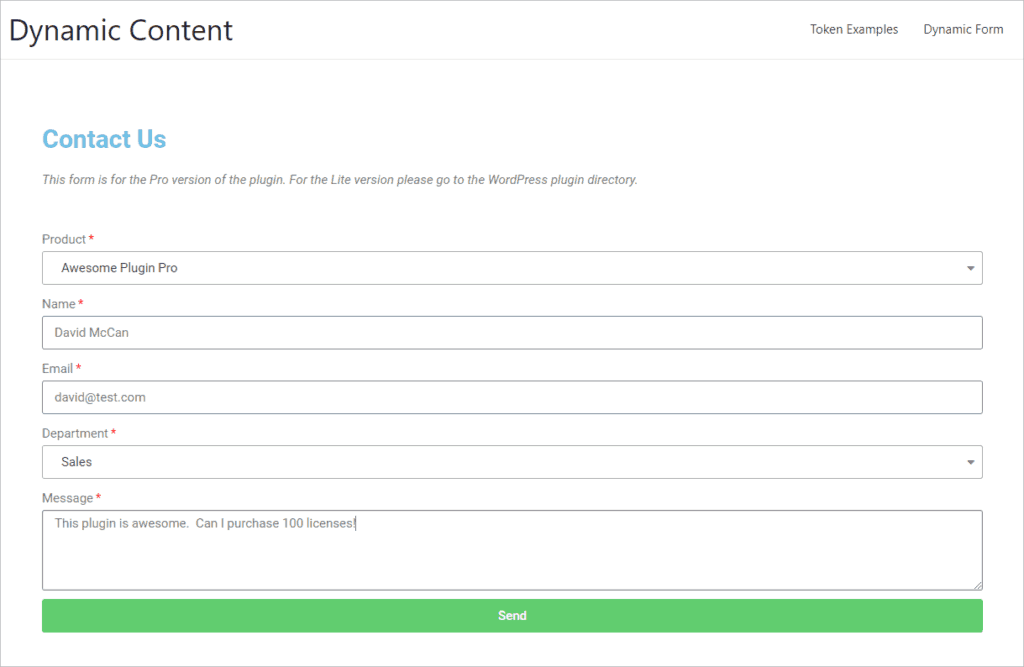
After you set the three Dynamic Email options then we are ready to test. Click the green update button and the preview icon to go to the form. Refresh it if needed. Now, fill out the form, select one of the departments from the list, add a message and click Submit. Here is the form as I filled it out:
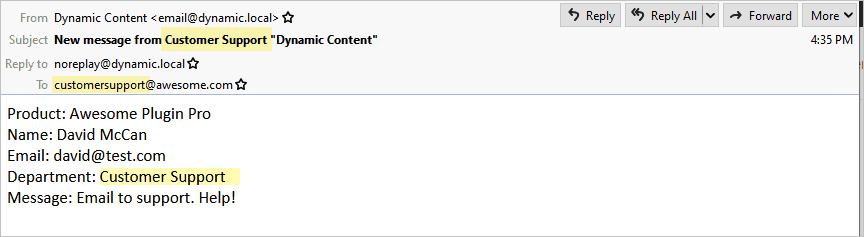
Here is the email that was generated:
Saving Form Submissions to the Database
By default the forms are just emailed, but email can be unreliable. It is much better to keep a record by saving the form to the database. Dynamic Content for Elementor offers that option. We already did the hard part by creating the Custom Post Type in the beginning of the tutorial. To enable saving, go back to edit the form and in the Actions After Submit area, add a Save action. This is another feature added by Dynamic Content for Elementor.
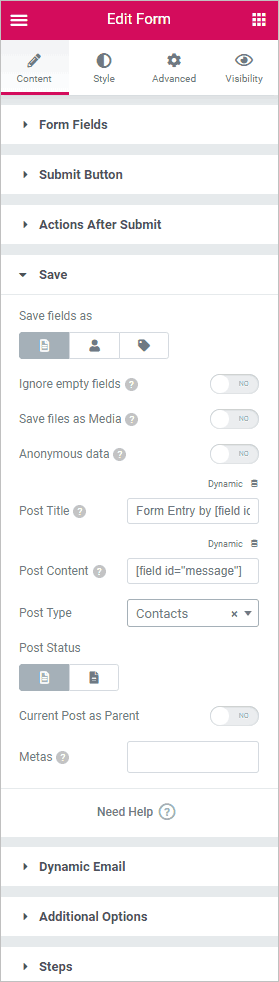
When you add the Save action then another accordion shows for “Save.” Open that up. By default the Title field will include the name field. Let’s add the department field also.
Form Entry by [field id="name"] for [field id="department"]
Also by default the Message field will go into the post content. That’s fine. Now, for the Post Type field, select Contacts from the list.
To test this, save again by clicking the green update button at the bottom and then the preview icon. Go to the page with the preview and if necessary refresh the page. Fill in the form and submit it. Here are the values I entered:
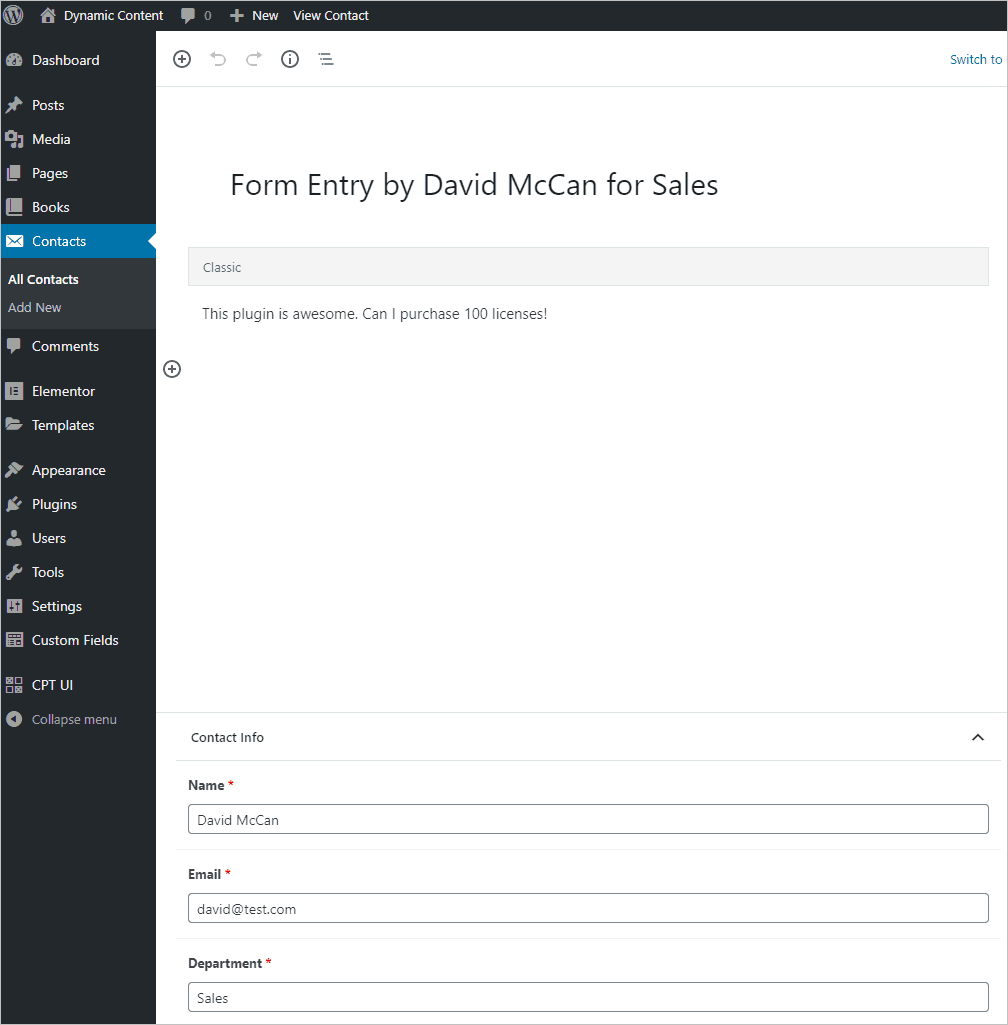
Go in the Admin to the Contacts menu and check that the form was saved. This is what I have and it matches what I entered.
Summary and Conclusions
In this tutorial we used CPT-UI and ACF to add a Custom Post Type and custom fields to hold our form submissions. We used Dynamic Content for Elementor to dynamically show form fields, to dynamically pick the email address based on the user selection, and to save the form to the database. We could also use Elementor to show the form submissions on the front-end. If you are interested in that then you might check the tutorial Creating Theme Templates with Dynamic Content for Elementor. It doesn’t look at the Contact form, but the process is the same.
I found using the Dynamic Content for Elementor form extensions fairly easy to use. I’ve noticed that the documentation has been improved and there was enough to point me in the right direction. The only issue I ran into is a glitch where the drop down condition field for the Dynamic Email didn’t always populate the first time.
The Elementor Pro form extensions provided by DCE are useful and help make it possible to create more dynamic forms and add more advanced features to your website. The save to database option, for instance, allows you to create front-end forms for user submission. This is something that usually requires extra plugins, but with Dynamic Content for Elementor you can now use your favorite page builder.