
Setup for Site Building – Elementor & Page Builder Framework
Introduction
Recently someone on Facebook asked how to get started with Elementor and the Page Builder Framework. They weren’t sure what settings to configure in the theme and what settings to configure in Elementor. This is a common question and it is important to get it right in order to be efficient and avoid conflicts. In addition to Elementor and the Page Builder Framework, I also use the Central Color Palette plugin for managing color options globally.
This post outlines the steps I take when starting on a site. This is a high level overview. There are probably dozens of different ways to do this, but this is the process I follow.
Video Version
Installs
I install the theme and Elementor first. Then I install the Central Color Palette plugin. This is because, as we will see, when we setup the Central Color Palette we can enable it for the theme and Elementor, so its easier to have those in place first.
First Install the Theme
If you are using the Hello Theme then this tutorial doesn’t apply. Otherwise, on a high level, the steps are similar for most general purpose themes. I’ve chosen the Pro version of the Page Builder Framework because the theme is lightweight and fast, but has a nice set of features. Also, the theme’s settings are easy to understand and use. The overall process would be similar for Astra Pro, Generate Press, or most other themes.
Most of the page builder friendly themes have a free version of the theme in the WordPress.org theme directory and a premium addon.
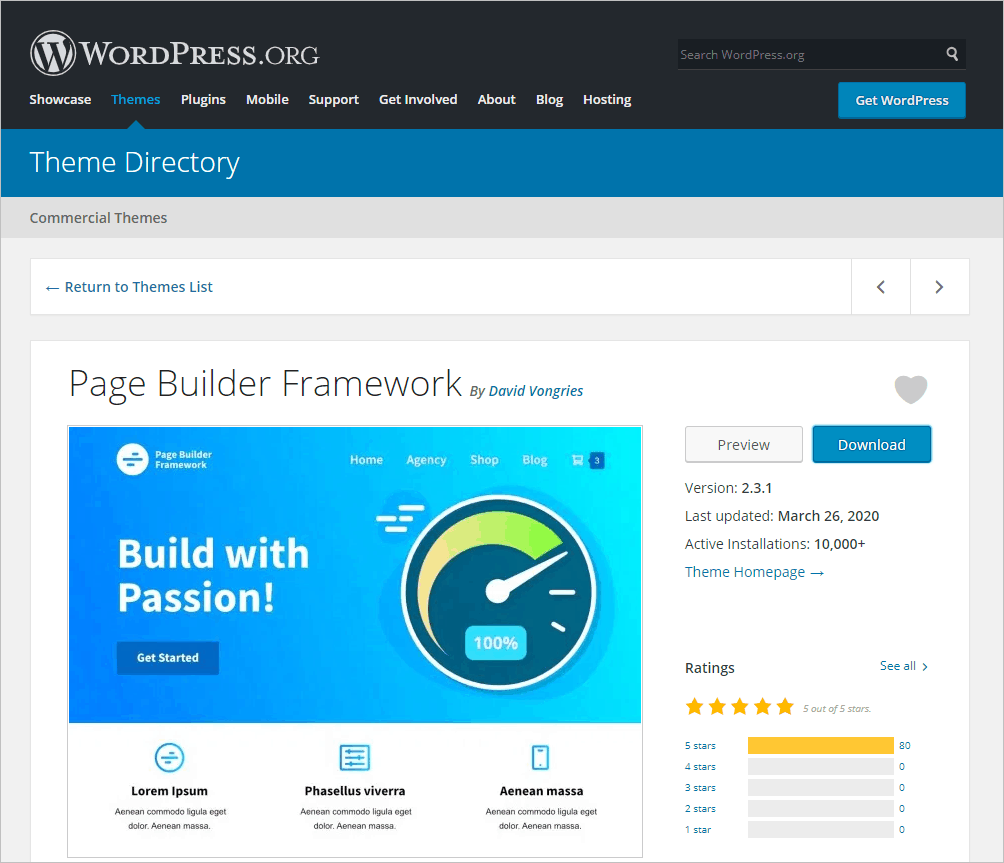
The premium addon is usually a plugin that adds extra functionality that you need to get from the theme’s website.
Install the theme, the premium addon, and enter your license key.
Second Install the Plugins
Elementor Free Version
Install Elementor from the WordPress.org plugin directory and activate it.
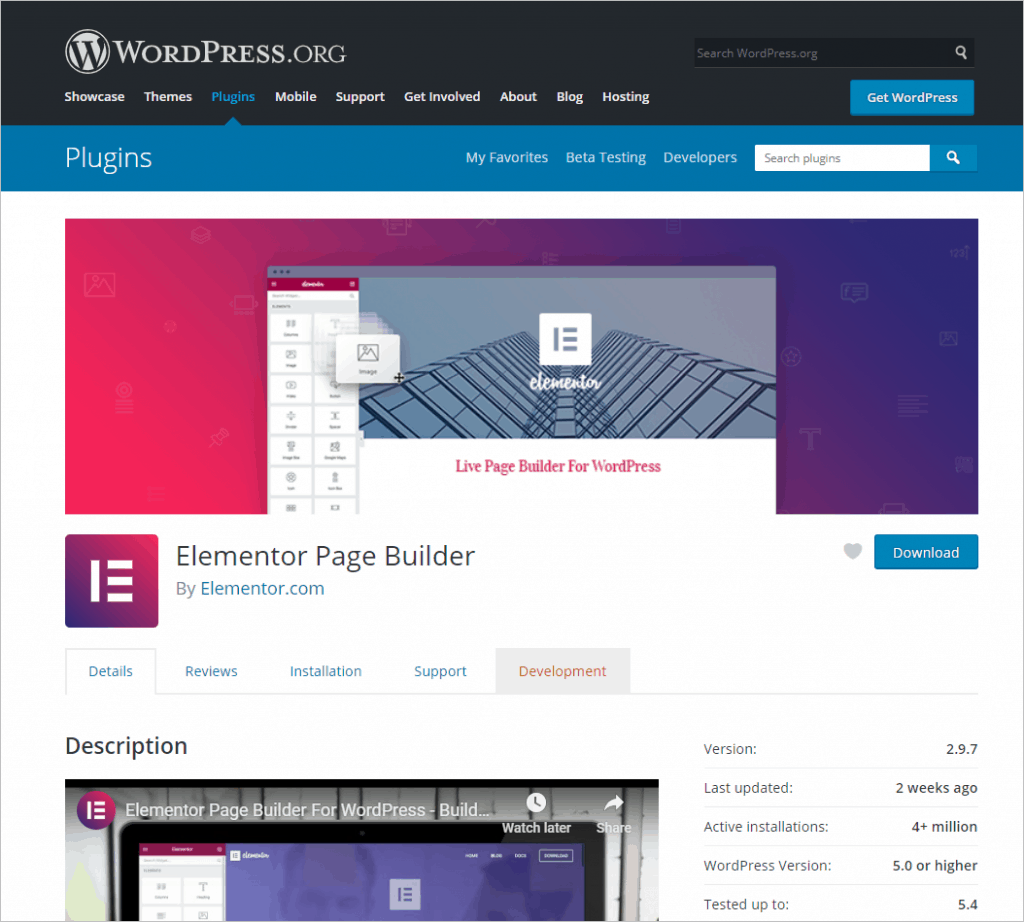
Elementor Pro Version
If you are using Elementor Pro in your site build then go ahead and install and activate it and enable your license, but the settings we will be looking at are all in the free version.

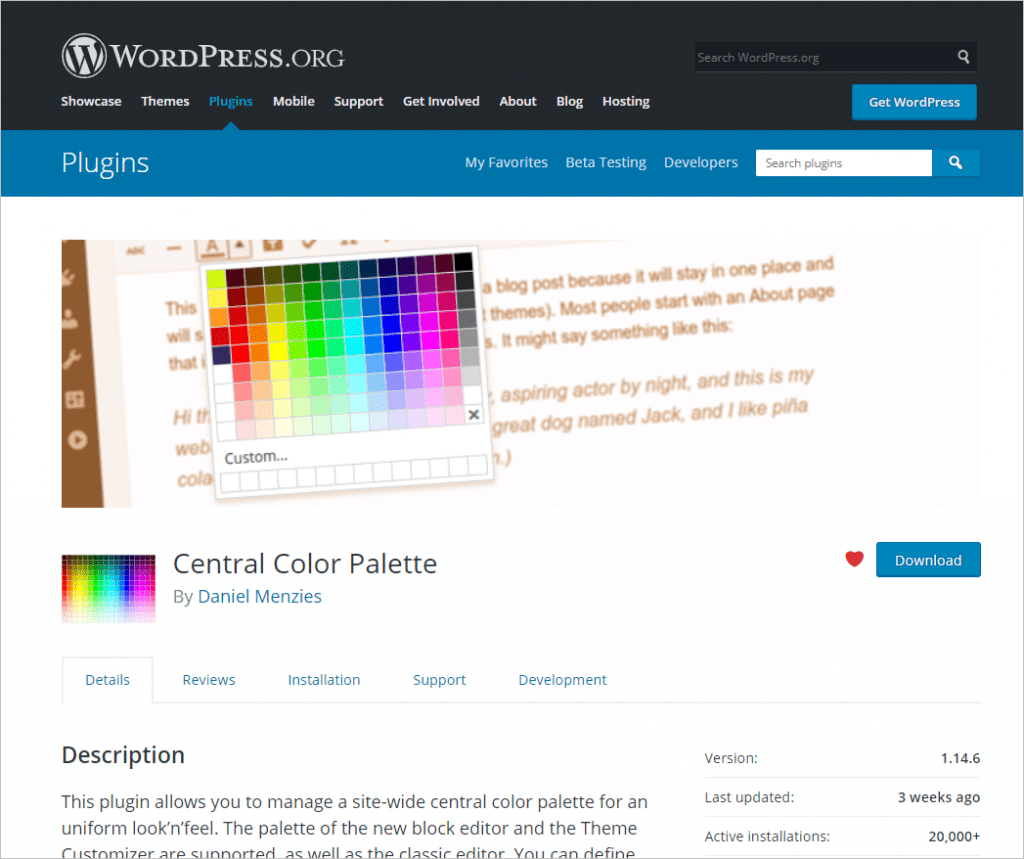
Central Color Palette
The Central Color Palette plugin is also free and available from the WordPress.org plugin directory. Go ahead and install and activate it.
Using the Central Color Palette Plugin
I set the site colors in the Central Color Palette plugin because the colors set here will be shown in the theme’s Customizer, in Elementor, and in the Gutenberg block editor. So, we can set them in one place and they are available site-wide.
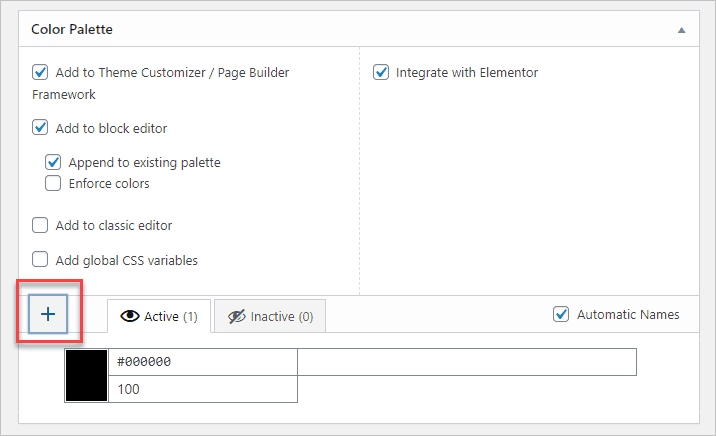
The settings for the Central Color Palette are available in the Admin under the Settings menu. You can see in the screenshot below that it has detected the theme and that Elementor is installed. That’s why we install those first. Also see that you can use it with the block editor. I check these options and click the “Save” button at the bottom.

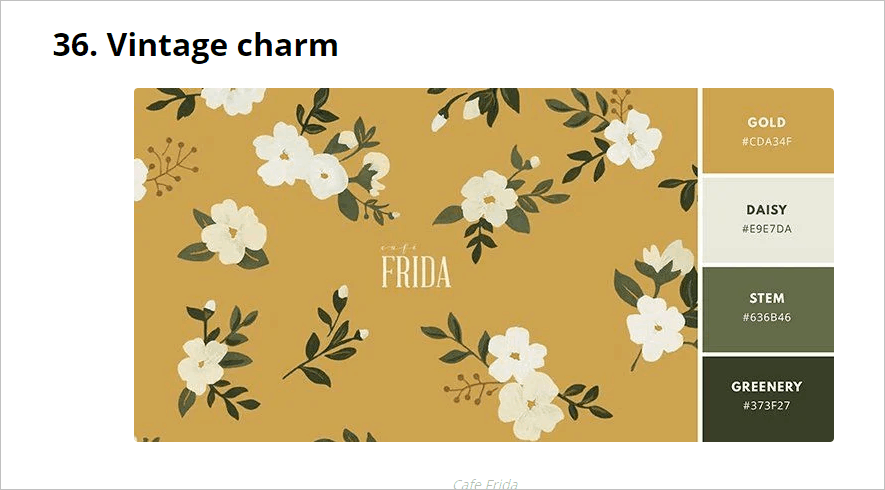
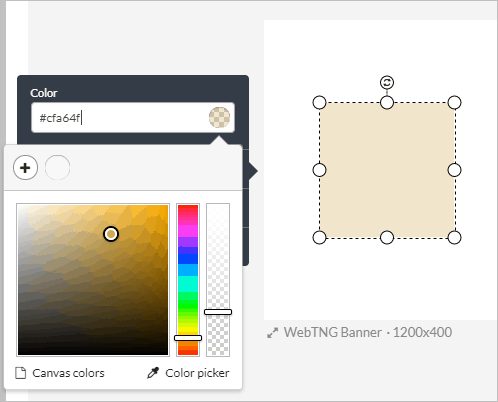
Next enter your color hex codes. Maybe you got the brand colors from a client or maybe you picked some colors from an image or from an online source. For this tutorial, I started by going to the Canva website where they have a long list of color palettes. I picked “Vintage Charm.” I’ll use the green as the primary color and the gold as the accent color.
You enter the colors into the Central Color Palette by clicking on the big plus sign.
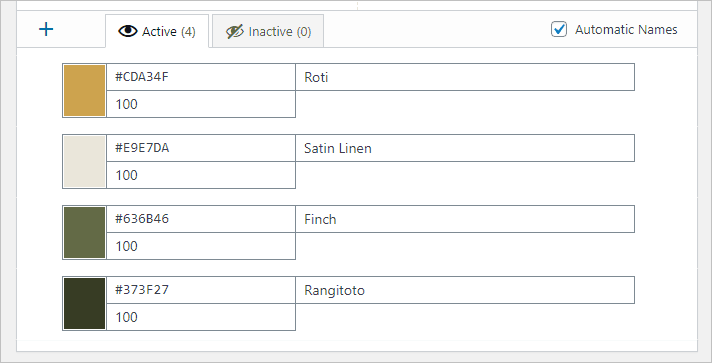
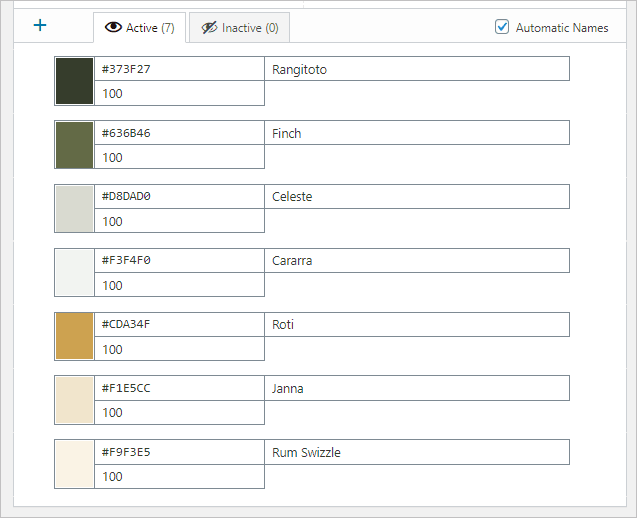
I enter the base colors by typing in the hex codes. After typing in the code click out of the box and it will give the color a name. You need to click the plus sign for each color. Here are the colors entered.
I usually add lighter shades of some of the colors to use as section backgrounds. I create those by going into my graphics program and first adding the white as the bottom layer. Then I add a layer above it with the base color and adjust the transparency to get a lighter blend.
I dropped out the grayish color from the original palette and dragged the colors to order them. Don’t forget to click the “Save” button at the bottom before leaving the screen!
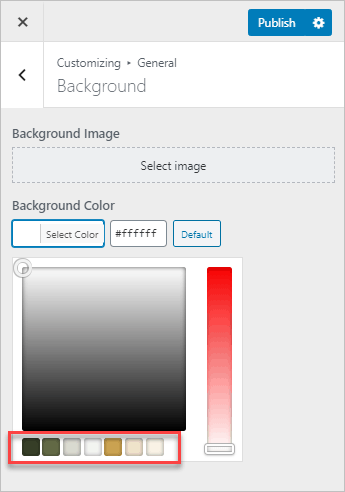
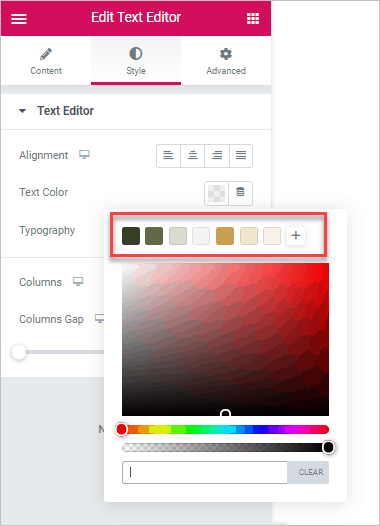
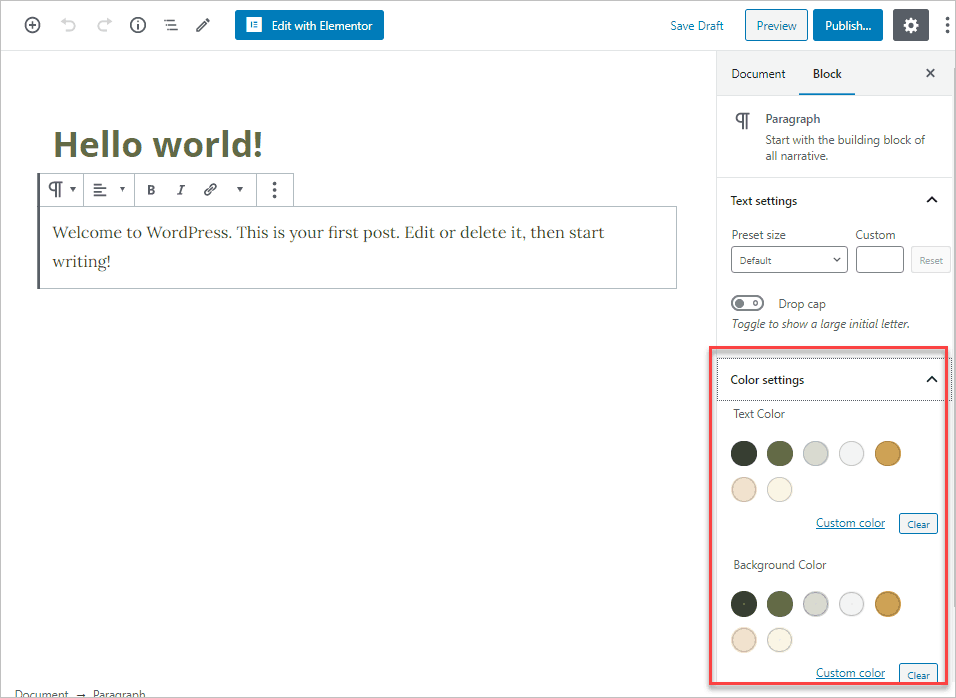
Just so you can see what all of this was about, here are the color pickers in the Customizer, Elementor, and in the Gutenberg editor. Note that our colors show in all three.
Configure the Theme
Now that I have the global color options set, I next make the selections for all of the theme options. I do the theme options before Elementor because it is possible to set Elementor, as we will see, to pickup the theme’s settings, but not the other way around. Gutenberg will also use a lot of the theme’s settings, but cannot use Elementor’s settings.
The settings you use for the theme Customizer and in the Page Builder Framework theme settings page are up to you, but you want to set all of the theme settings before setting the Elementor settings.
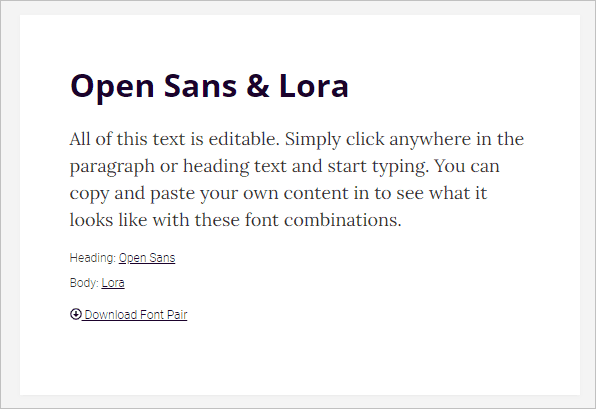
I went to the Font Pair website to pick a font for headings and one for text. I went for Open Sans for headings and Lora for text. Both of these fonts are available from Google fonts in the Page Builder Framework Customizer, so no special setup is needed to use them.
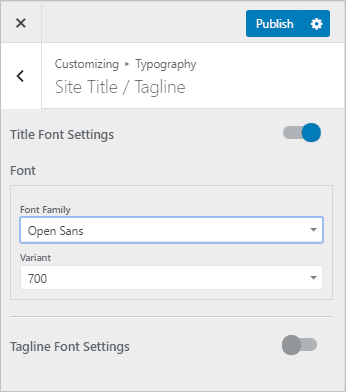
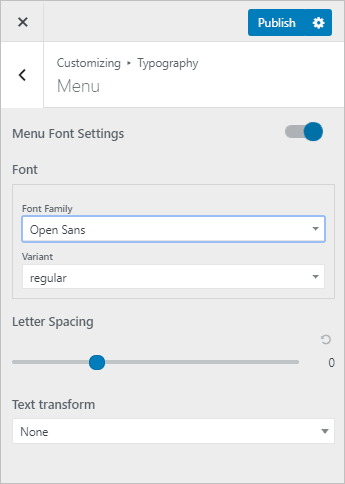
I then go through all of the sections of the Customizer and set the options. Here are some of the color and font choices I made. Here are the typography settings for the logo, site title, and menu.
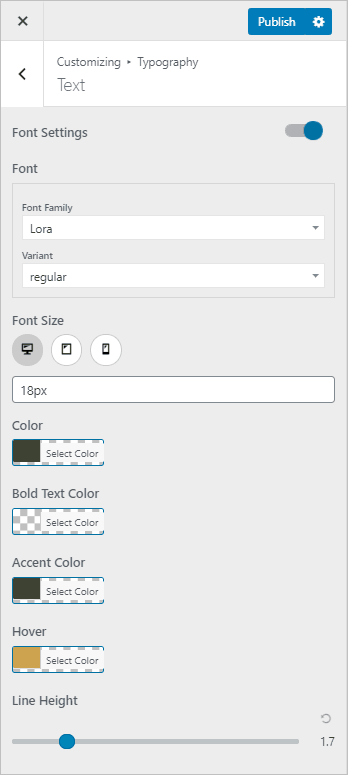
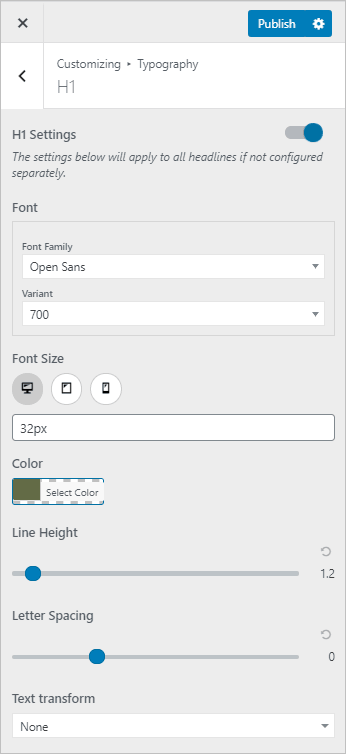
And here are the typography settings for the text and headings.
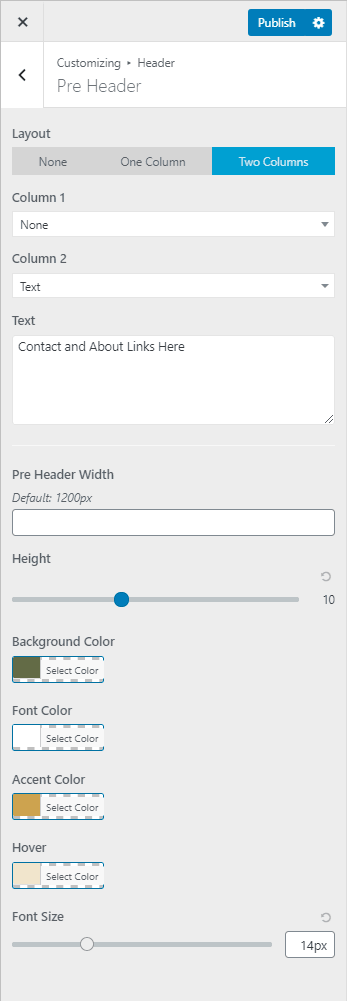
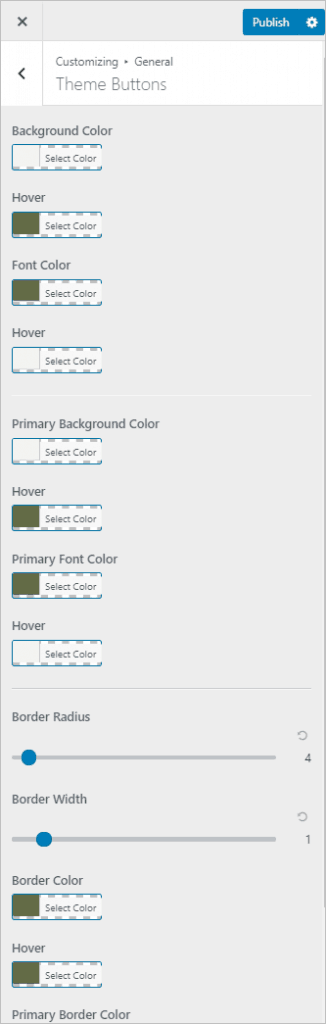
Here are the settings for the pre-header and for the theme buttons.
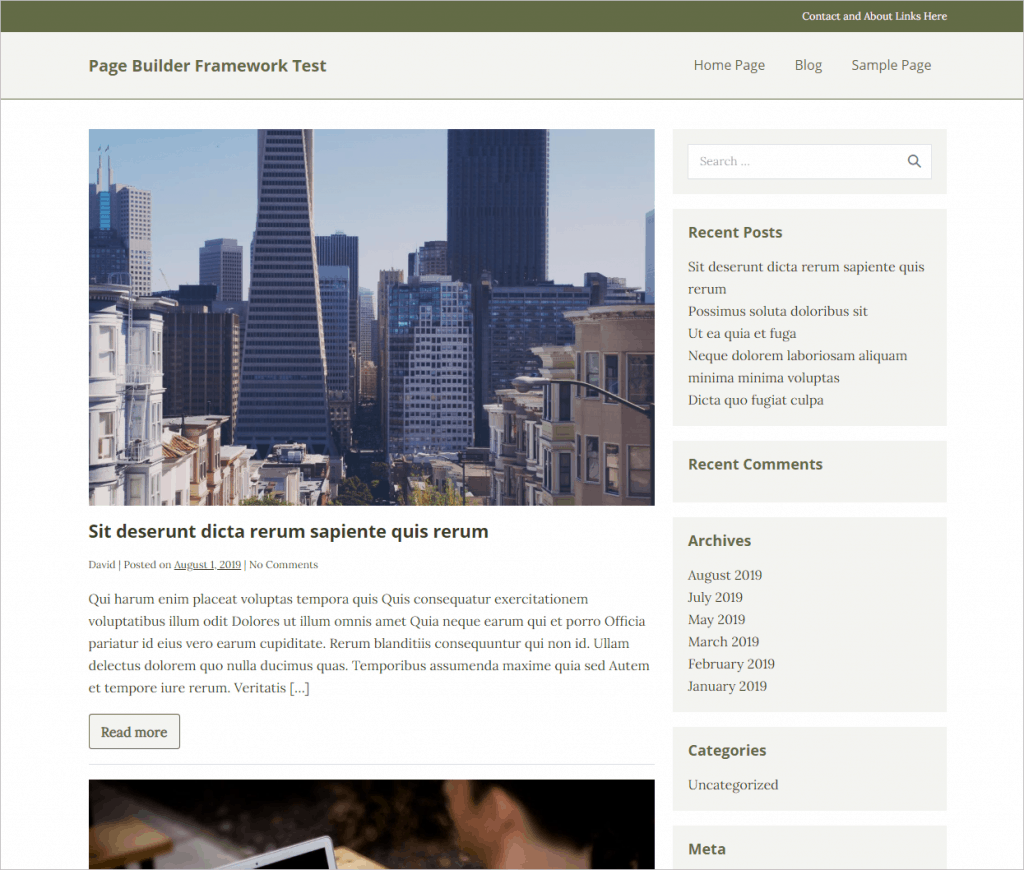
And here is a screenshot of the final result. If this were a real site I would create a logo and spend more time on the design, but this is enough for you to get the idea.
Configuring Elementor
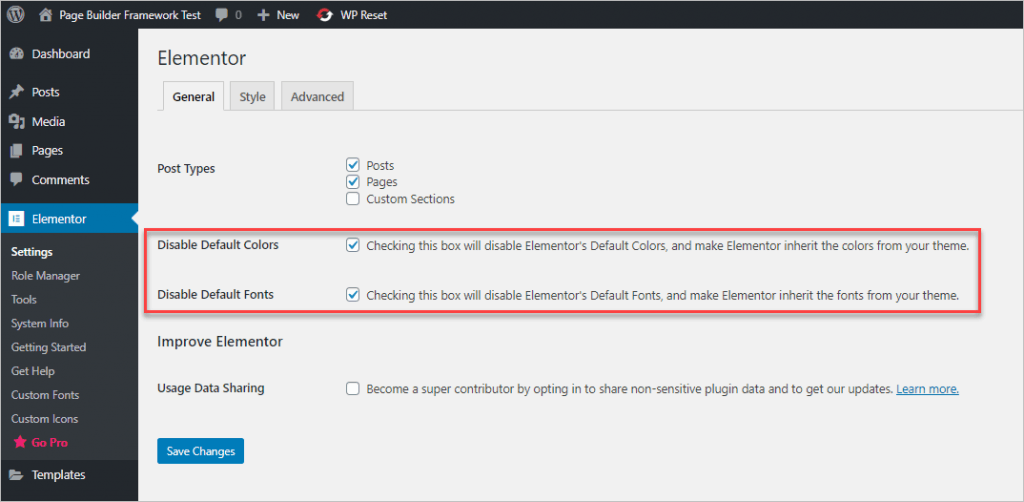
The first thing is to go to the Admin / Settings / General tab and check to “Disable Default Colors” and “Disable Default Fonts.” What this does is tell Elementor to use the color and font settings from the theme that we just configured in the previous step.
Next, click on the Style tab. We need to fill in the value of the Content Width, Table Breakpoint, and Mobile Breakpoint as I’ve done in the screenshot below.
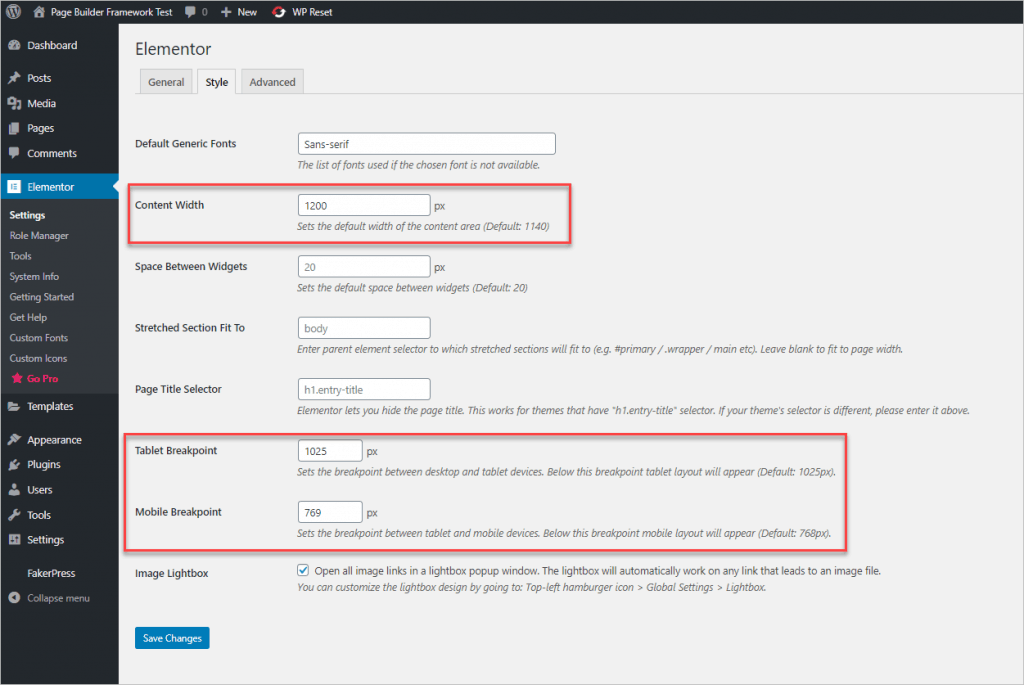
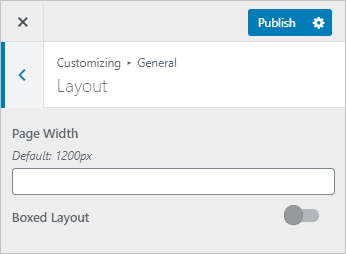
By default Elementor uses a page width of 1140px. The Page Builder Framework has a default of 1200px. You can imagine why you’d want them to match, so that the width of posts created with Gutenberg match the pages created with Elementor. You find the setting for the theme in the Customizer under General / Layout. I didn’t change it so it is still at the default of 1200px. I entered that value into the Elementor settings for page width.
The pro version of the Page Builder Framework lets you change the responsive breakpoints on the theme settings page. Some themes don’t give you the option to change this from the UI, so this is a nice perk of the pro version of the theme. You get to the Responsive Breakpoint settings by going to the Admin / Appearance / Theme Settings page. Scroll down to find them. The defaults are shown.
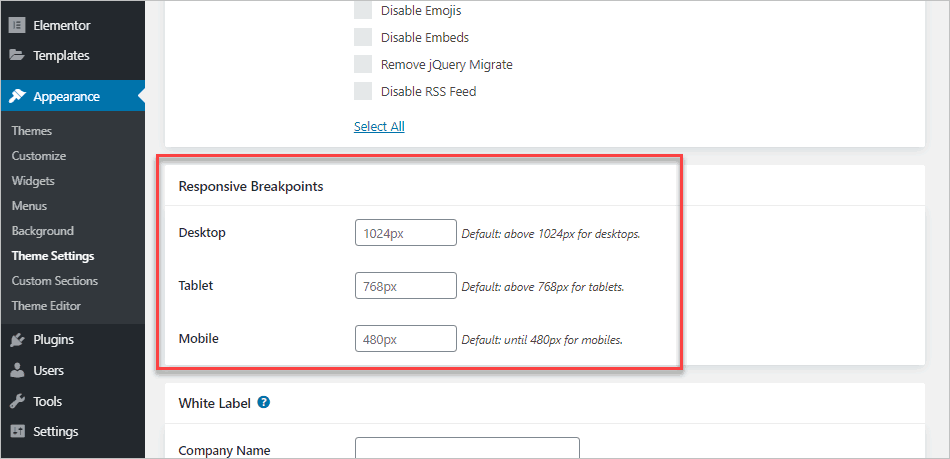
Most people think of breakpoints being applied when the screen size is “above” a page width, but Elementor’s settings say they will be applied “below” this number. So to match the settings, Elementor’s number needs to be 1px more than the theme’s number. The default tablet breakpoint for Elementor is 1025px, which is correct to match the theme’s 1024px, because the logic says below 1025px, witdh … which equals 1024px. The Elementor default for mobile is 768px and we need to bump that up one to 769px to match the theme’s 768px. It can be a bit of a mind twister, but hopefully this helps figure it out. Save those settings and we are ready to go into the Elementor editor to look at settings there.
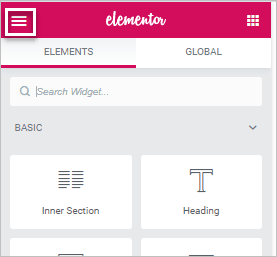
Go into Elementor by editing a page. Then click on the hamburger icon in the upper left corner.
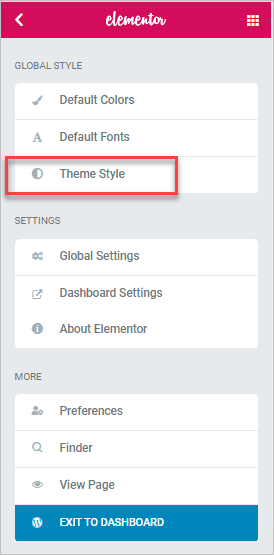
Inside the editor settings click on the Theme Style button. This is a nice new addition to Elementor. Note that the Default Colors and Default Fonts were already turned off in a previous step, so we don’t need to go there again.
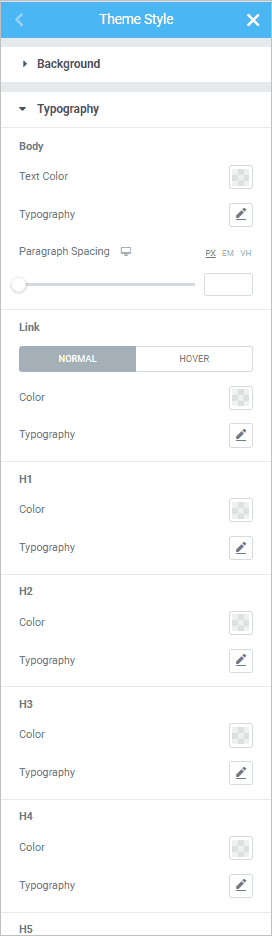
When you go into the Theme Style area you see the options that you can apply settings for. The goal here is NOT touch any of the settings that we were able to set in the theme and only set those that won’t carry over from the theme.
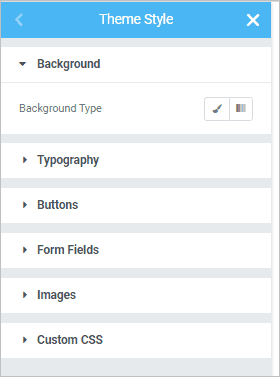
For example, if we look at the Typography section, we can see that we set all of these in the theme Customizer. Remember, we did that because the theme’s settings will trickle down and be used by Elementor, but it doesn’t go the other way.
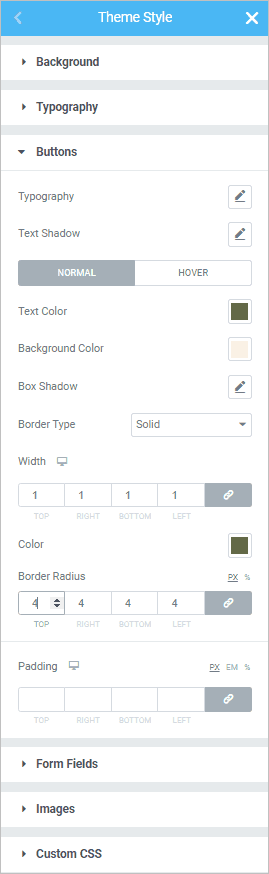
Sadly, Elementor does not pick up the button styles from the theme. It uses its own button classes, but it is easy enough to duplicate the settings here so the button styles match. Note that for some reason Gutenberg also doesn’t pick up button styles from the theme.
Because Tables, Form Fields, and Images are HTML element based, like Typography options, I believe they will automatically pickup any theme styling, though I haven’t tried this to confirm.
That’s it. We are ready to continue building the site.
Summary and Conclusions
To summarize the steps involved:
- Install the theme and base plugins (the theme, the theme’s pro addon, Central Color Palette, and Elementor).
- Set the global colors in the Central Color Palette settings and apply those to show in the theme Customizer, Elementor, and the Block Editor.
- Apply all of the settings in the theme Customizer as most of these will be picked up by the Block editor and can be set to be used by Elementor.
- Disable the default colors and fonts in the Elementor settings so that Elementor will use the theme’s settings.
- Set the page width and breakpoints in the Elementor Style settings to match the theme’s settings.
- In the Elementor editor go to the Theme Style area and do not set the Typography settings as these will be picked up from the theme. Set the Button styles to match the settings from the theme Customizer.
I used the pro version of the Page Builder Framework theme for tutorial because the settings are clear and you can do things like change the breakpoints from the theme settings page. If you are using a theme that doesn’t show the page width or breakpoints then you may need to contact the theme’s developer to get that information.
These are steps that you might do anyway, but by following them in this order you can intelligently make the most of the layout, styling, and responsive options with the minimal amount of effort. You also avoid setting the options in two places where you might accidentally create conflicts.
I hope you’ve found this tutorial helpful.