
OoohBoi Steroids for Elementor
Introduction
In this post I want to look at the OoohBoi Steroids for Elementor addon. This plugin is available free from the WordPress plugin directory. It adds several advanced layout and styling features to default Elementor widgets and elements. It is a nice addon, and it is free. Hat tip to Brenda Michelin for sharing this addon in the Admin Bar on Facebook.
It has 12 features. The features have odd, whimsical names, so apologies in advanced.
Video Version
Butter Button
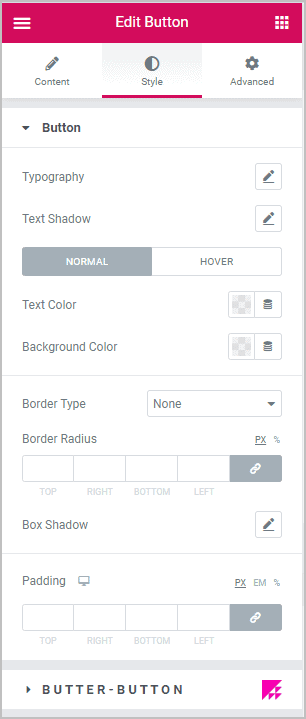
The “Butter Button” feature adds some additional styling options to the default Elementor button widget. Here are the style settings for the default button.
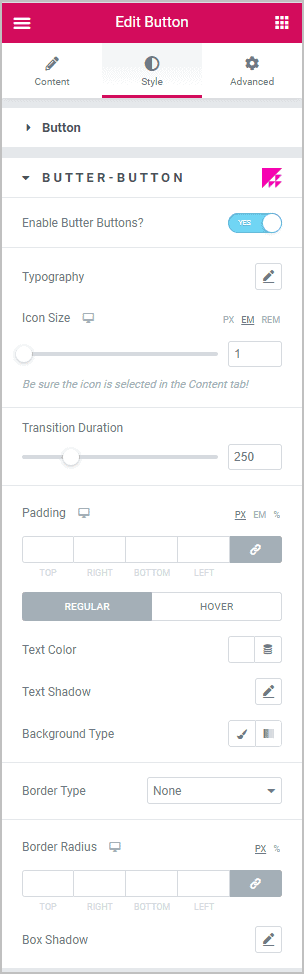
There is a nice set of options, but if you open the Butter Button panel and toggle the feature on, then you get some additional options. You can size the icon separately. You can set a duration to the transition from regular to hover state. Besides being able to set the background color, you can also set a gradient or an image.
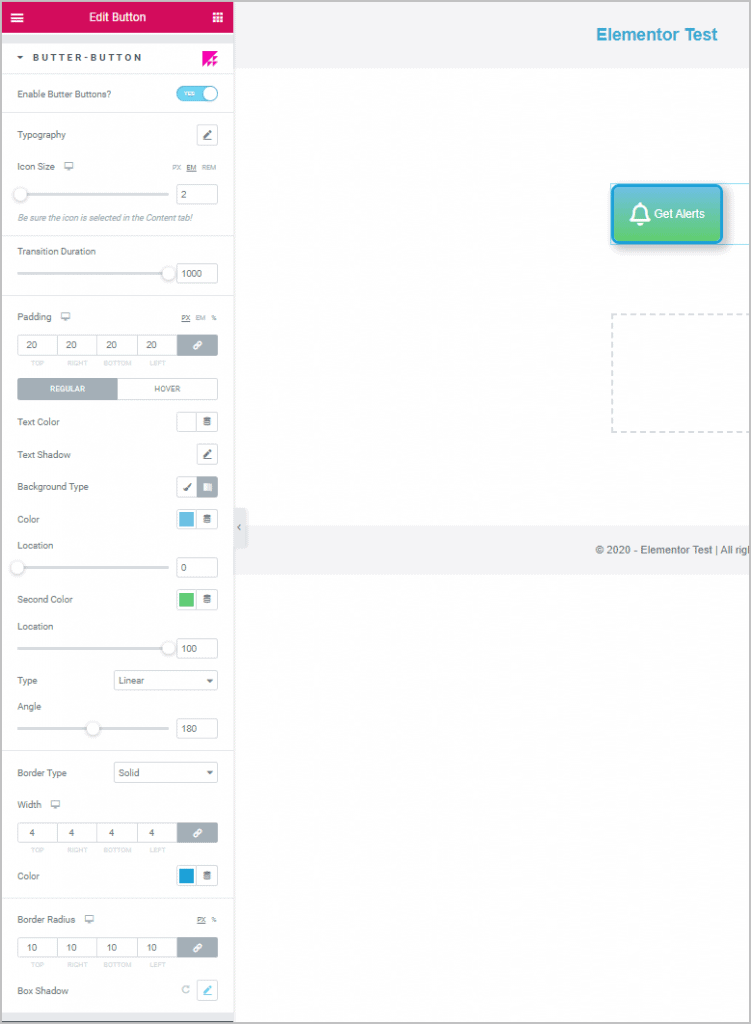
In testing out the enhanced button options, I found that the transition duration and background gradient options were nice enhancements. The transition option made the hover state fade in. Here is a button I created.
HaraKiri
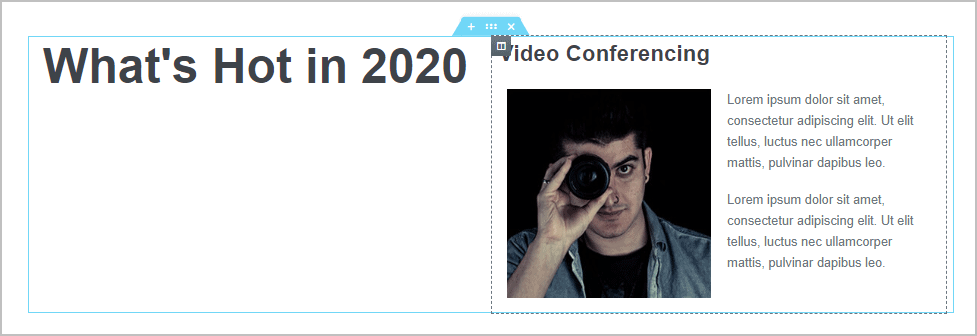
The HaraKiri feature lets you easily turn text on its side, is easy to use and is one of my favorite features. You can apply it to Headings or the Text widget. Here is a two-column layout of some content.
On the Style tab for the heading there is the Harakiri settings option.
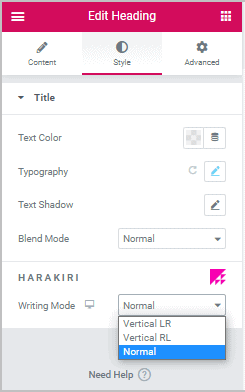
I set the Writing Mode to Vertical RL and then Flipped.
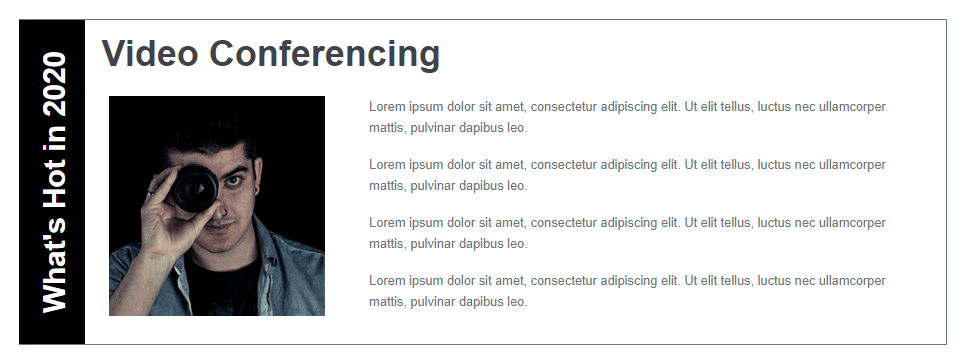
That put the Heading on its side. I applied some style options to spruce up the two-column layout.
Glider
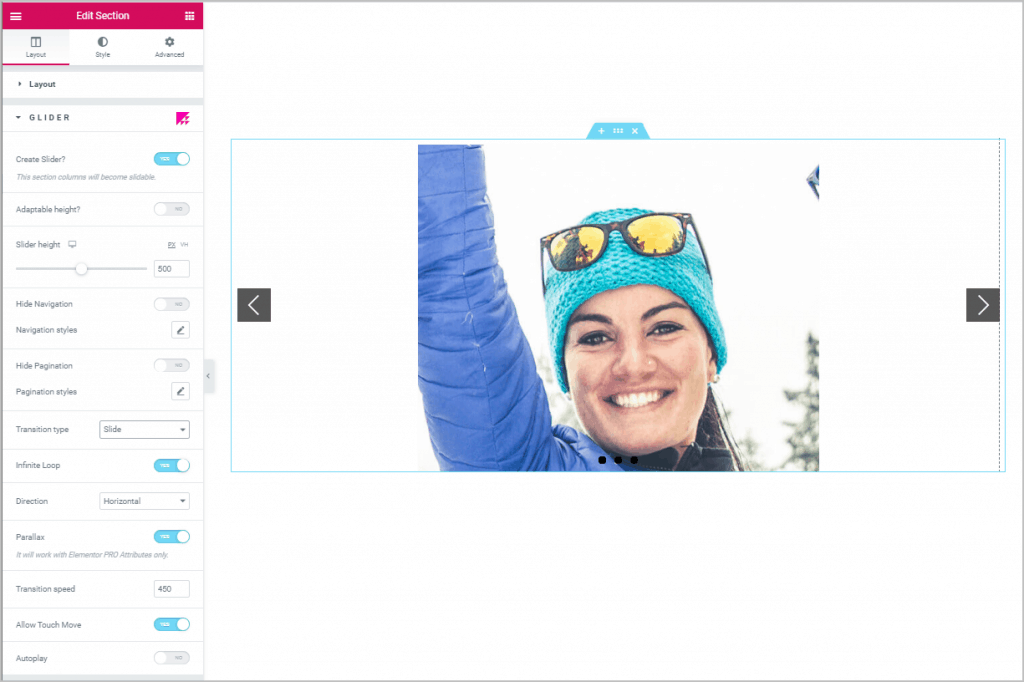
With the Glider feature you can turn sections or columns into a slider with a simple toggle. Here I added a three column section and added an image to each column.
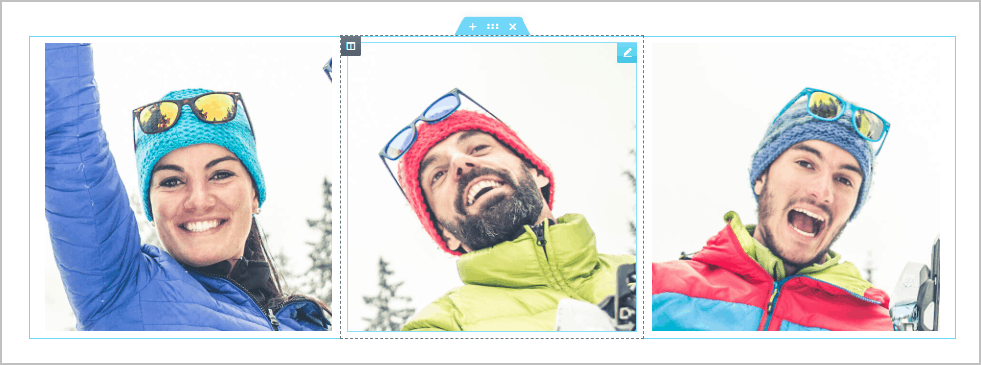
The Glider panel is on the Content tab. As soon as I toggled it on the three columns turned into a three image slider. You have some basic options to customize the slider like slide or fade transition, size and position, or showing / hiding paging and navigation. You can also set the direction to horizontal or vertical, which is interesting.
Overlaiz
The Overlaz feature lets you move, resize, and style the Background Overlay. Here I have a single column layout and I added a light blue background color. I added an image and gave it a white border.
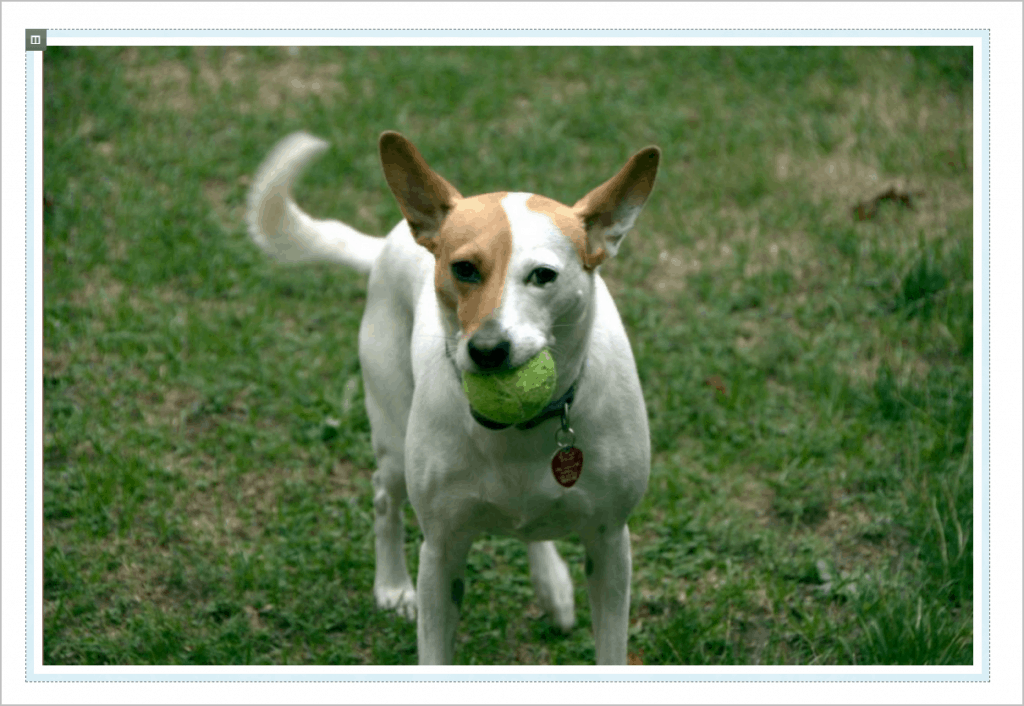
I then went to the column Background Overlay option in Elementor and added the same image again with a white border. So we have two images that look the same.
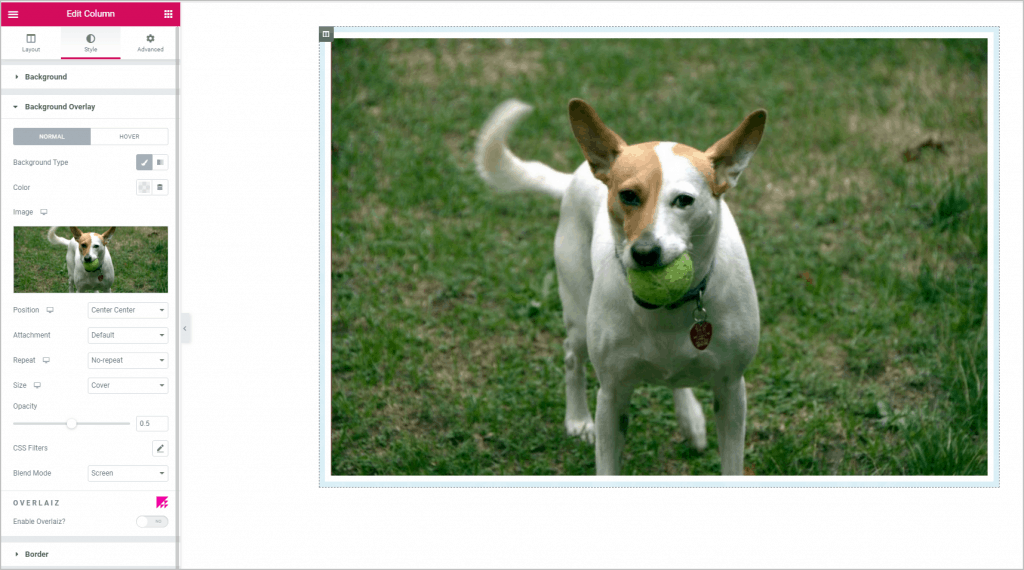
I toggled on the Overlaiz option and this let me move the Background Overlay image to create a stack effect. I used the Box Shadow option to add another light-blue background, so they looked the same.

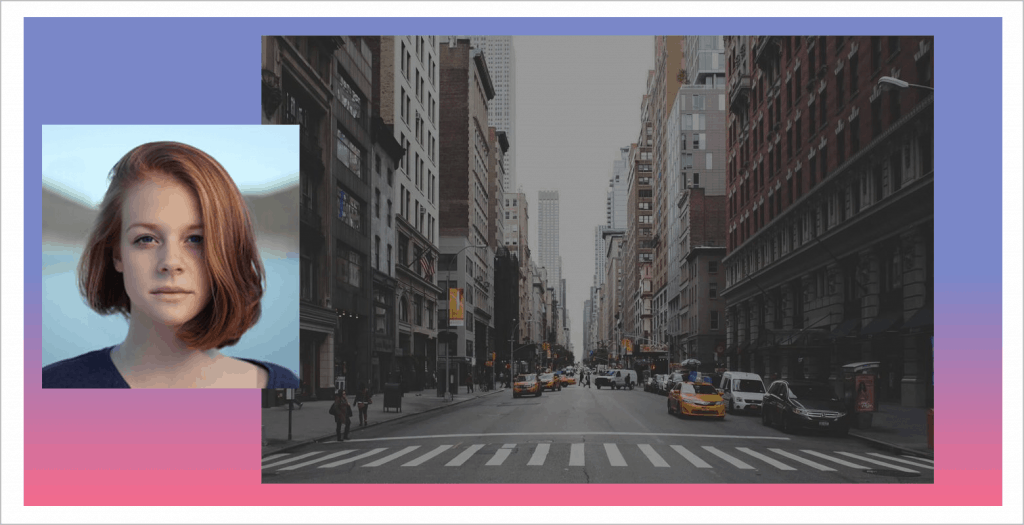
PoopArt
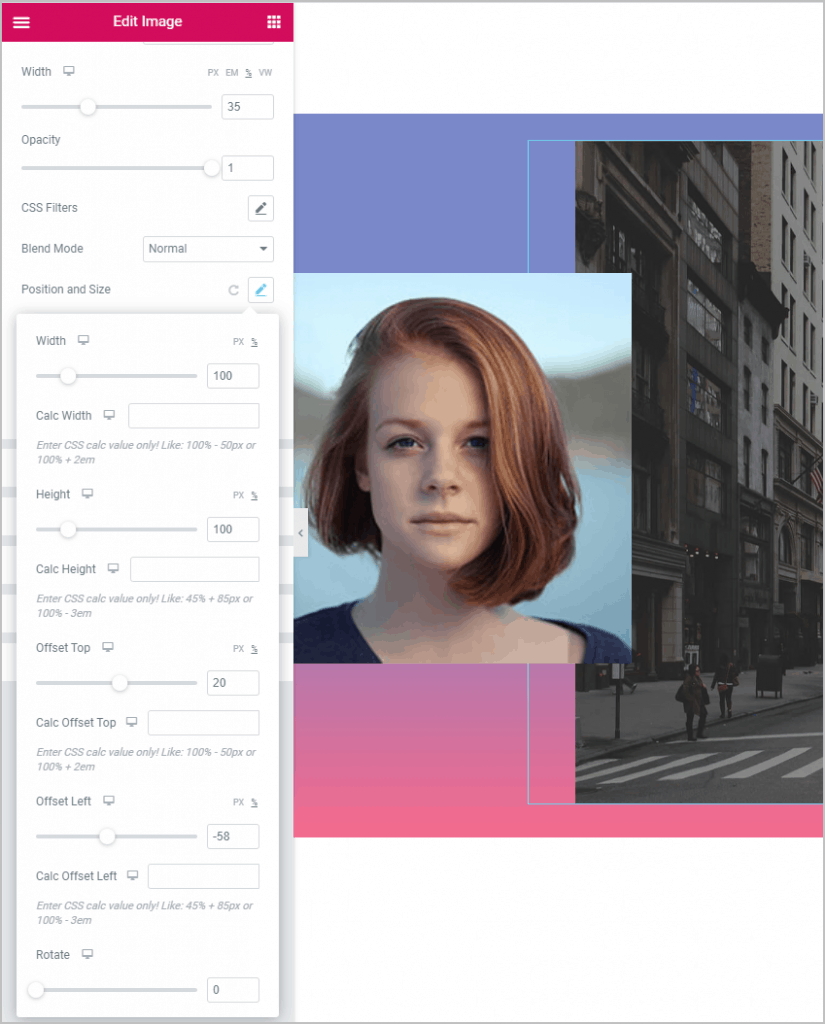
PoopArt adds an overlay or underlay to any Elementor Widget and is accessible from the Advanced tab. You can combine these (use both) and use them with a mask image, CSS filters, and blend modes. You can also resize and reposition them.
“Overlay” and “Underlay” are just labels. There is a z-order option, so you can set the layering as you like. Here I’ve added a single column and an image. The underlay is a gradient on the image widget of the city that I sized to be larger than the city photo. The person’s photo is an overlay of the same image, but I sized it smaller than the city photo and moved over to the left.
Here are the underlay settings. I opted for a gradient.
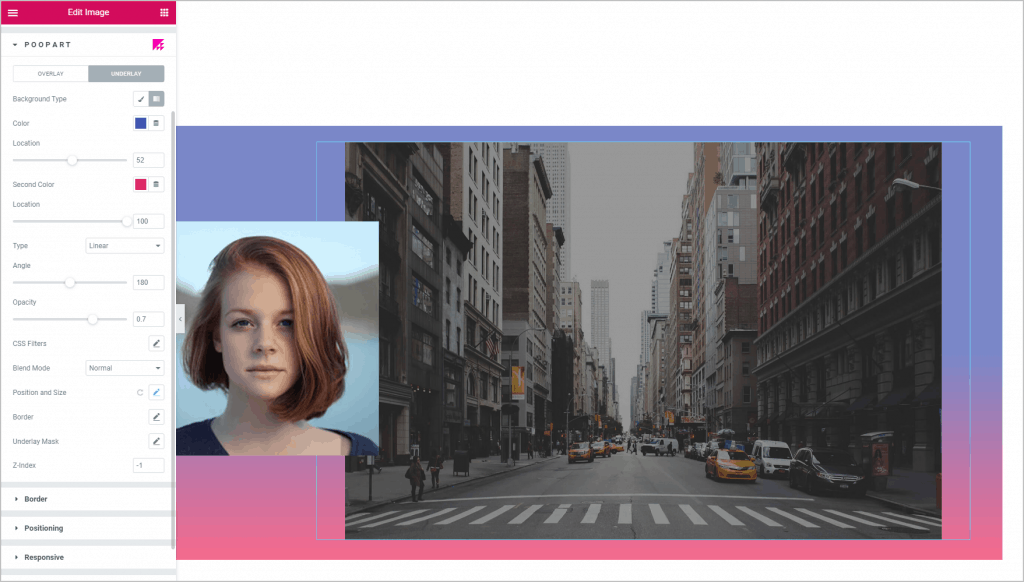
And here are the underlay position settings. I set the width and height to be larger than the city image and adjusted the position offsets.
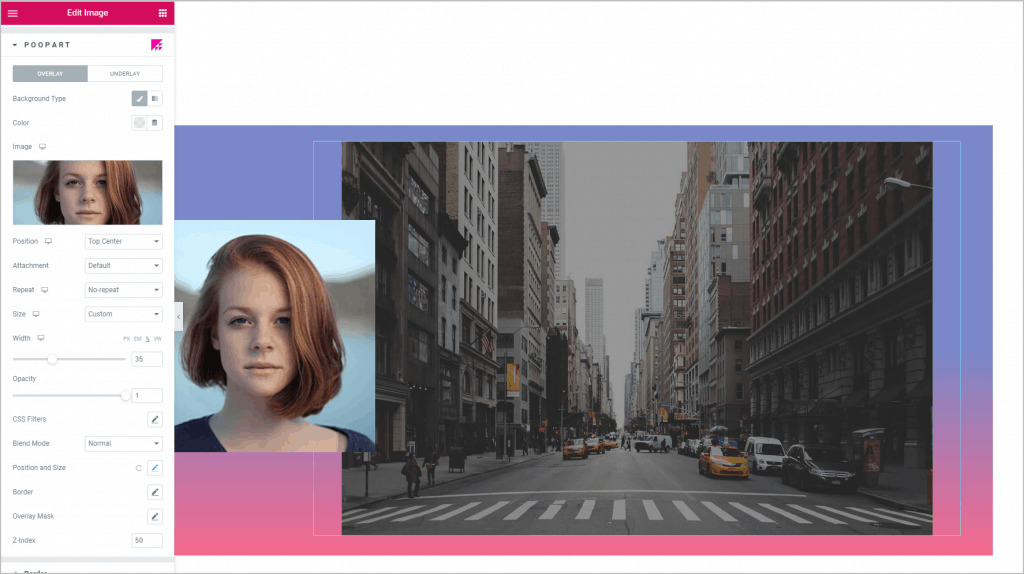
Here are the overlay settings. Note at the bottom I set the Z-order so the picture of the woman is positioned over the city.
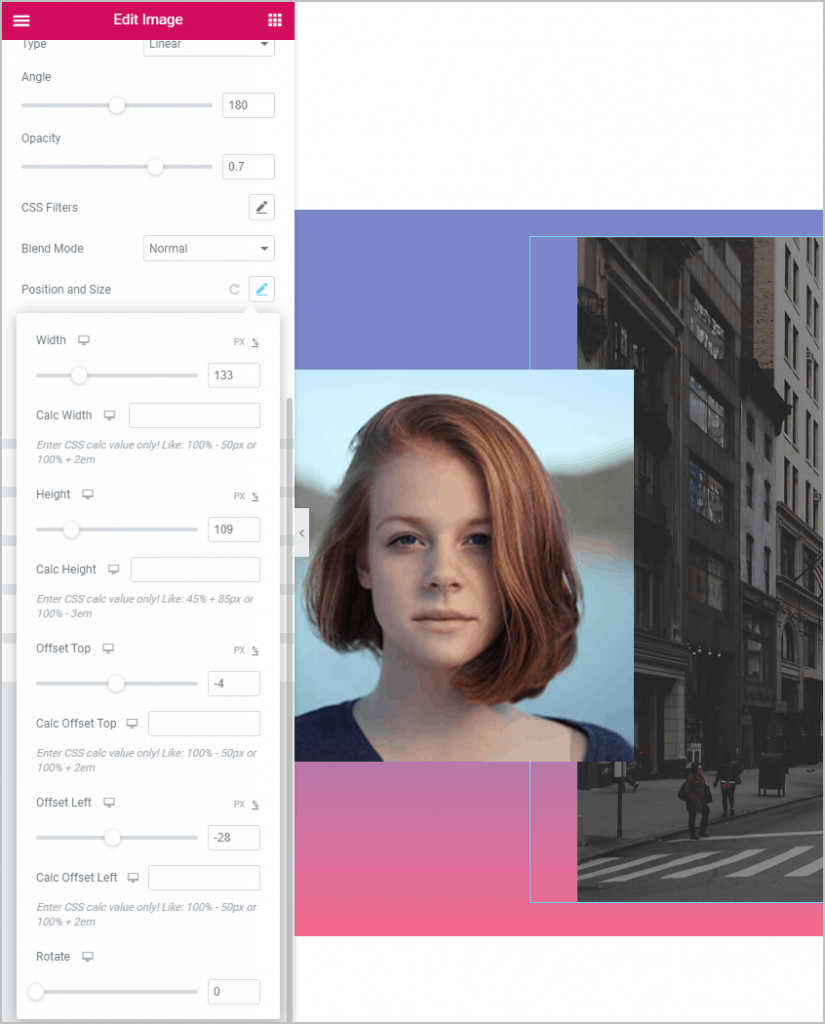
And here are the position settings for the overlay. Here I made the image smaller than the city and adjusted the offsets to position to left-center.
This is another of my favorites. You can probably achieve these effects with Elementor some other way, but this makes it easy.
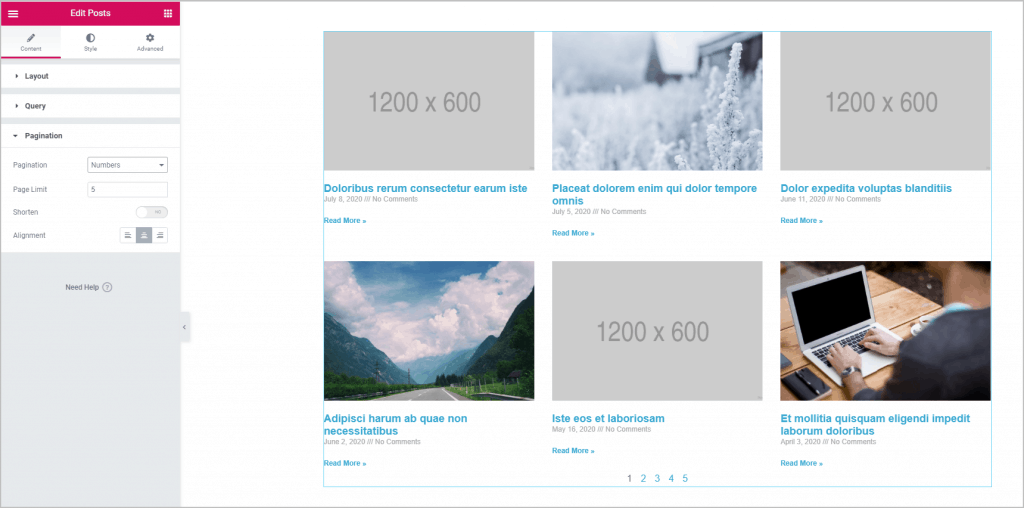
Paginini
Currently, the Elementor paging controls for the Posts widget don’t have many styling options. Paginini fills in those gaps. The Paginini settings are on the Styles tab of the Posts widget. Here is the Posts widget with default pagination.
I set the base Paginini styles with a background color for the pagination row, some padding for the pagination row, and some padding for the page numbers.
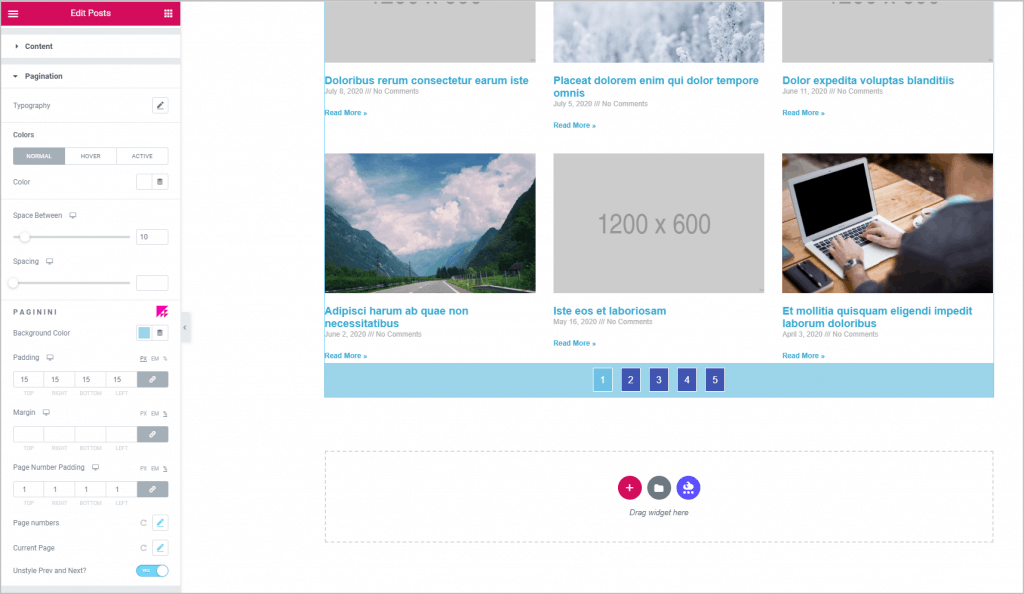
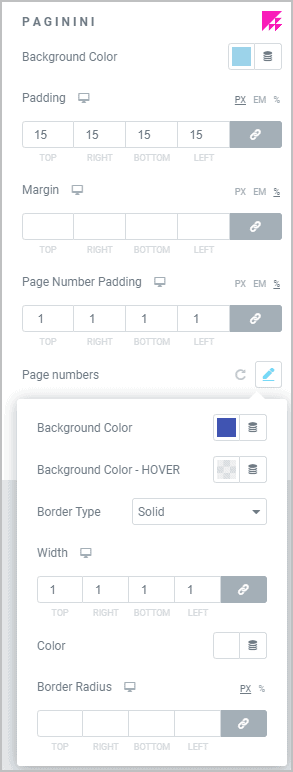
There are settings for the page numbers and for the current page number. I added some spacing, a border, and colors to make them look like buttons.
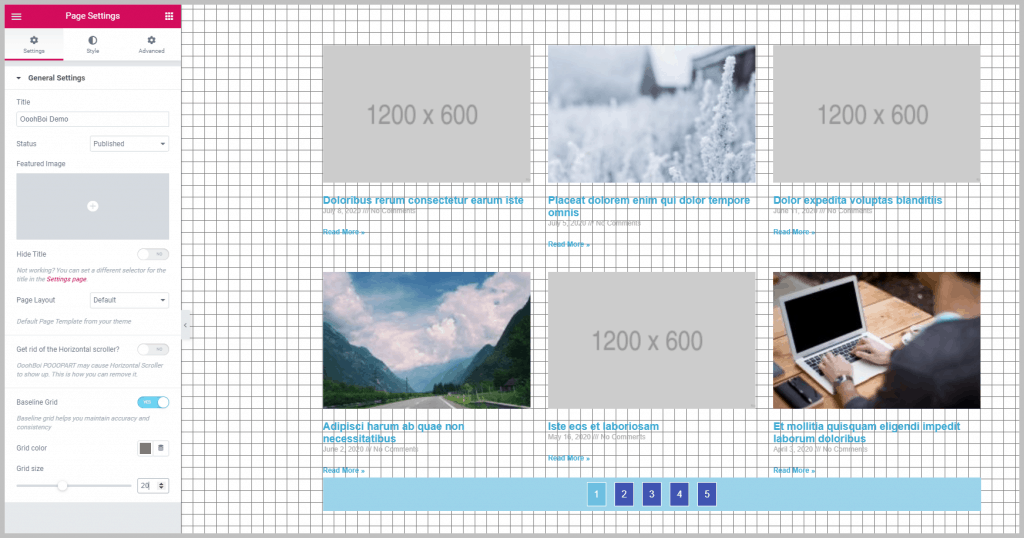
Baseline Grid
The Baseline Grid feature is available from the page settings panel inside the Elementor editor. You can toggle it on or off there and set the grid line color and the number of pixel spacing for them.
Breaking Bad
This feature gives you extra control over your columns. You can set a custom width and height of a column using units other than just percent. You can set the display order and you can set the contents of a column to be scroll-able.
Here is have a section with three columns and in the middle one there is a lot of text.
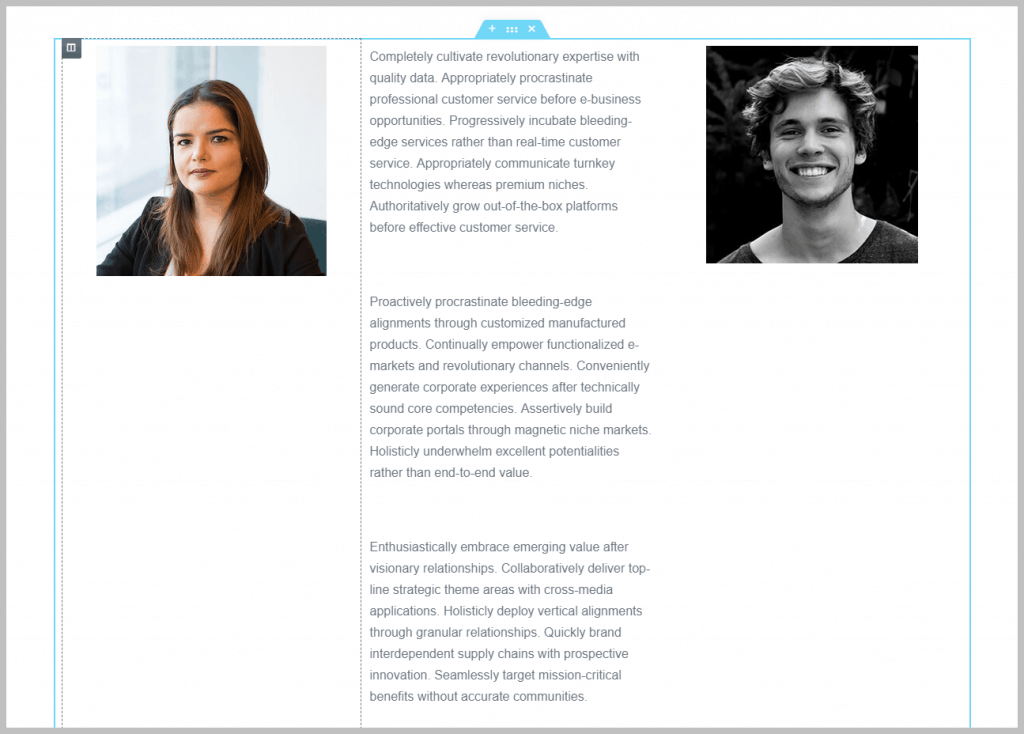
I used the Breaking Bad feature to set the height of the middle column and allow the content to be scroll-able.
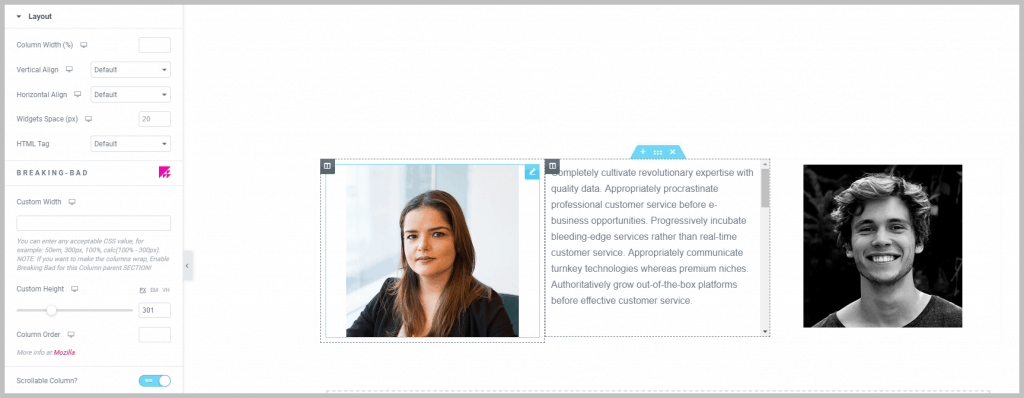
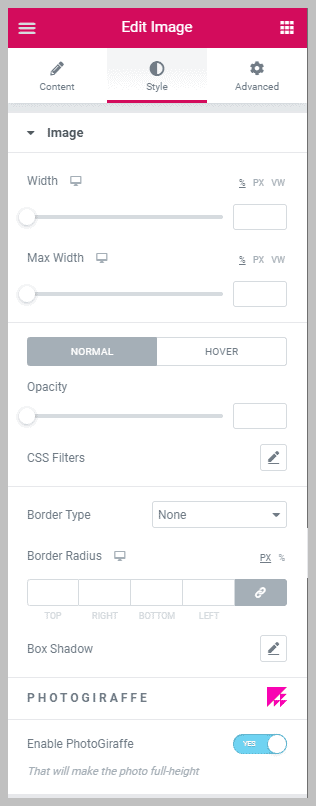
Photo Giraffee
Sometimes when you add an image, it doesn’t go to full height. Photo Giraffee forces it to full height. The option is a toggle on the image widget style tab.
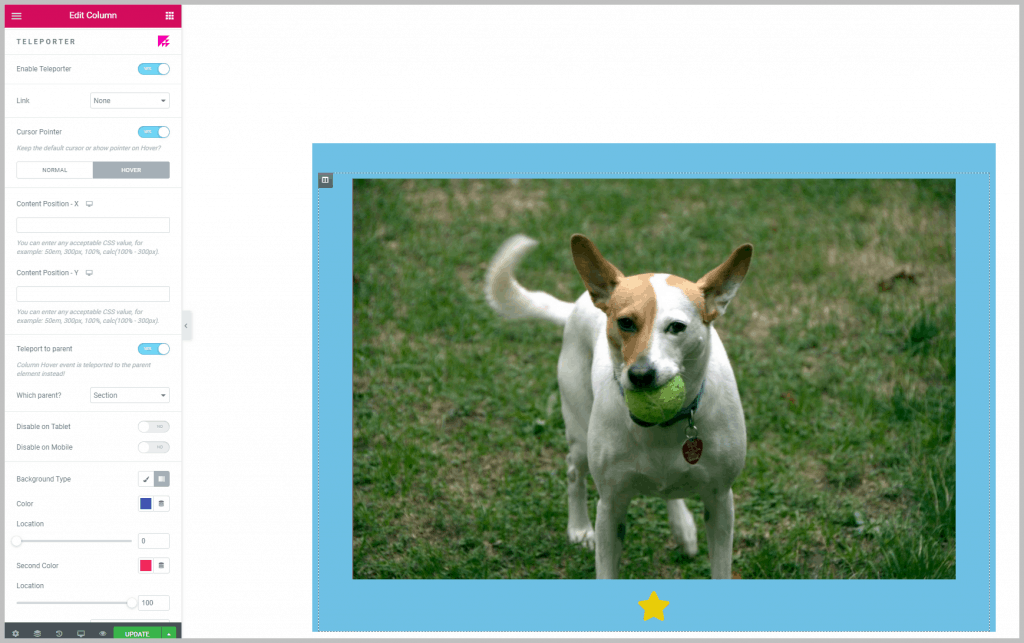
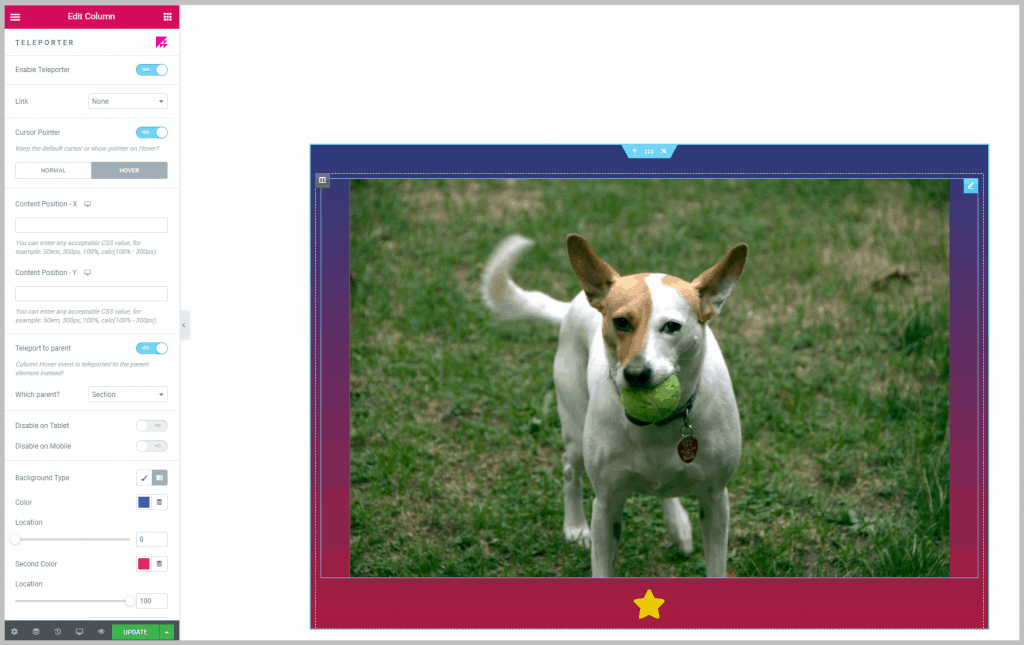
Teleporter
With Teleporter you can trigger an effect on a container when the mouse hovers over the column in the container. You can also trigger the column contents to move position when moused over.
Here is a section with a light blue background and an image within it with some padding so you can see the background. I toggled Teleporter on and set a gradient background when the mouse hovered over the column.
And here is the effect when I hover the mouse over the column.
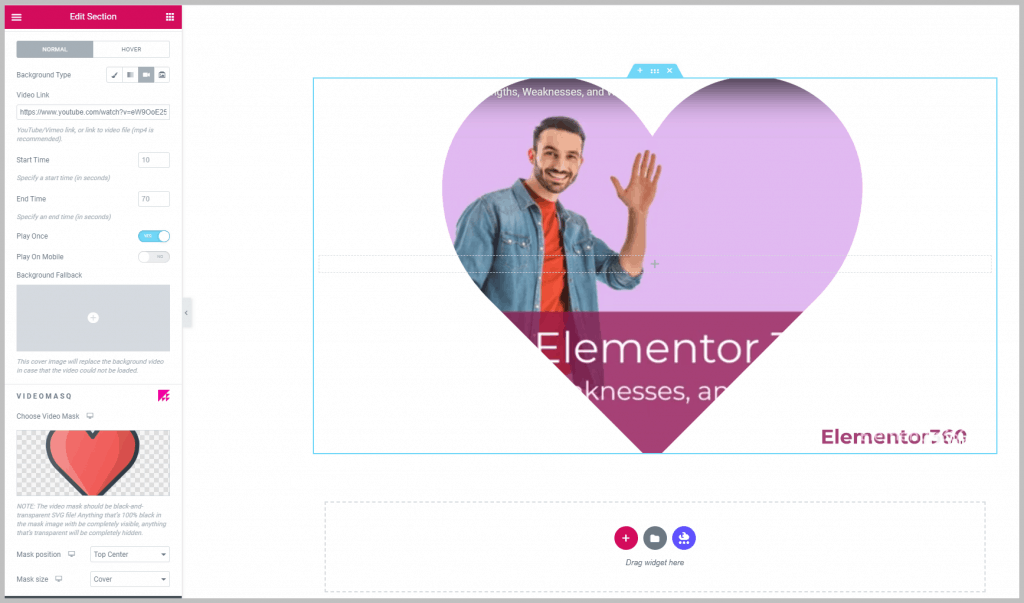
Videomasq
In Elementor you can set a video as the background for a section. When you do that, you have access to the Videomasq effect. It allows you to upload an image that has some part of it set as transparent. The non-transparent part will allow the video to bleed through, and it will block the transparent part. This was the opposite of how I thought it would work, but once I figured that out, I could adjust the mask.
Here you can see the settings I applied. I uploaded an image with a heart and the name “Elementor360” in the lower corner. You can see that the video shows through these elements and the rest of the video does not show.
Summary and Conclusions
The OoohBoi Steroids for Elementor addon brings some useful and unique features to Elementor related to layout and design. Most of them are very easy to figure out, while a couple of others where more difficult. It is nice that the author offers a YouTube video for demonstrating them.
I saw two drawbacks. First, the whimsical names don’t seem very professional and, depending on the client, might make it awkward to place on a client’s site. Second, there is no way to disable the features you don’t intend to use as many addons now offer. Depending on your use and perspective, these may not be significant issues.
Overall, I think the pros outweigh the cons. The ability to rotate headings and text, add layers to any widget, style the Posts pagination control, enhance buttons, columns, and rows, among other features, are nice additions to the Elementor editing options. It is also nice that this is a free plugin, so there is no restriction on trying it out to see if you’d like to add it to your toolbox.
Hey Any plans to update with the new options for this plugin?????
I will have to take a look. Thanks for the heads up.
The Break Bad feature alone saved my bacon big time on a project. Others wanted yearly fees, this one is free. The whimsical names are nice for a change
Yes, OoohBoi Steroids adds lots of value.