
Switching an Elementor Site to the Blocksy Theme
It has been two years since the launch of the Elementor360 website and it is time for a refresh. As a first step in that process, I decided to replace the Page Builder Framework theme with the Blocksy theme. In this post I share an overview of the Blocky theme, show you my process for changing themes, and share my overall impression of Blocksy.
Reasons for Switching to the Blocksy Theme
I use Elementor for many of the advanced features on the site and Gutenberg for producing post content, so I wanted a theme that works well with both of those. I’ve been using the Page Builder Framework and when I set p the site I used the Central Color Palette plugin so that I would have consistent color options in the Customizer, in Gutenberg, and in Elementor. Last September when Elementor introduced its global color option, the Central Color Palette plugin stopped working.
During the process of picking a theme I compared several and shared the results of that testing in a previous post. Unfortunately the Page Builder Framework does not integrate its colors with Elementor or Gutenberg. I was surprised to find that Astra didn’t either. Of the ones I tested, there were three that provided full site-wide color palette integration: Kadence, Neve, and Blocksy. Of course a global color palette is just one feature among many, but I think it is a good indicator of the attention, care, and extent that a team is willing to go to provide a great user experience.
I’ve been curious about Blocksy and many of my online friends have recommended it to me. I purchased the Pro version when it was released and have found that the team is very responsive to user requests. For example, I’ve asked for several features which they added. I decided that this was the perfect time to try it out.
Blocksy Overview
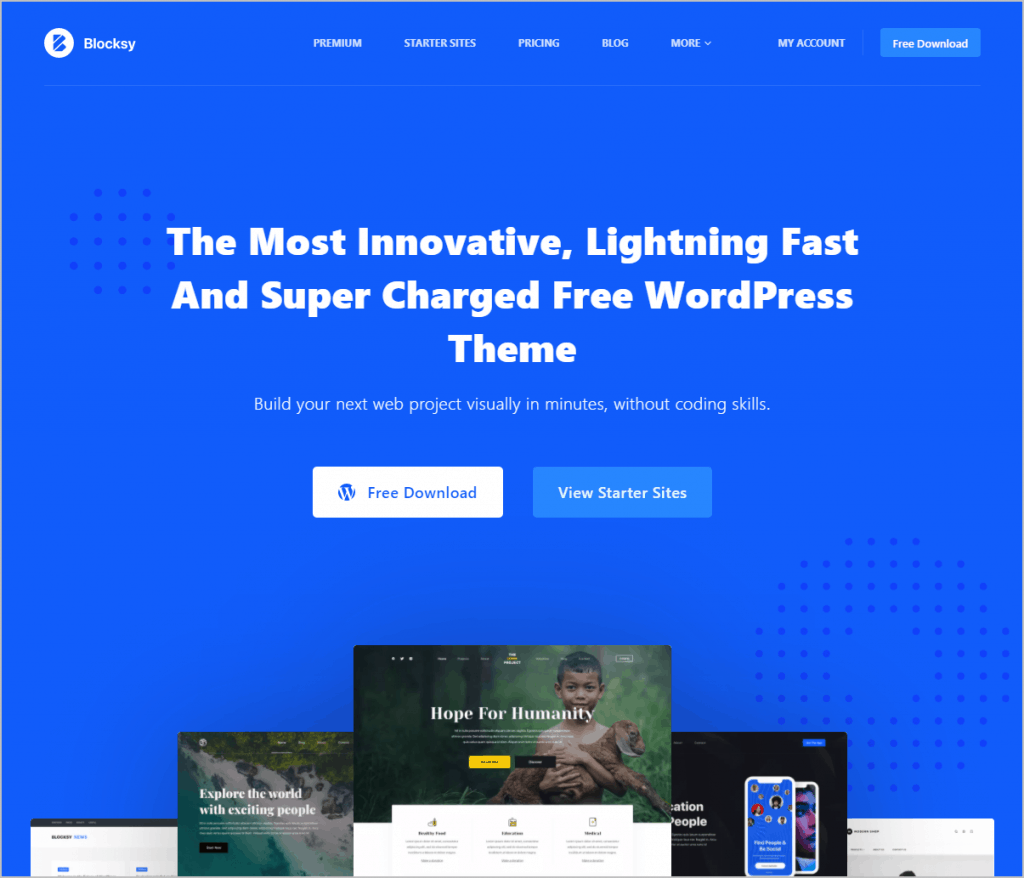
The base Blocksy Theme is available in the WordPress theme directory with more than 20,000 active installs. Wow, Blocksy has a perfect 480 five star reviews!

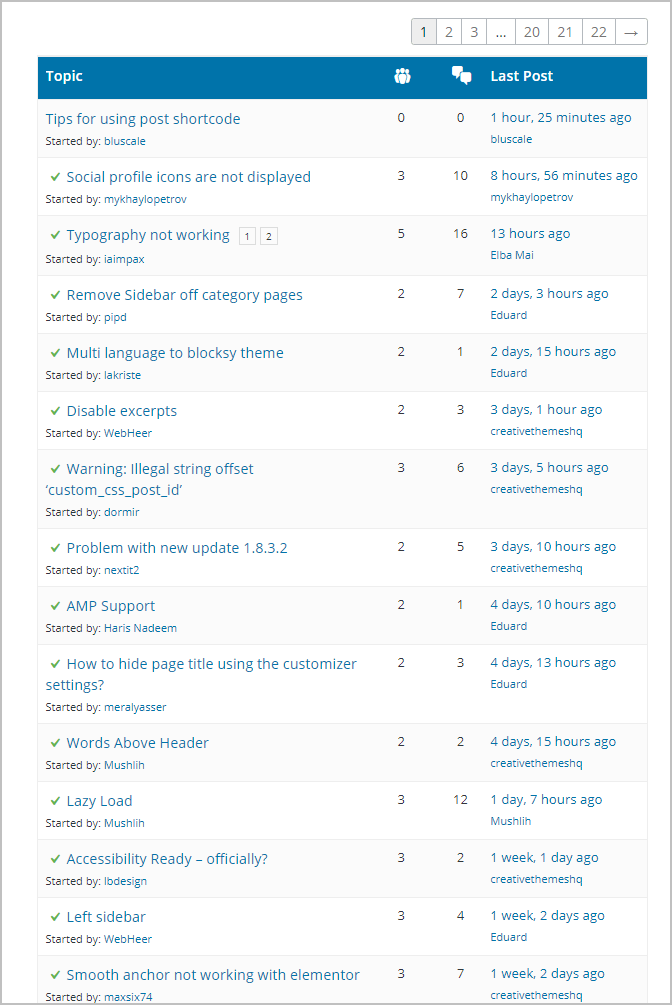
I always like to check the support forums to see if the team is active in helping users. As you can see, the Blocksy team is on top of support questions, most of which are resolved.
Blocksy Pro is sold from the Creative Themes website. Their website has the documentation, which is pretty good. Blocksy Pro is available in annual or lifetime packages.
Blocksy Installation
After I installed the theme I was prompted to install the free Blocksy companion plugin. However, I knew I was going to install the Blocksy Pro plugin, which replaces that free one, so I installed that instead.
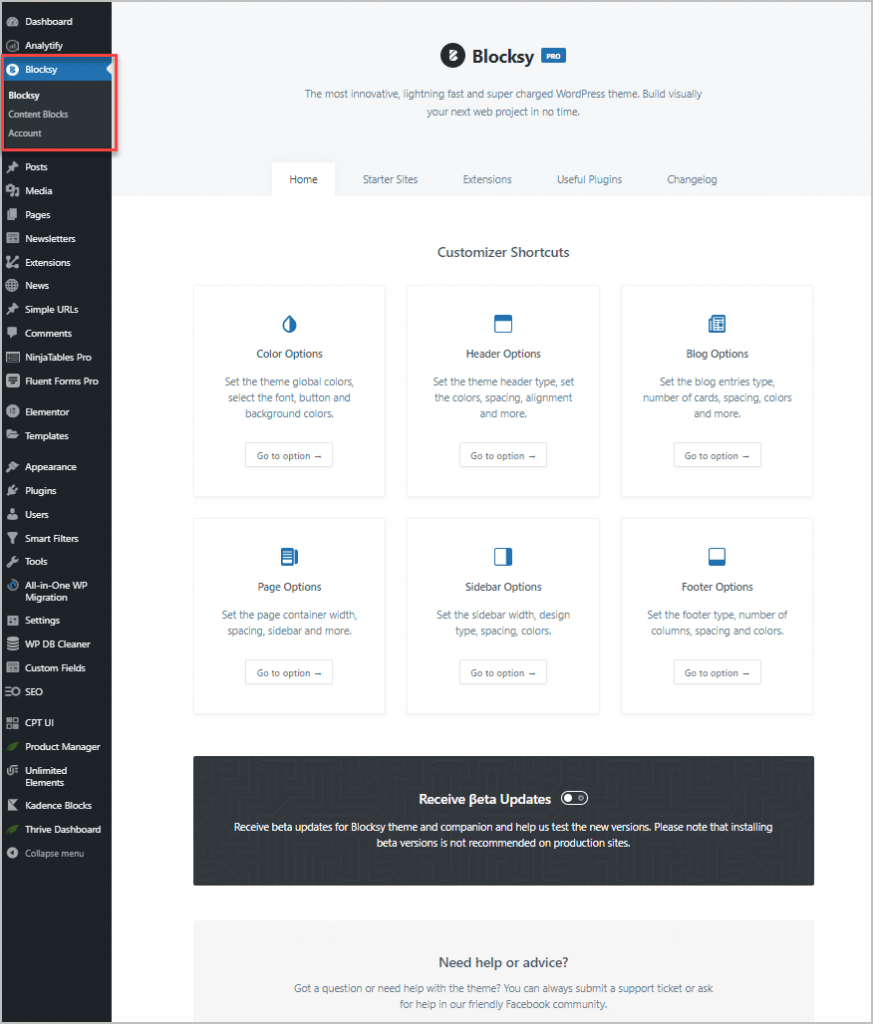
You get a new menu for the theme near the top. Usually themes put their dashboard under the Appearances menu and that is where it is found if you don’t have a companion plugin installed.
The Blocksy page has several tabs. The home tab has shortcuts to many of the Customizer options.
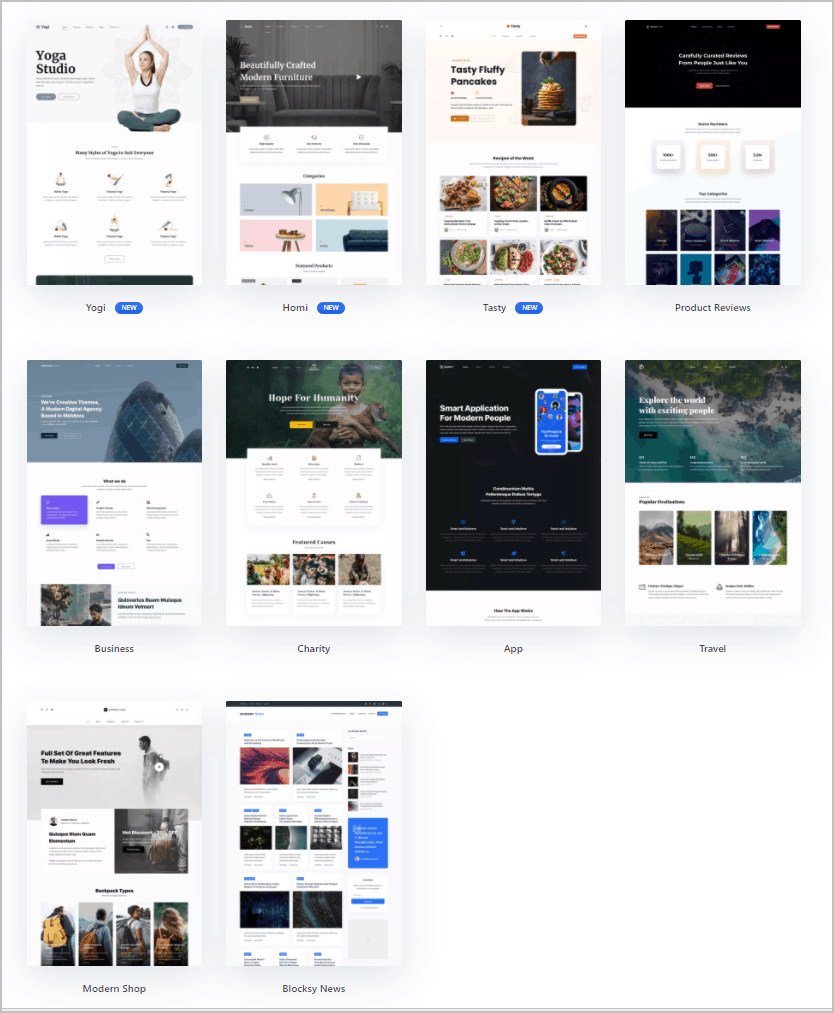
Looking at the Starter Sites I see that at this point, they only have 10 starter sites.
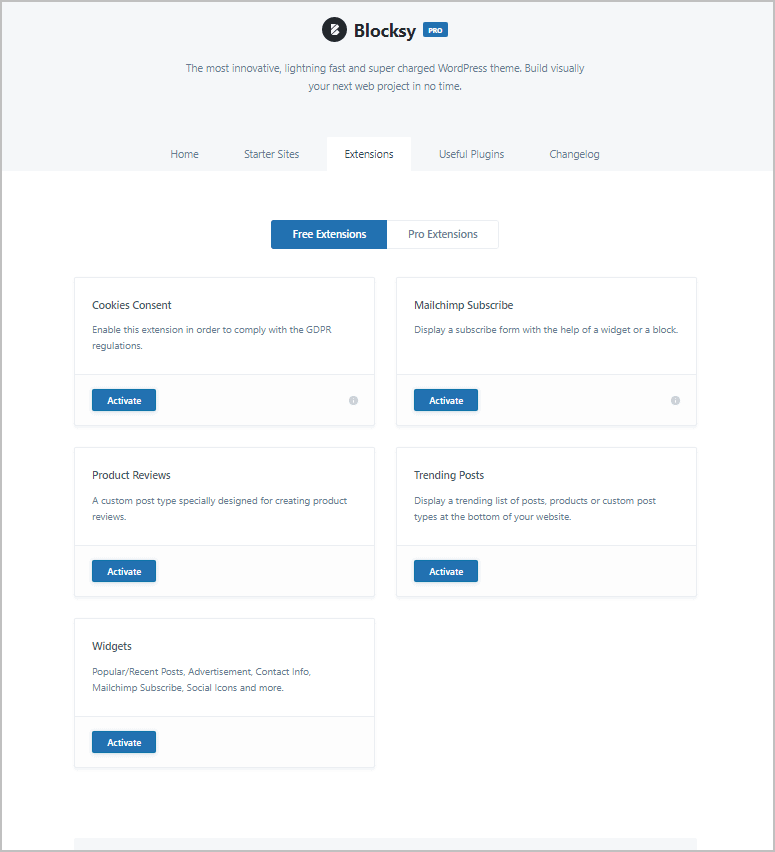
The extensions tab has an area for free and for pro. Here are the free extensions.
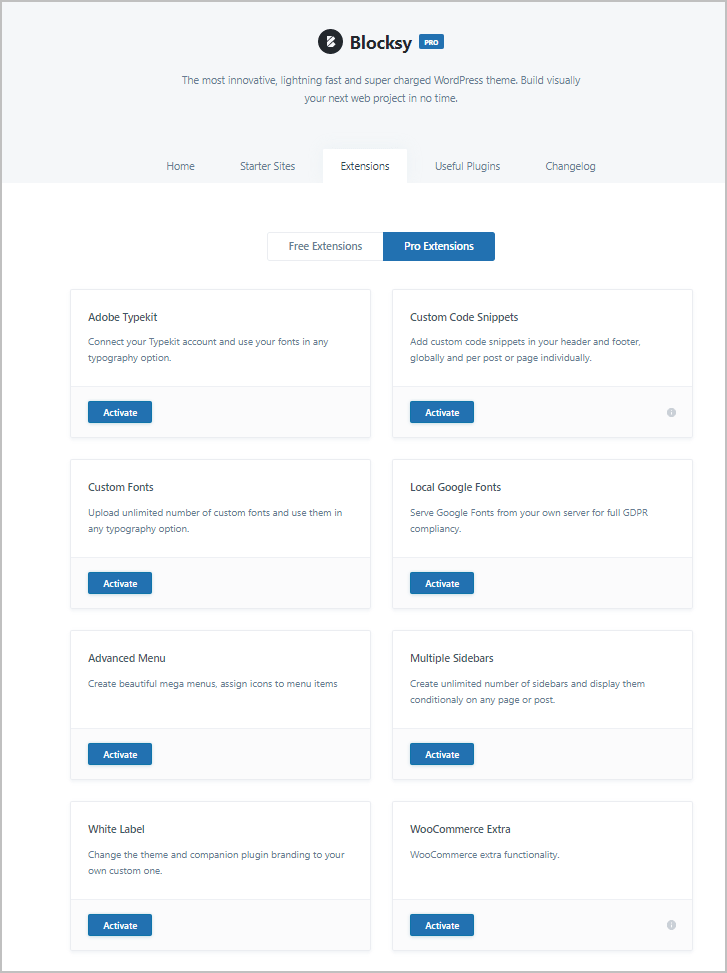
And here are the pro extensions.
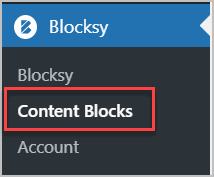
Another feature of Pro are Content Blocks. This is where you can create some content as a template part and use hooks to place it. We will use this feature later on.
Blocksy Removes the Need for Two Plugins
I’ve already mentioned that Blocksy, the free version, provides the integration features that the Central Color Palette plugin offered. The Blocksy Pro header builder has an Account widget, which will replace a small utility plugin, “Login Logout Menu.” This plugin adds a login link to a menu that is contextually aware and changes to a logout menu if the user is logged in. I’m the only user on the E360 website, but I login every day, so I don’t feel guilty adding a login menu item for convenience. I’ll replace the functionality of the Login Logout menu when doing the header.


Customization
I recently did a deep dive looking at the themes and found that the most popular general purpose, page builder friendly themes have a very plain starting style. This is because they have options to let you Customize them for your brand and purpose. Blocksy was no exception, with a plain white header, for instance.
Customizer Organization
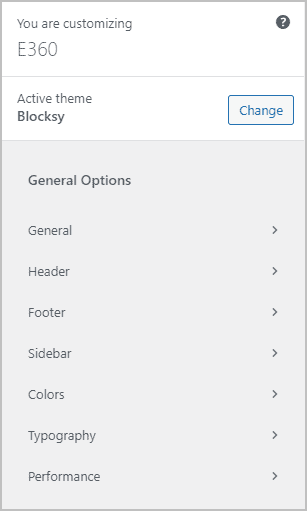
The Blocksy Customizer is very well organized. Instead of one long screenshot, I split it into three. At the top are the General options. Of course each of these high level menu items has sub areas.
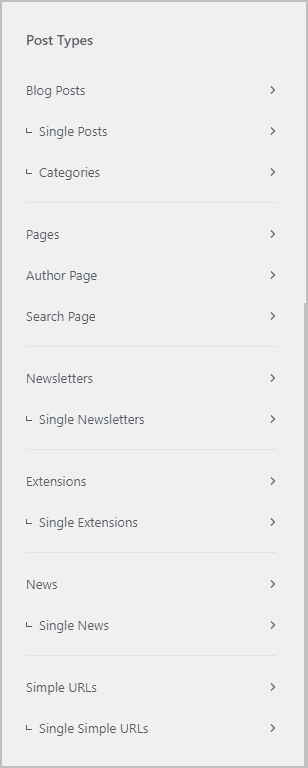
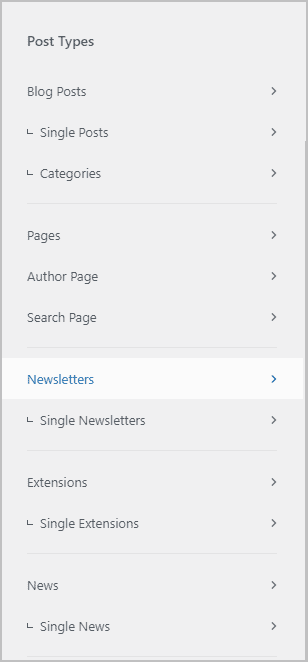
Then the post types are listed, with the option to Customizer the single and archive.
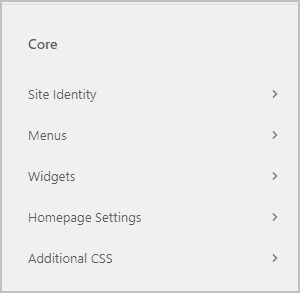
Finally, there are the WordPress core options.
Colors
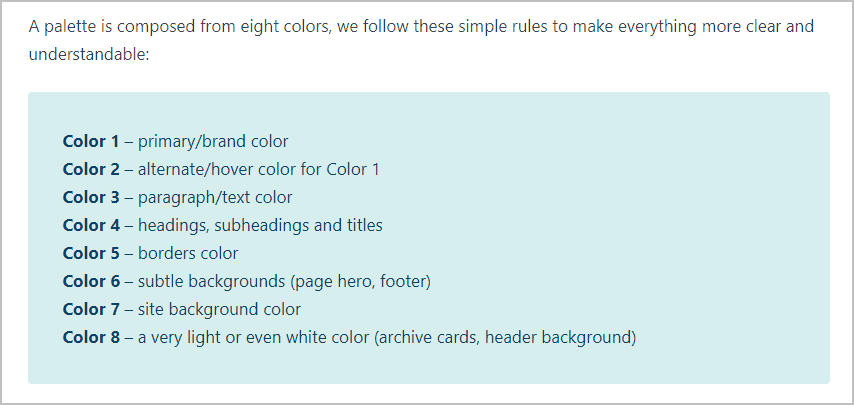
I found a good help doc on the Blocksy website that explained the global colors.
Before deactivating the Central Color Palette plugin, I copied the colors into the Blocksy Customizer. Note, one thing I noticed when working in the Customizer was that it was a good idea to save on each page to make sure changes were not lost. I don’t recall needing to to that before with other themes.

Header
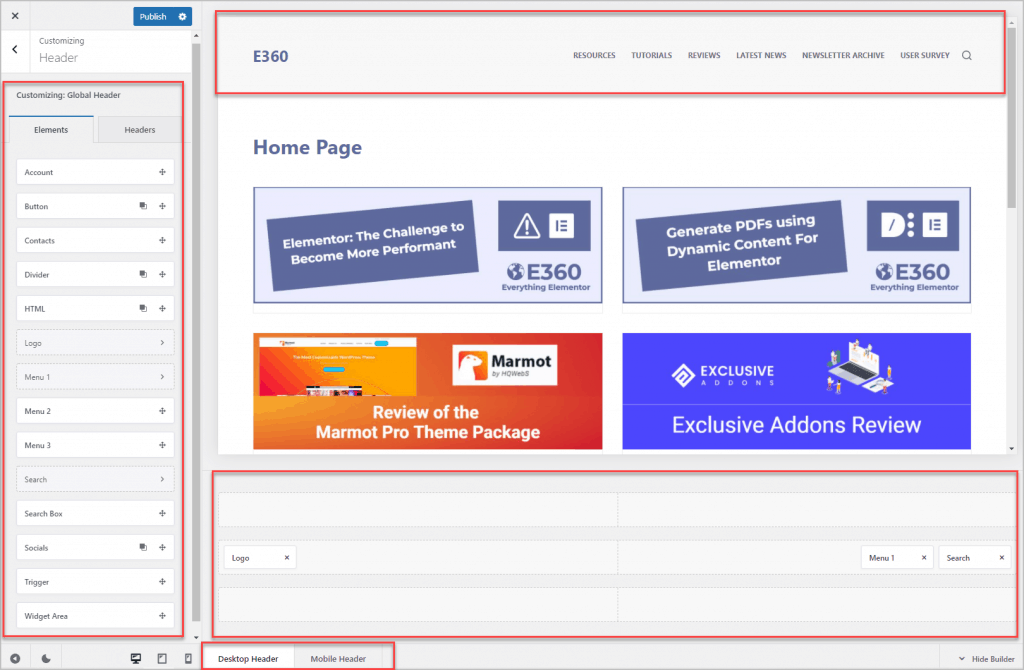
Now that was done, the next step is to work on the header. Here is the header I want to create.

Blocksy has an easy to use header builder. When I set the colors, I got the background colors for the header and page. I also got the colors for the header menu items. In the screenshot we see the header preview at the top, then there are three rows (below the content), then below that tabs to switch between the desktop and mobile header, and finally over to the side is a list of elements you can use. Note that the top and bottom rows don’t show yet because there isn’t anything in them.
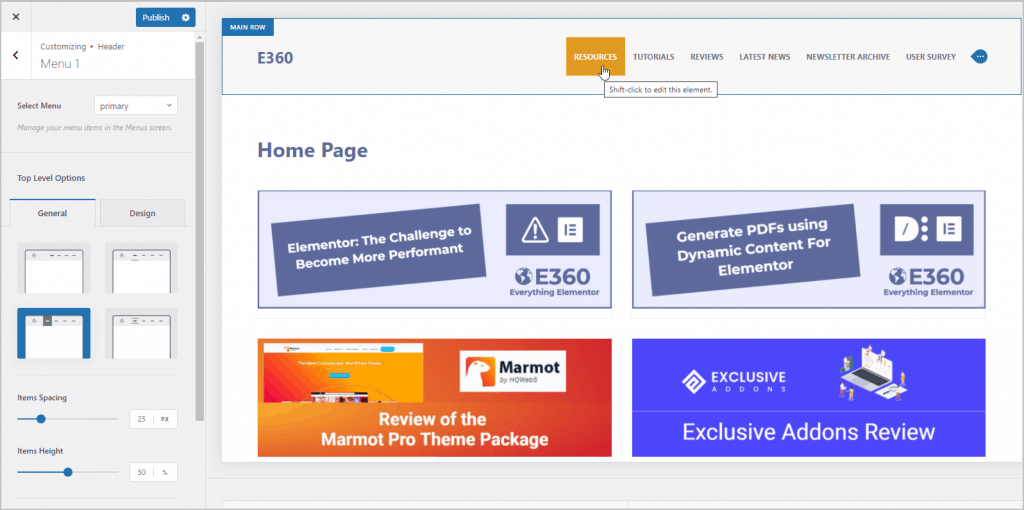
First, I went in and tweaked the primary menu settings. Though it picked up the right menu, I set it explicitly. Note the four boxes of menu types. These are different styles for hover. I picked the third one and adjusted the height of the background box to 50%.
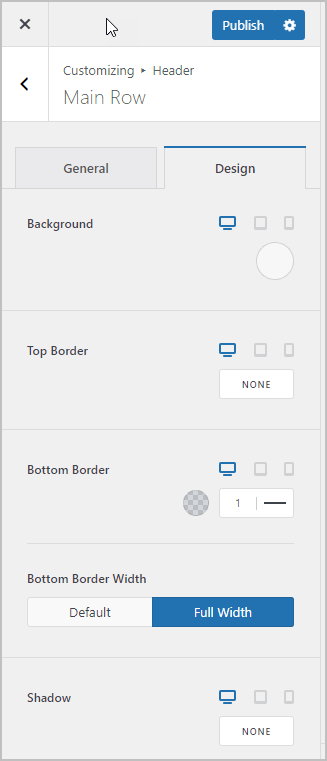
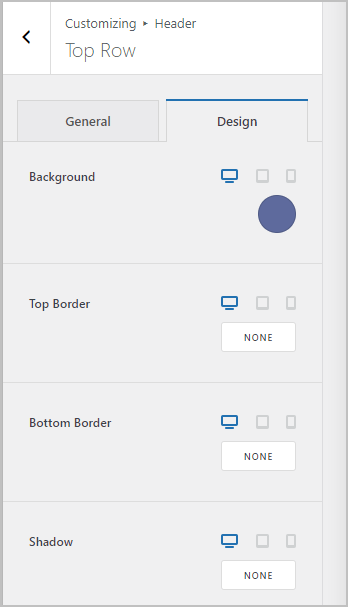
Next I selected the logo and adjusted the height of the main row. I also added a bottom border.
This was my header so far.

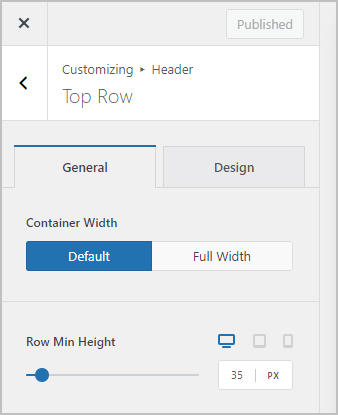
Now for the top bar. This was pretty simple to implement.
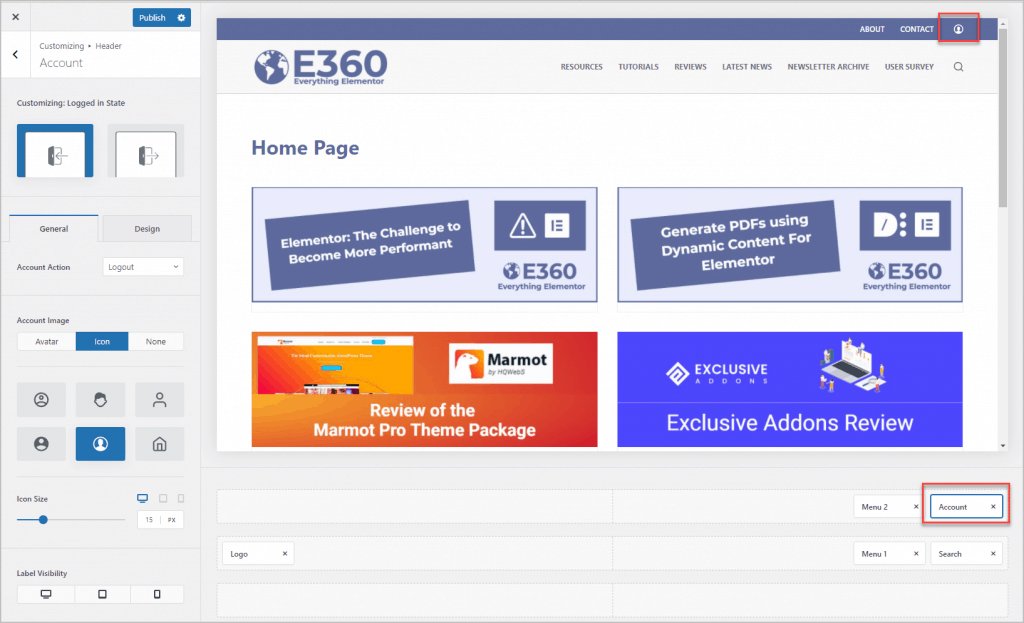
I disabled the Login Logout plugin and I assigned the menu the same way I did for the main row, but gave it different colors since the background is different. There is a header element called “Account” which I dragged over next to the top bar menu. I didn’t see the option to have the words, so just configured the icon and behavior options.
Footer
Now for the footer builder. The desired e360 footer looked like this.

But the current footer looked like this.

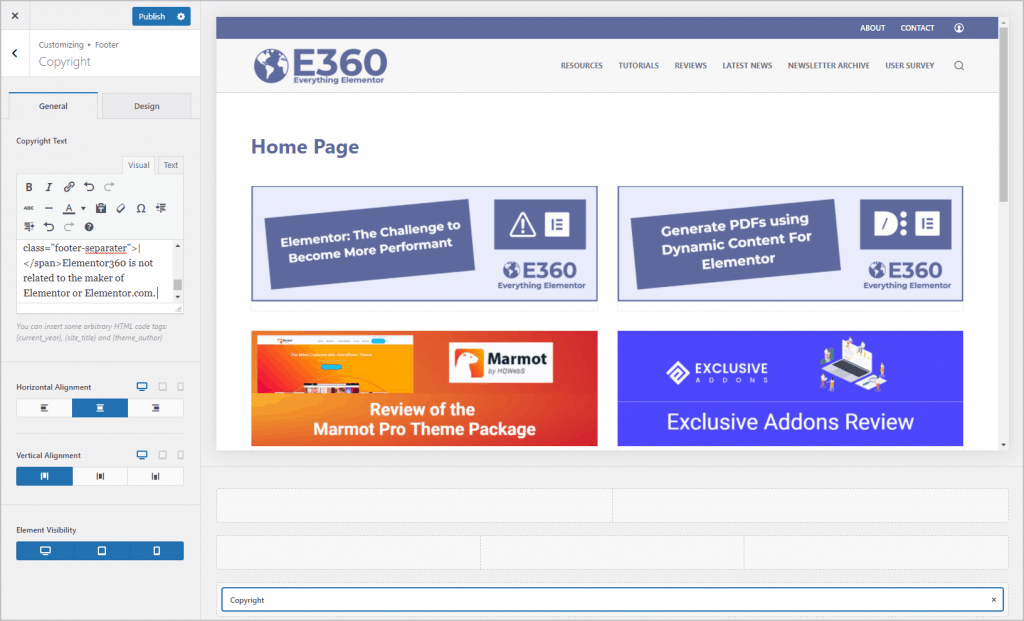
So I went into the Blocksy Footer Builder. i clicked on the row and then the design tab to change the background color. Then I went to the bottom row and clicked on the “copyright” element. I pasted in a modified version of the copyright notice from the existing site, but then realized I needed to add it to the text tab or I got the HTML markup showing.
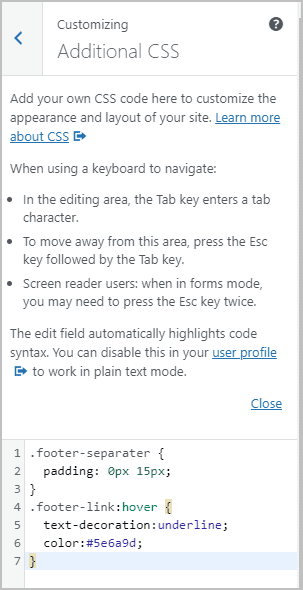
I needed to add some CSS for the spacing and to underline links on hover.
Here is the final version.

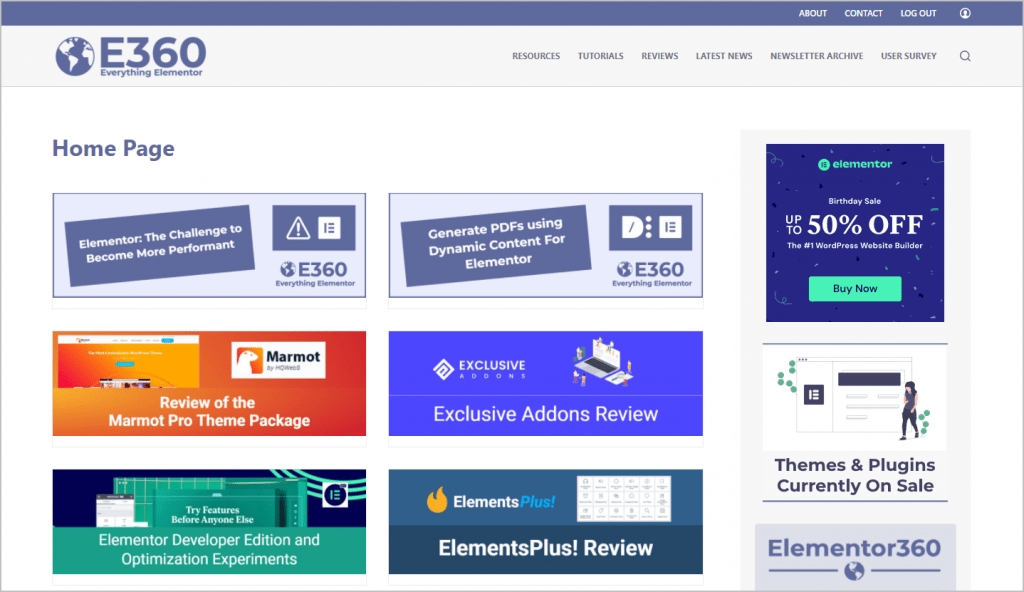
Home Page
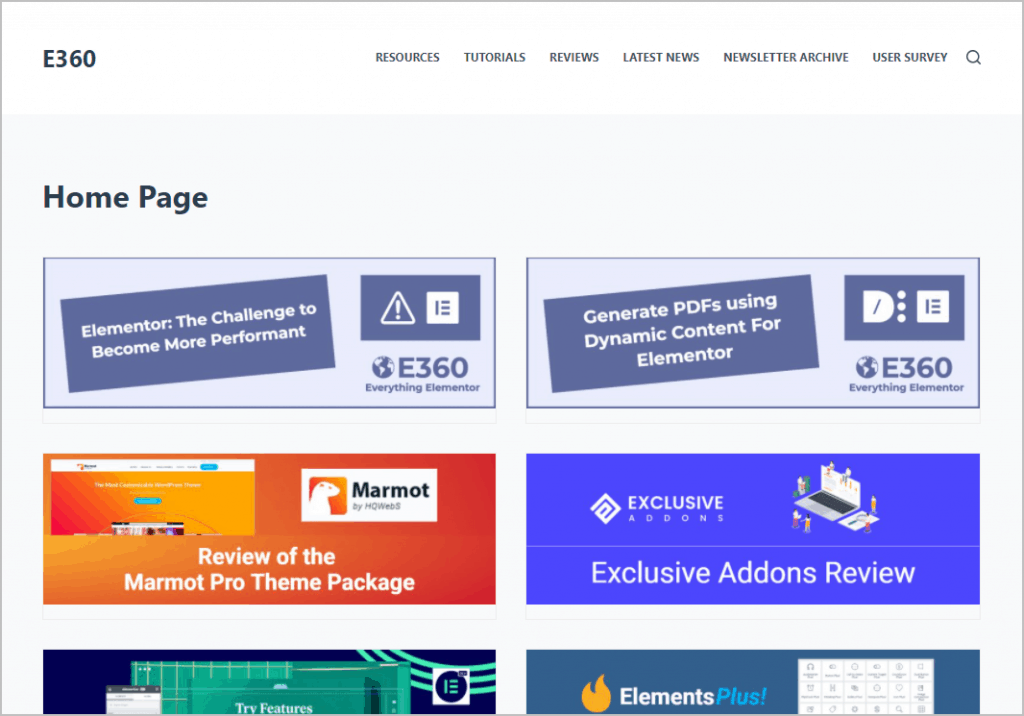
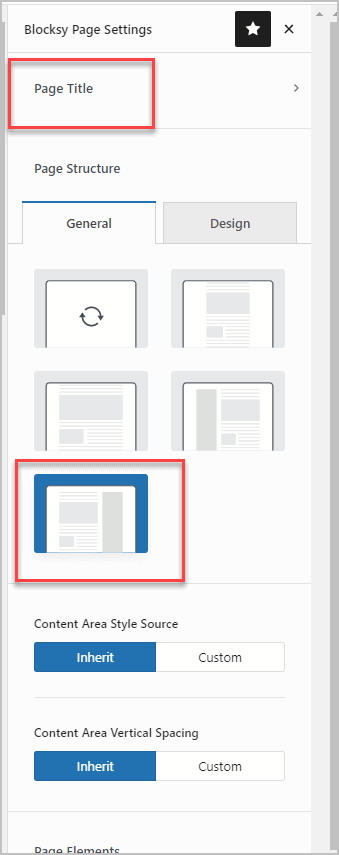
The Home page needed two tweaks: I didn’t want the title “Home Page” showing and I wanted a layout with a sidebar. The Home Page was a page that was using a Gutenberg block to show the posts. I went into the page and accessed the Blocksy settings for the page. I set the Page Structure to have content with a right sidebar.
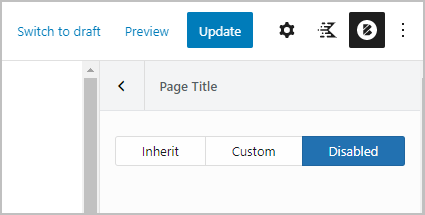
I clicked on the Page Title panel and disabled the page title.
I now had the home page without a title and with a sidebar, but the sidebar needed some work.
Sidebar
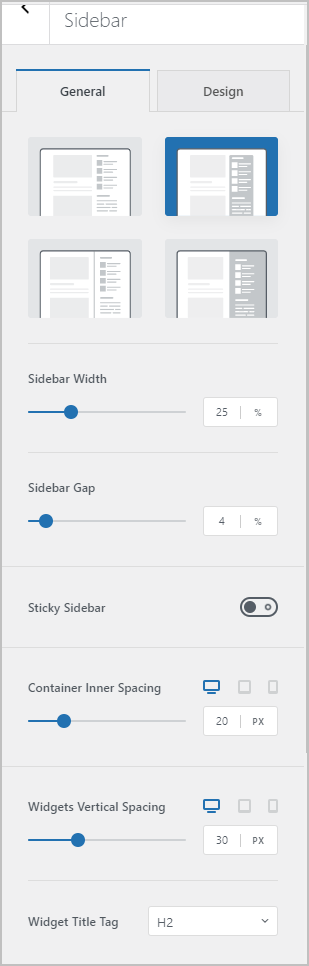
There is a panel for the sidebar in the Customizer. At the top there are 4 predesigned options related to the divider and background options. I selected one with a boxed background and adjusted the size and padding.
Setting the Default Page Layout
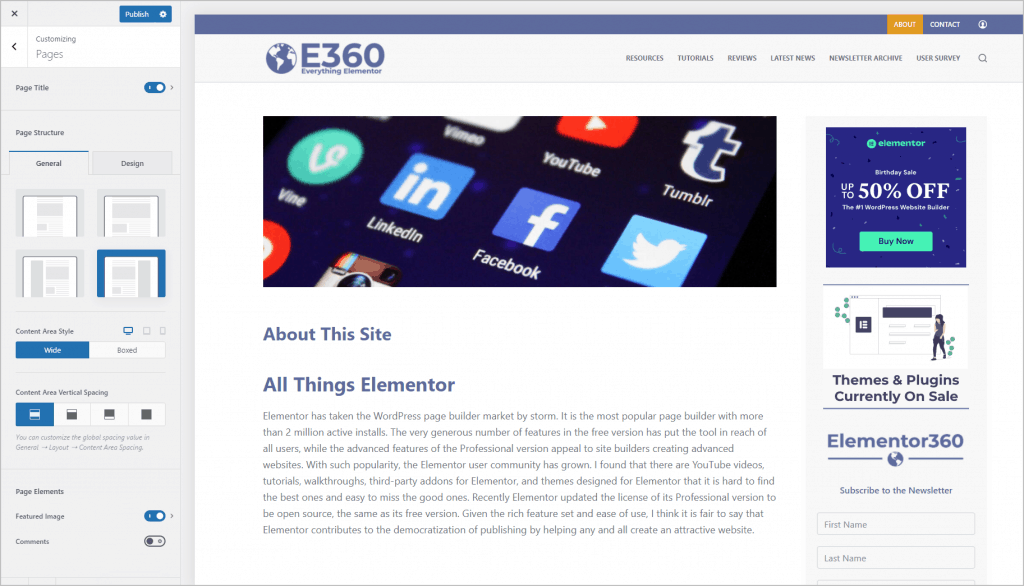
There was no sidebar on the About and Contact Us pages and that content was very wide.
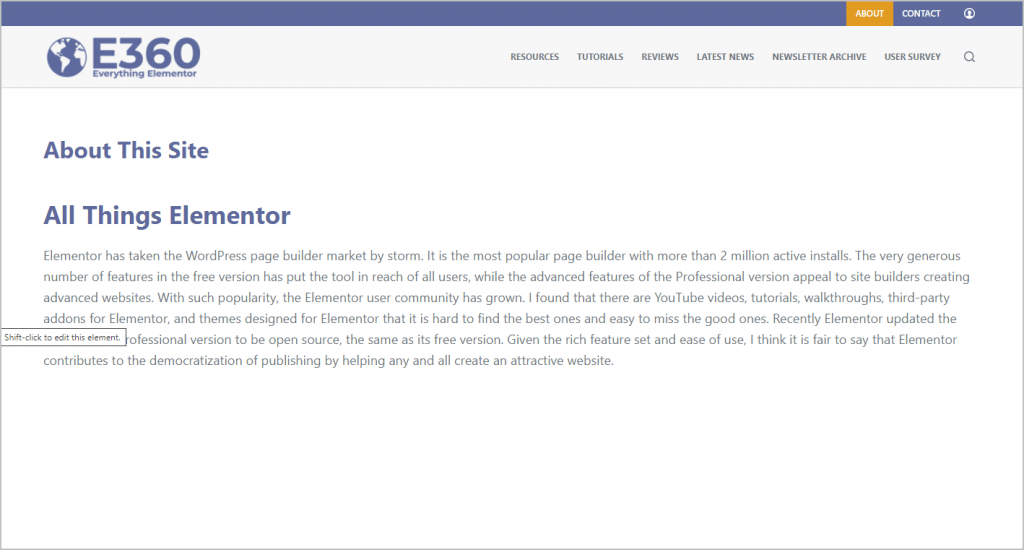
So I went to the pages area of the Customizer and turned on the sidebar and featured image. The result looked nicer.
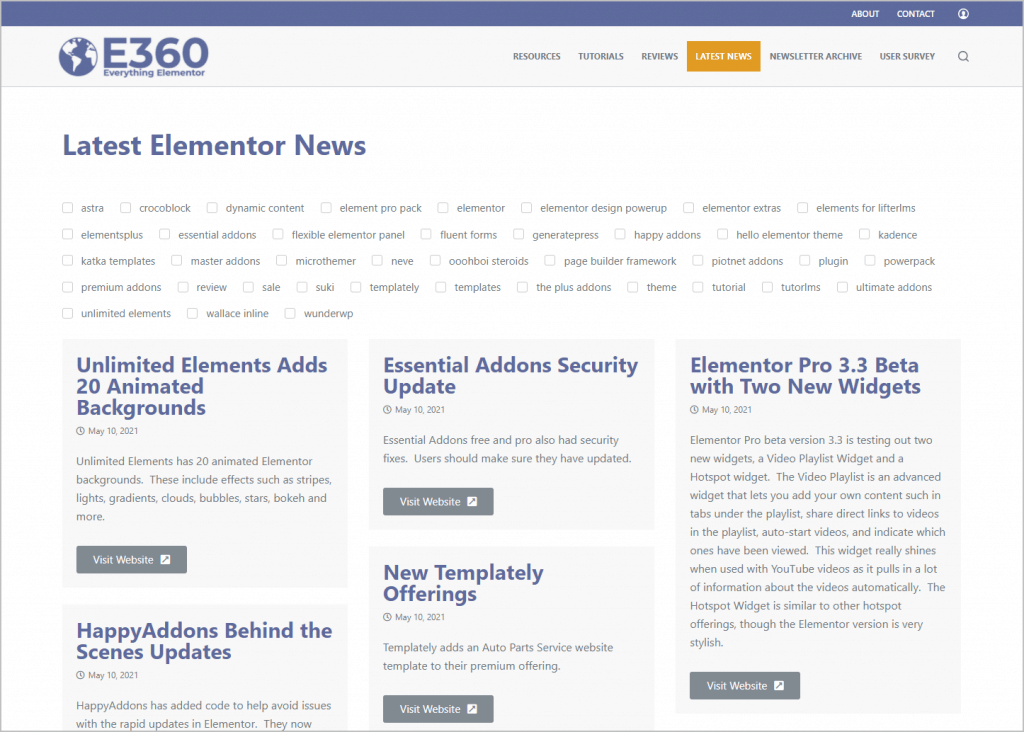
The other pages looked fine. Most of them had been created with Elementor, so there wasn’t an issue of the sidebar showing or not. They were laid out as desired.
Newsletter Archives and Single Pages
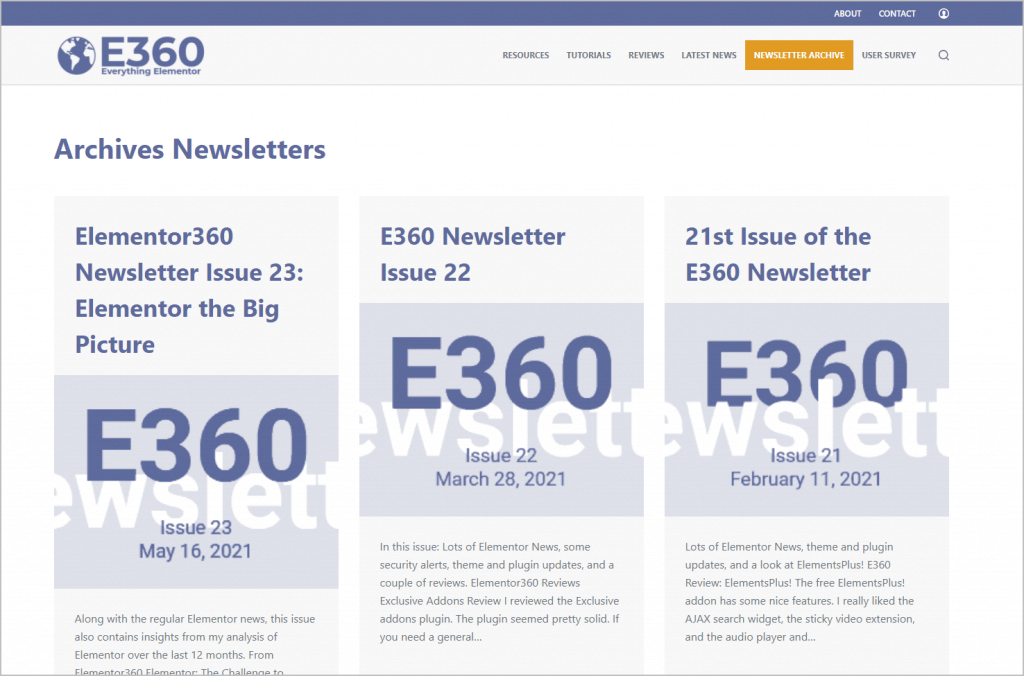
I checked the newsletter archive page and saw that the featured images were being cropped off.
A cool feature of Blocksy is that you can customize the layouts for each post type and its archive separately.
I went into the archive settings for Newsletters. Like we’ve seen in other areas, there were some predesigned layout options available.
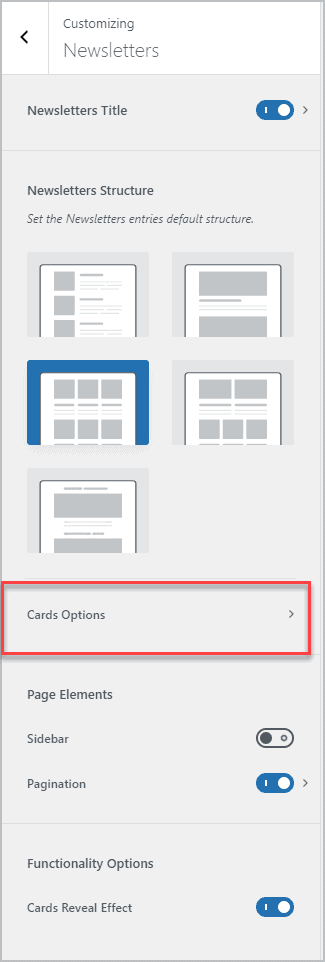
I clicked to go to the card options and found more settings that could be changed.
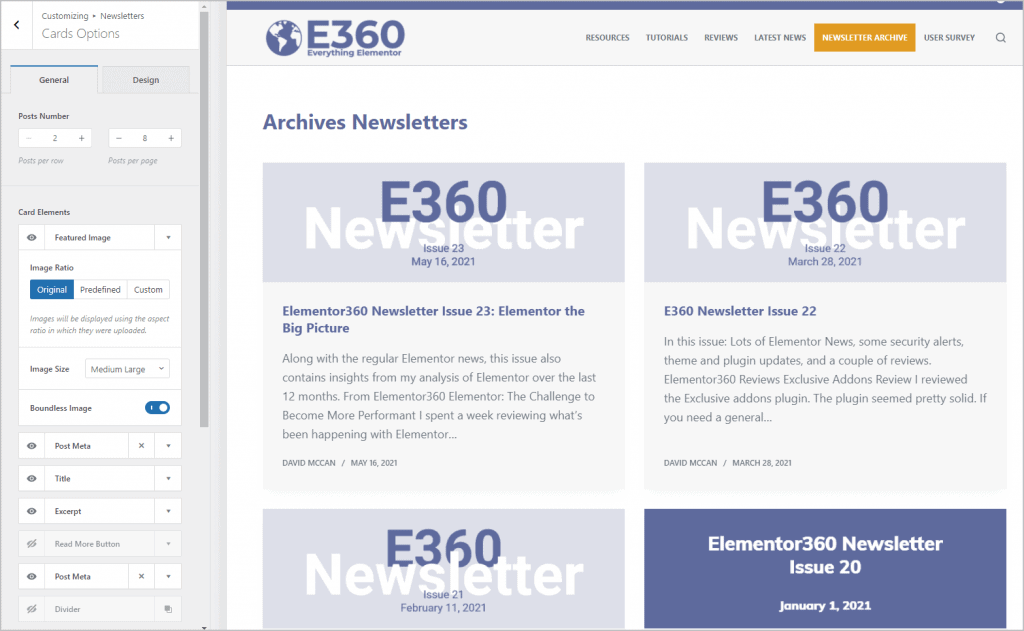
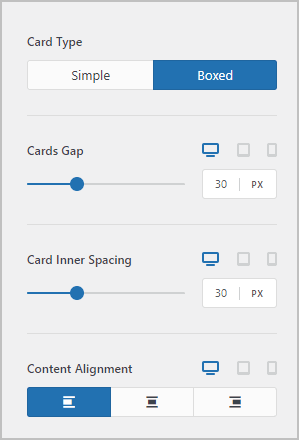
I changed it to two columns, moved the title below the image, and adjusted the size of the featured image. There were some other card options, but I left them at their default.
The single newsletter page also needed to be tweaked.
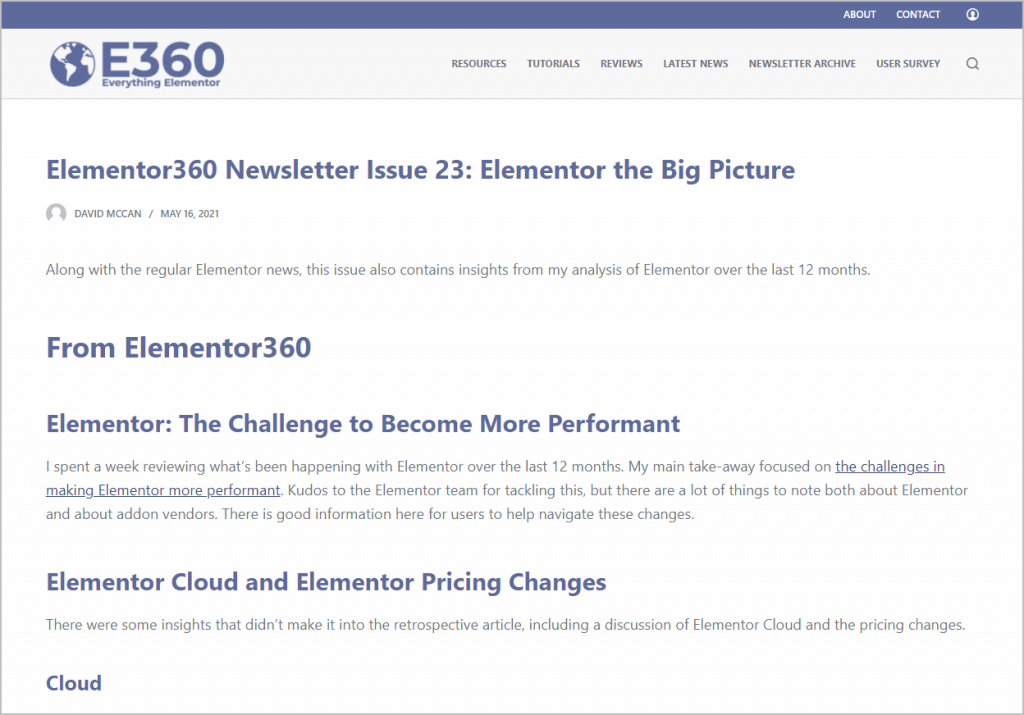
I selected the layout option with a sidebar and turned on the featured image. I was also happy to see a share option. However, it showed at the bottom of the page. I noticed a small chevron next to the toggle.
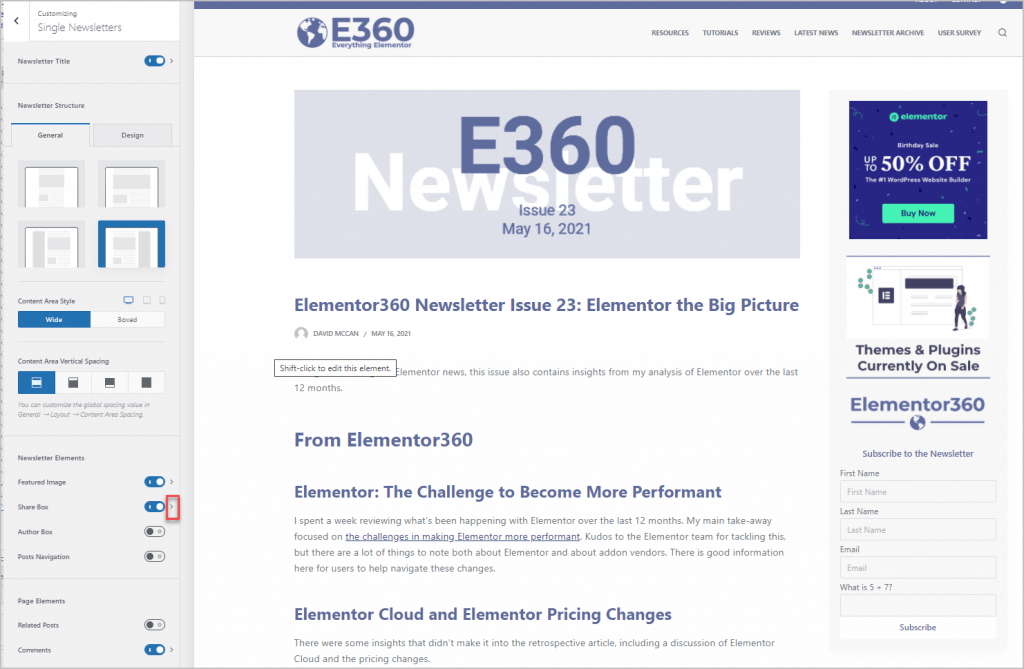
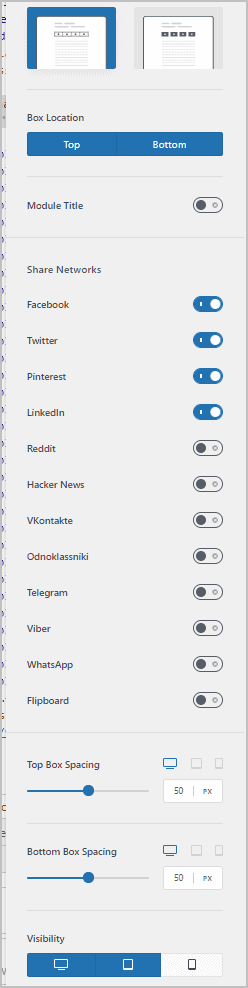
Here I was able to switch it to the top. You have the predesigned option of a bar or separate buttons. I left it as a bar. You can also select the social networks you want to add.
Tweaking the Header
After looking at that yellow orange for a while, I decided to change it to light blue.


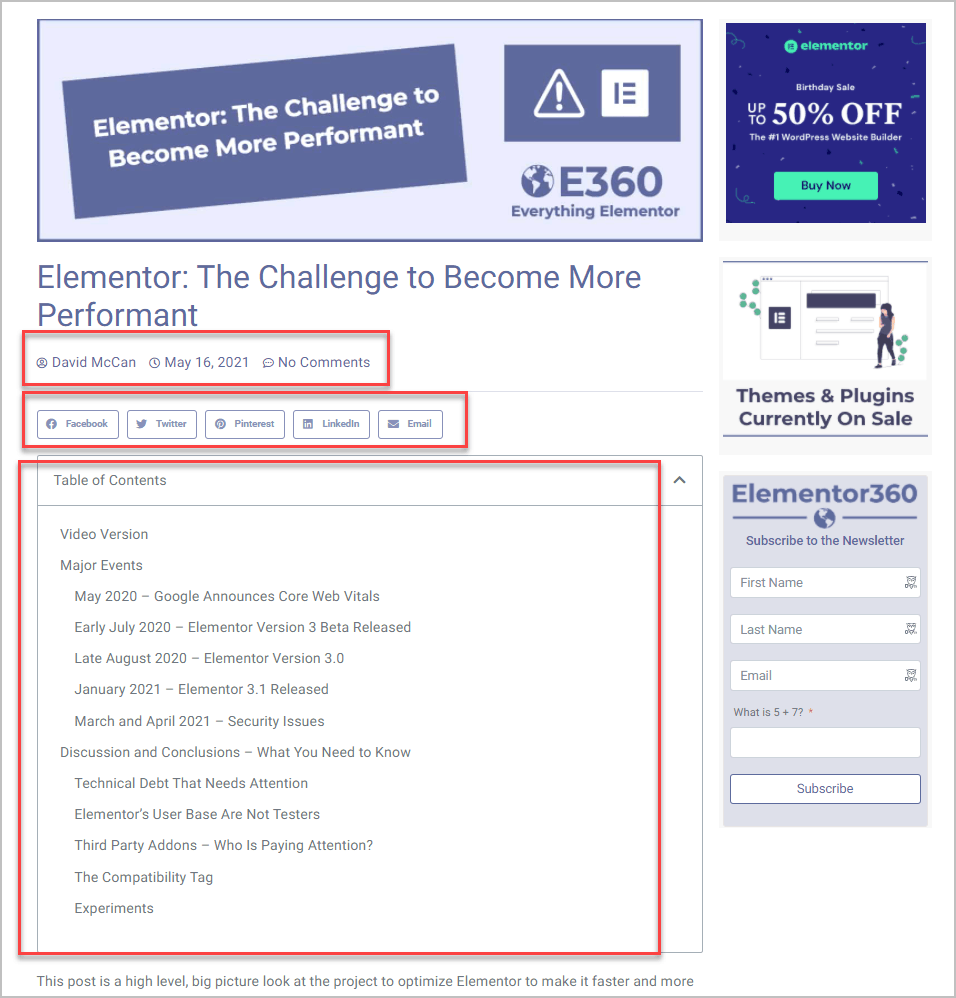
Post Single
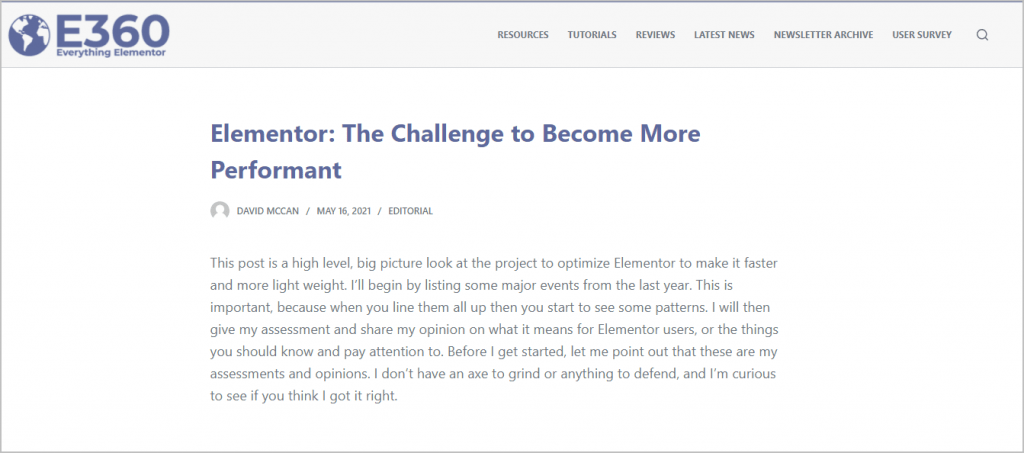
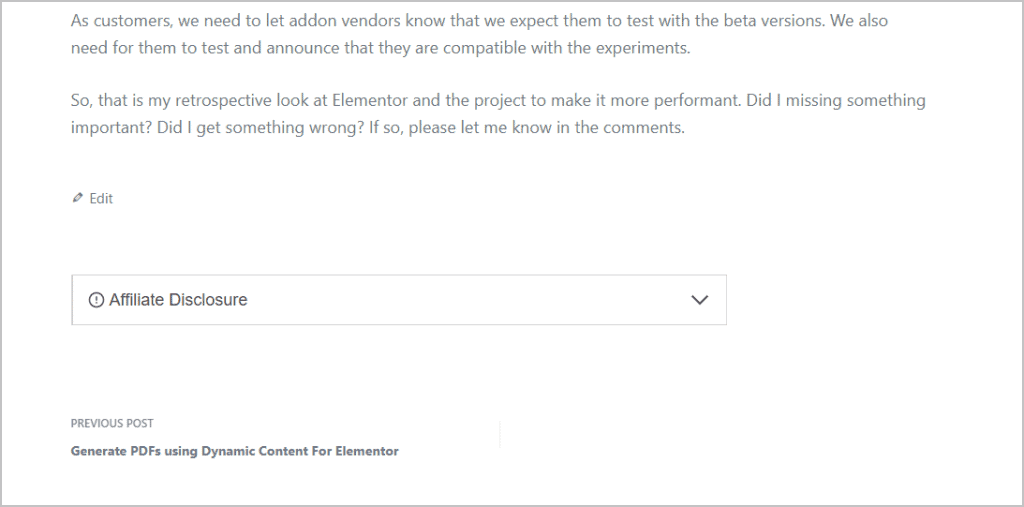
Seeing the option for the social share box got me thinking. I had created the template for the post single using the Elementor theme builder, but I was wondering if I might be able to use the various Blocksy options and simplify. This is what a single page currently looked like. At the top there was nice post meta with icons, then share buttons and then a table of contents.
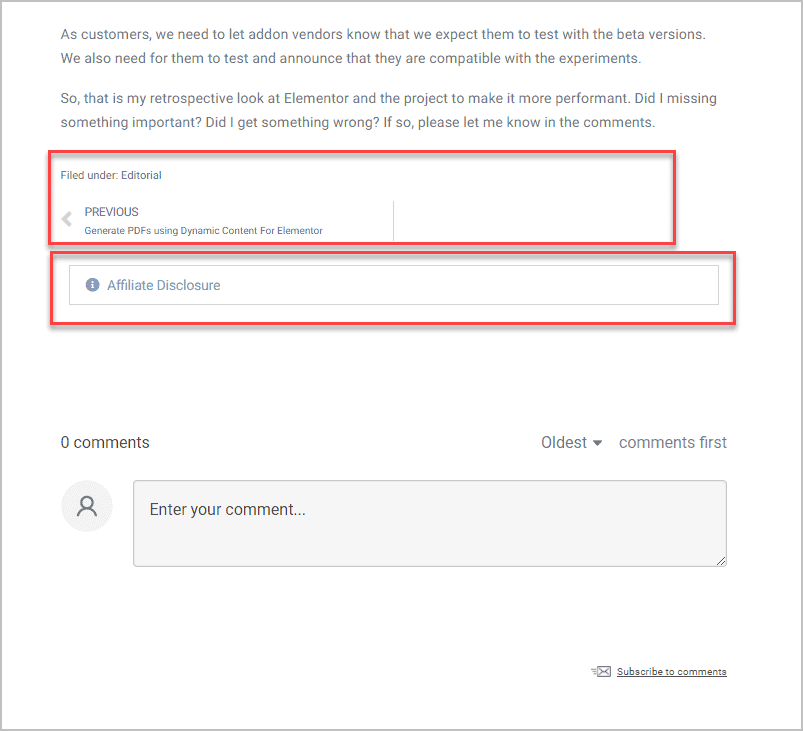
At the bottom there was post navigation and an accordion with my affiliate disclosure.
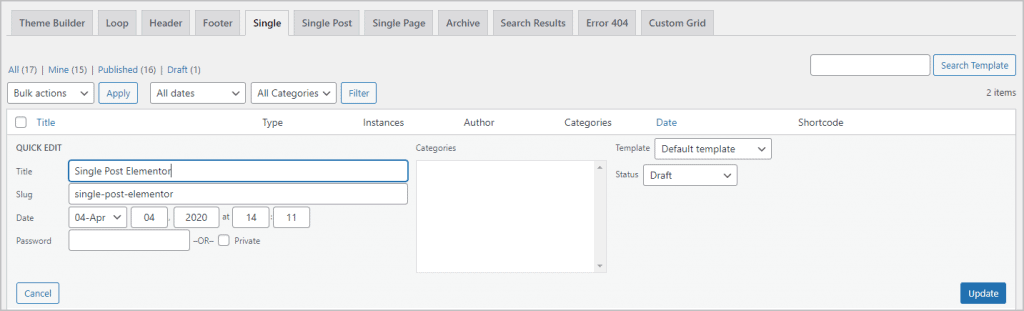
I went to the Elementor Theme Builder template area and changed the Post Single template to draft. That seemed safe instead of deleting it, in case it didn’t work.
I took a look now at the single post and found that it was very bare and the sidebar was gone.
So I went in the Customizer to the post single are and enabled the option with a right sidebar.

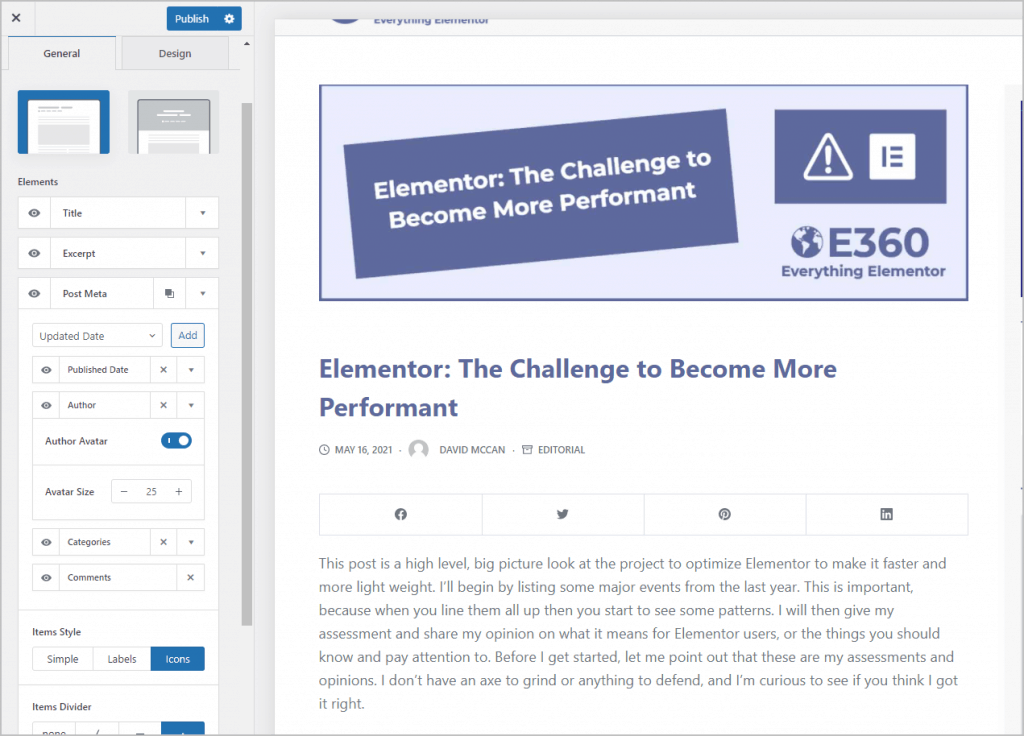
I enabled the featured image, turned on the share box and put it at the top, and adjusted the post meta options. I now had everything at the top except for the table of contents.
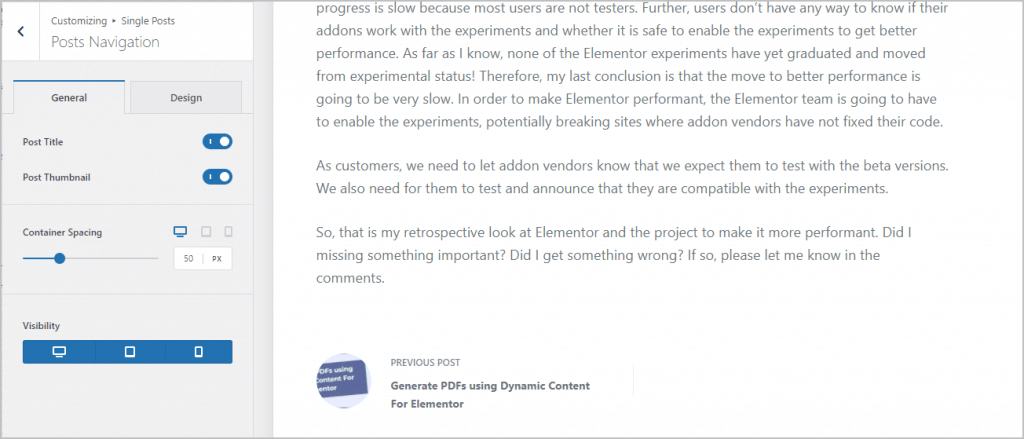
At the bottom I saw that the featured image for the post navigation was a circle and I didn’t see a way to change that, so I turned off the featured image option. That circle didn’t work in my case and I was surprised there were no options with it. Now I had everything at the bottom, except for the accordion with the affiliate disclosure.
Blocksy Pro has the ability to create content blocks and place them using hooks.

Creating the Affiliate Accordion Using Blocksy Content Blocks
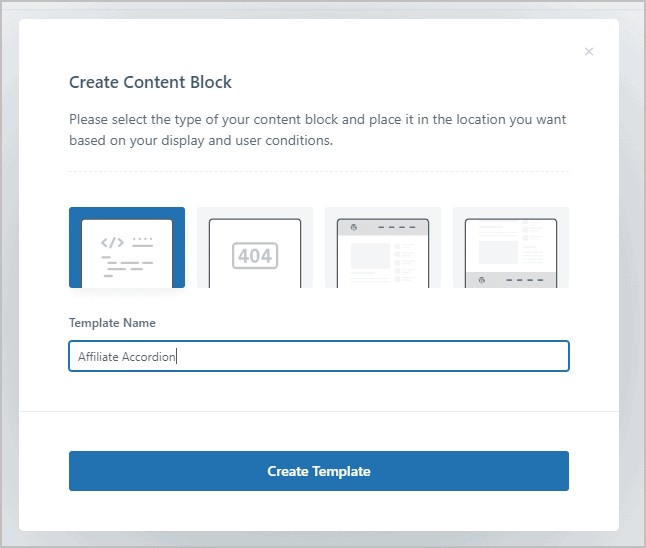
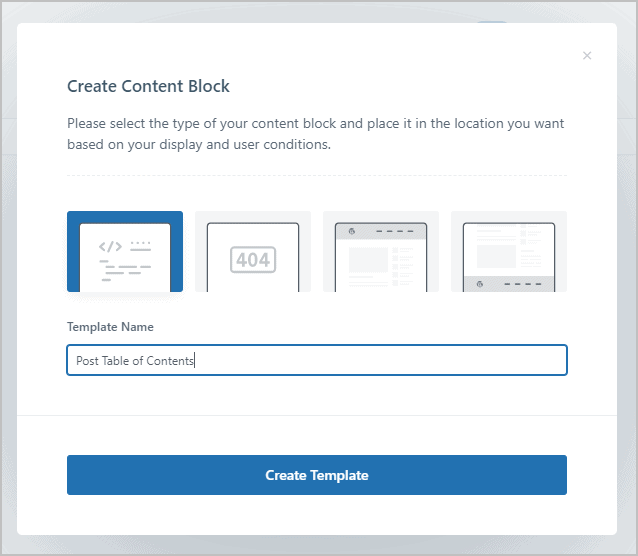
I clicked to create new and got a popup. The first one is to create a content block placed by hooks, the 2nd is for your 404 page, and then there is the option to create a custom page header or footer. I named mine Affiliate Accordion.
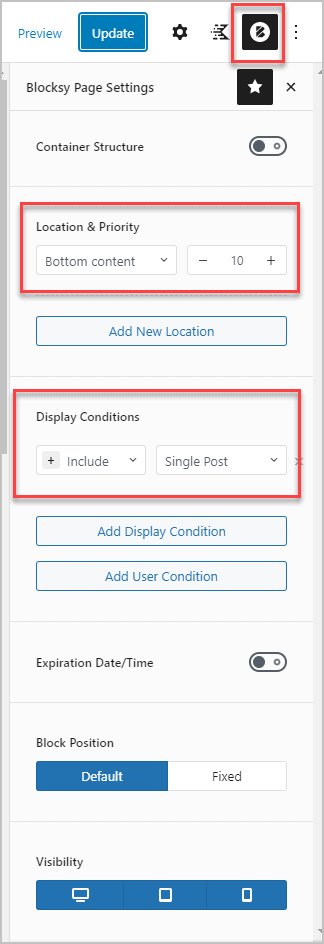
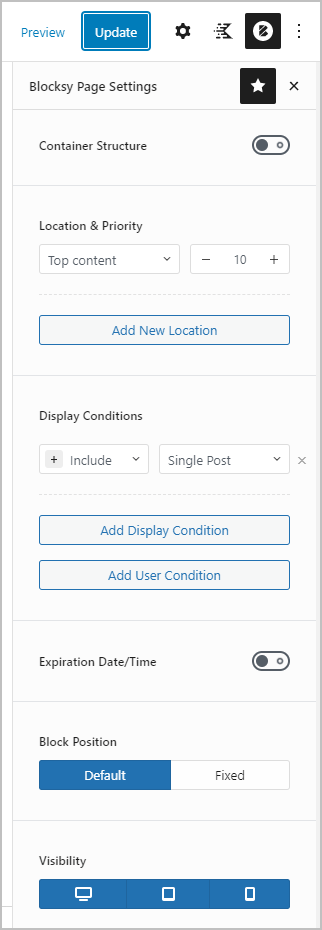
First I set the conditions. To access them, click on the B for Blocksy button. I set the location to be bottom of content and the display condition to include on single posts.
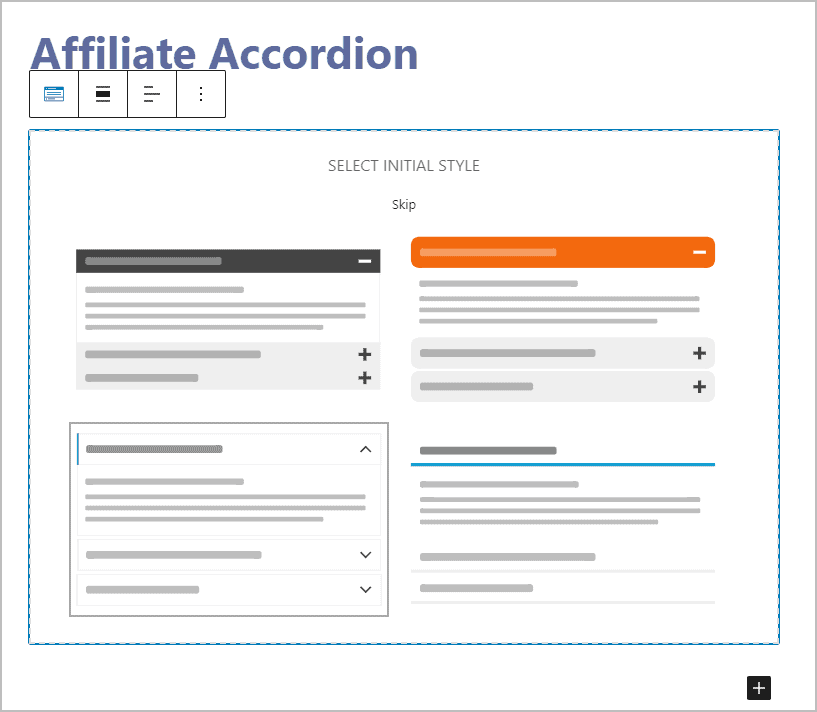
Next I added an accordion block. I’m using Kadence blocks on this site. It starts out giving you a few predefined options. I selected the one on the lower left.
I copied over the title and content from the live site. Then I set the title icon and position.
I then adjusted the settings for the accordion block so that it starts closed and the title color.
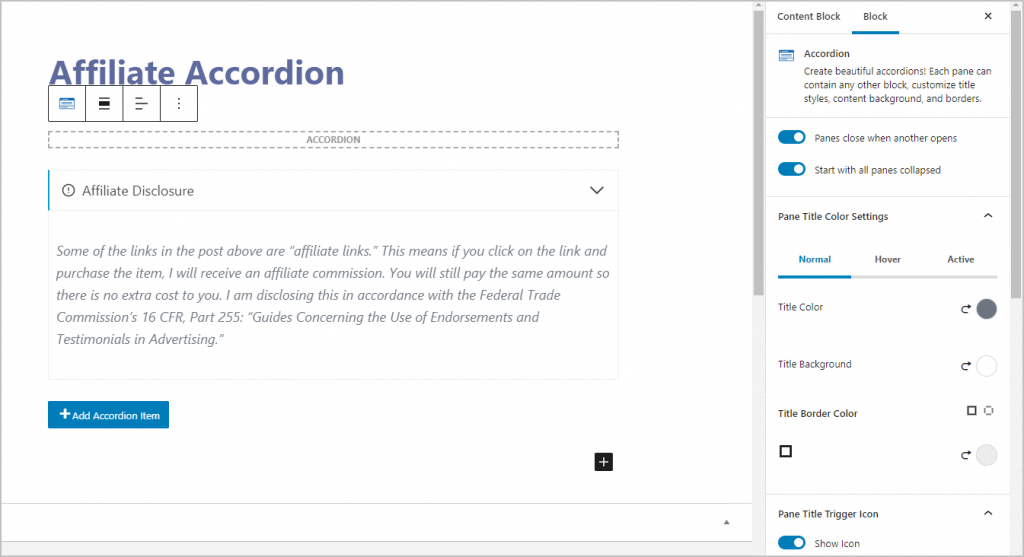
This is what the final looks like.
Adding the Table of Contents Using Blocksy Content Blocks
I went back and clicked to create a new content block. I gave it a name and clicked to create template.
Again, I clicked on the B and entered the location and display conditions.
Then I added the Kadence Table of Contents block and adjusted it’s settings.
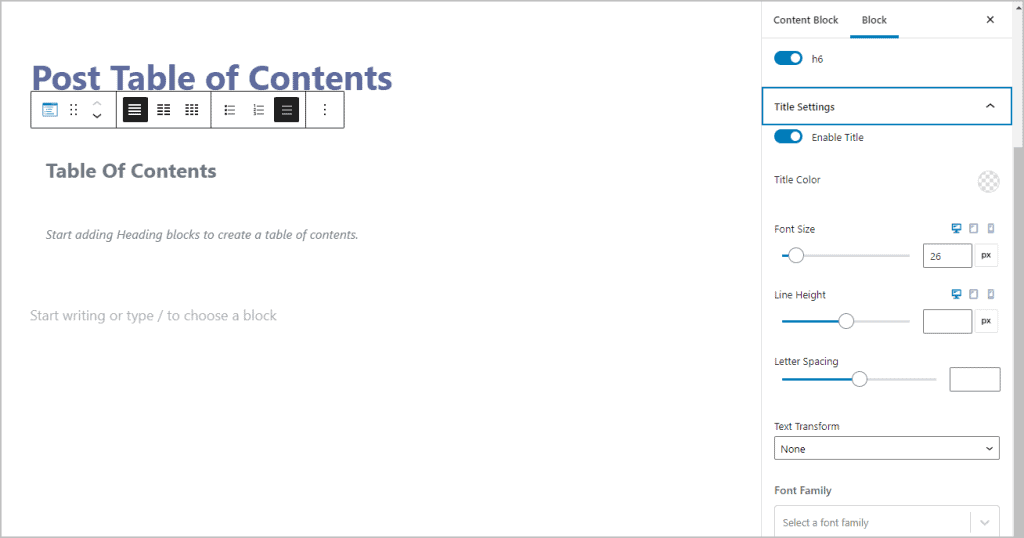
I saved and this was what the final looked like. Yay, I was able to replace the Elementor Pro template for post single.
Final Customizer Tweak
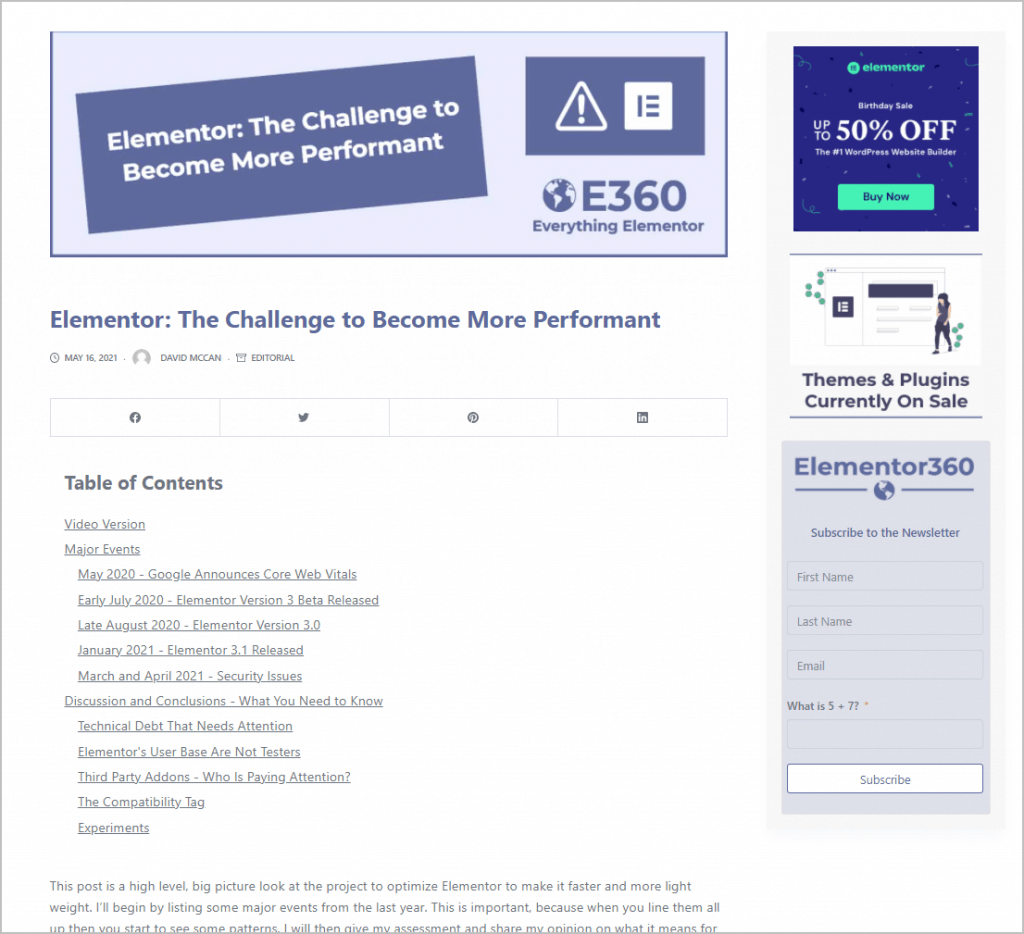
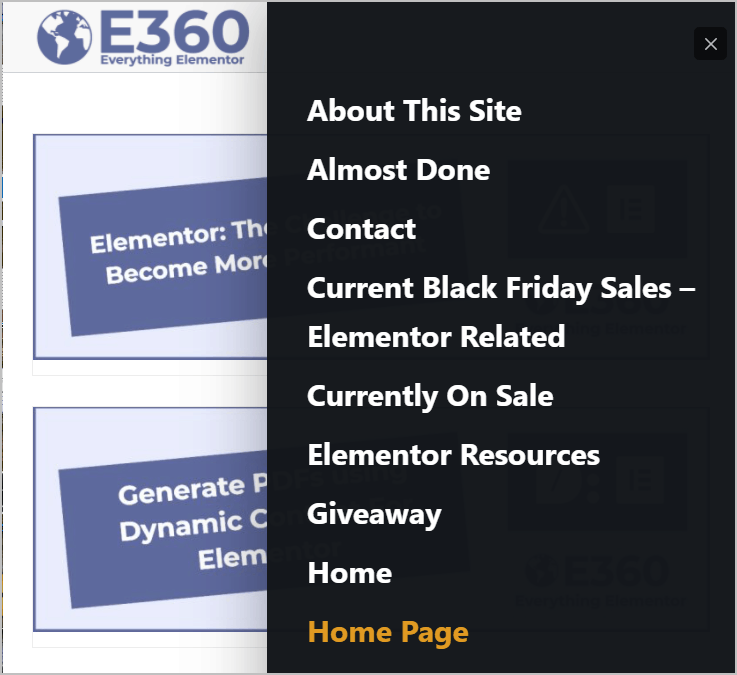
I was testing and noticed that on mobile the default menu showed all pages.
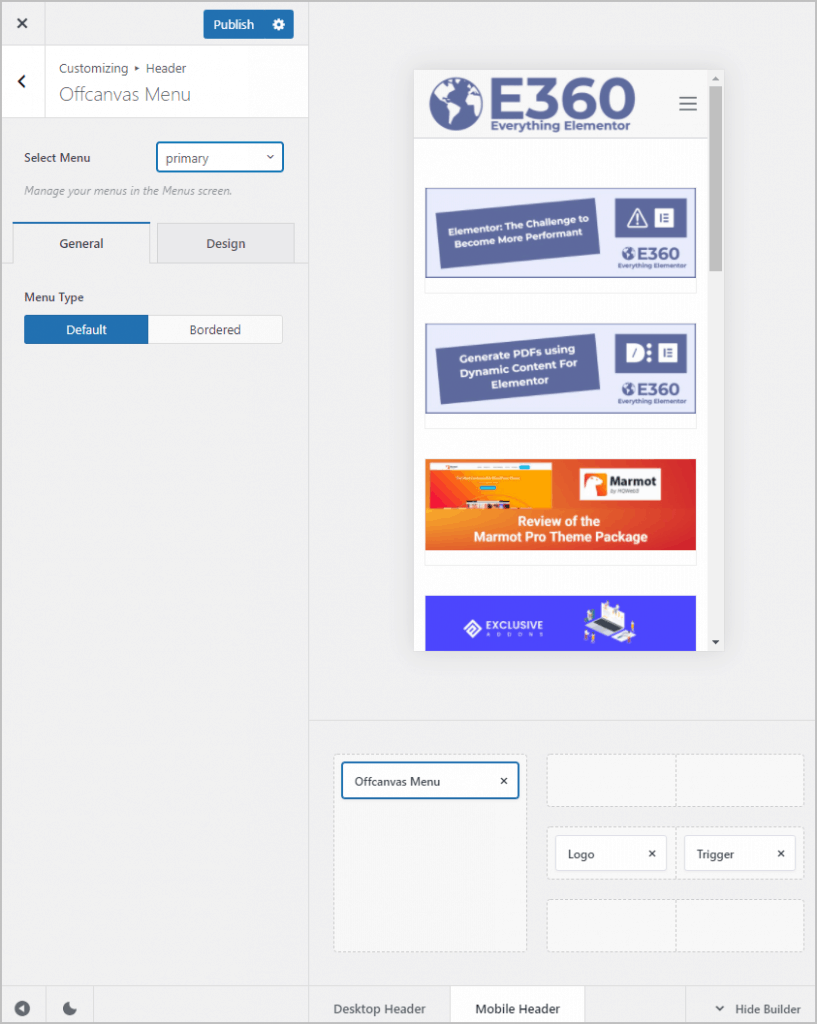
So in the Customizer I went back to the header builder and at the bottom I selected the mobile header tab and then the off canvas menu. There I was able to assign the menu.
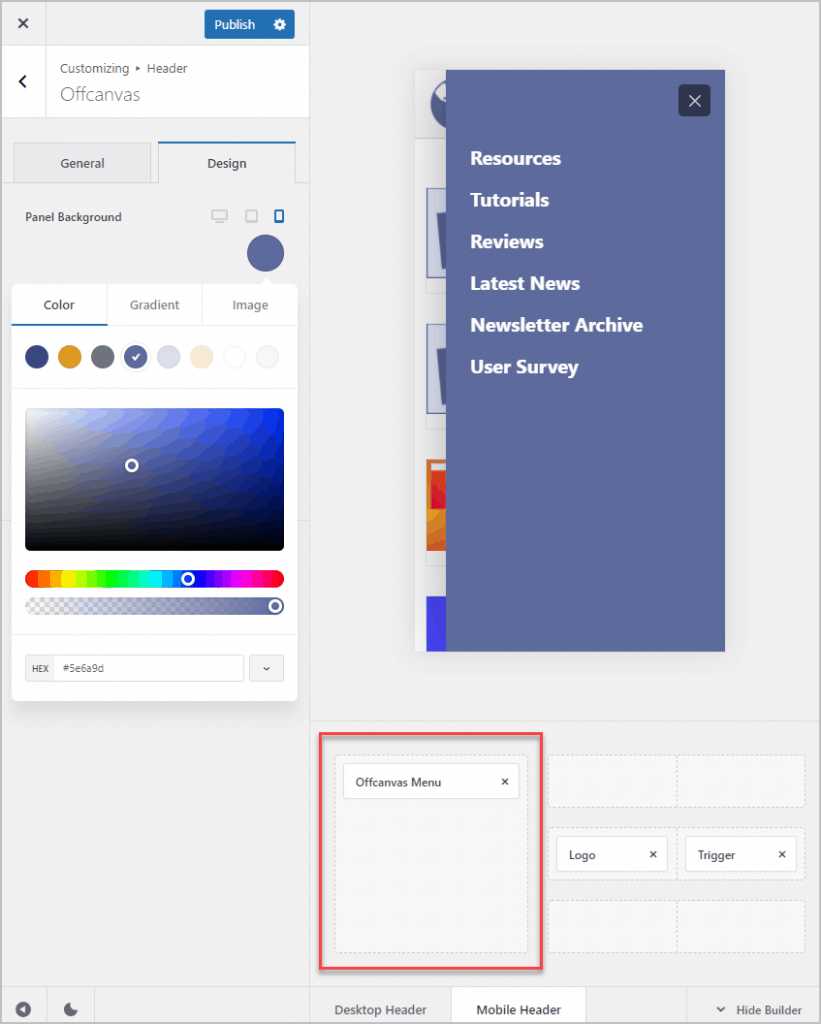
Then instead of clicking on the Offcanvas Menu card, I clicked on the entire frame and was able to style the background color.
Making the Move
I’m ready to port the changes over to the live site now. I make another backup in case anything goes wrong. I install and activate Blocksy. I then install the Blocksy pro companion plugin and disable the Page Builder Framework companion plugin. I turn off Central Color Palette and the Login Logout plugins.
Blocksy Pro has an export and import Customizer settings feature. In the Customizer you go to General / Manage Options / Export Options.
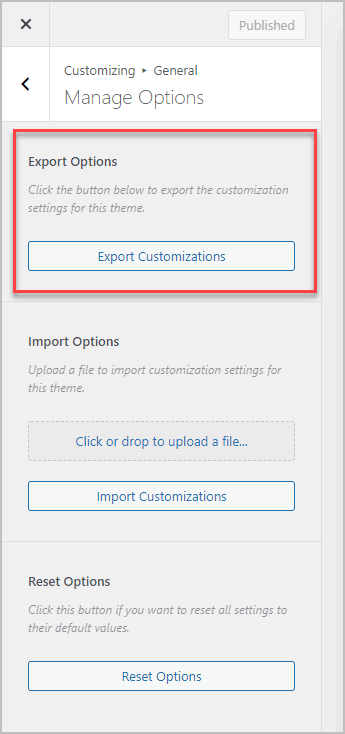
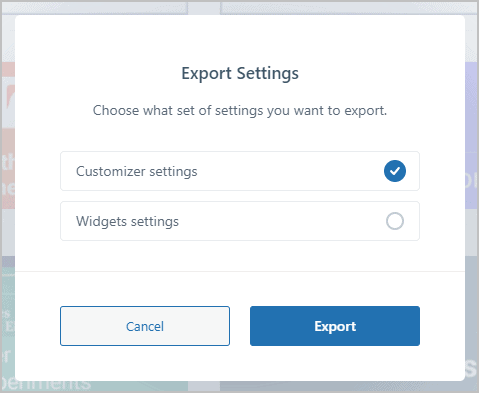
When you click the Export Customizations button you get a dialog. Since I didn’t change the widgets I didn’t need to check that. When you Export you get a file called “blocksy-export.dat” which you can then import on the other site.
I imported it. I saw all the changes when the Customizer was open, but not after closing the Customizer, so I made a small change and saved in the Customizer and then everything showed correctly.
Some changes I made were not in the Customizer and I needed to go in and tweak things like pages where the title was disabled.
Now I needed to switch the Elementor Single Post template to draft. The Blocksy Content Blocks aren’t part of the Customizer either. However, I just recreated them and when it came to the blocks, I was able to copy and paste them.
Blocksy Pro is sold from the Creative Themes website. Their website has the documentation, which is pretty good. Blocksy Pro is available in annual or lifetime packages.
Discussion and Conclusions
Switching themes on an existing site can be a bit nerve racking. You want to minimize disruption as much as possible. By making the Customizer changes on a cloned site first, I was able to import them to the live site quickly through the Blocksy Customizer import. The other things were mostly page by page changes. In general, everything went smoothly. Of course after the Customizer import and other quick changes, I checked over the site carefully in case there were tweaks that needed to be made.
There are several themes that, like Blocksy, have a lot of Customizer options. I found the Blocksy Customizer settings to be very logically laid out with the general, post types, and core sections. In fact, I think this was the best organized of any theme I’ve tried. Pretty much any layout and style option I needed was available. I liked the fact that you had a lot of control for customizing the different post types, both single and archive options. This is useful if, for example, the featured images of each post type are different sizes.
The Blocksy Content Blocks are very powerful. As you saw, it was easy to create and place the table of contents and affiliate accordion to customize the single post template for my site needs. I imagine that this functionality will become even more robust when WordPress adds more blocks for Full Site Editing. I was happy with Blocksy Pro.
If you remember back to beginning when I discussed the reasons for trying out Blocksy? They were because friends were very happy with the theme and shared their good experiences. Also, the theme developers are engaging users, paying attention to feedback, and then adding things users need. That kind of behavior turns users into fans and ambassadors. Blocksy is obviously doing a lot of things rights.


Thanks for the article. I’m new to Elementor and planning to use it for several small sites I currently have built with DIVI, as well as a new site from scratch. Now that you made the change to Blocksy, are you still using Elementor or just the Blocksy theme? Again, I’m new to the Elementor world and how it all functions.
Hi Chuck,
The short answer is I always use some builder option together with the theme. For simple sites some people now use a good theme like Blocksy together with a Gutenberg blocks addon like Stackable or Greenshift. That is assuming that you are comfortable working with Gutenberg, some people are and others are not. Coming from Divi, Elementor will be pretty easy to pick up and you can do a lot with the free version. If you need to work with custom fields then you will need Pro or an Elementor addon that lets you work with custom fields.