Dynamic Content for Elementor Custom Display Condition
Being able to conditionally show or hide content is a common requirement for advanced websites. There are many types of conditions. Perhaps you only want to show content on certain Custom Post Types, during the holiday, to certain users or user roles, if the visitor is on mobile, if the visitor has an old browser version, or if they click on a button. Dynamic Content for Elementor has a Visibility extension that supports all of these types of conditions and many more, including a custom PHP option.
Dynamic Content for Elementor has a Visibility Extension that provides a large number of ways to conditionally display sections and widgets. Each of the types provides different sets of variables and conditions that can be used, which together provides an insanely long list of conditional display options unmatched by any Elementor addon, or for that matter, any page builder. It is one of this plugin’s pillars of strength. I did an overview of the Visibility options in a previous article, but in this one I’m going to focus on the Custom condition option.
Video Version
The Challenge
A reader recently left a comment on one of my posts with a how-to question. He also found me on Facebook and joined the new Dynamic WordPress group. I was able to get some details from him and what he was trying to do:
In this post I want to show how the Custom Condition option of Dynamic Content for Elementor works and the steps I took to find a solution.
Site Setup
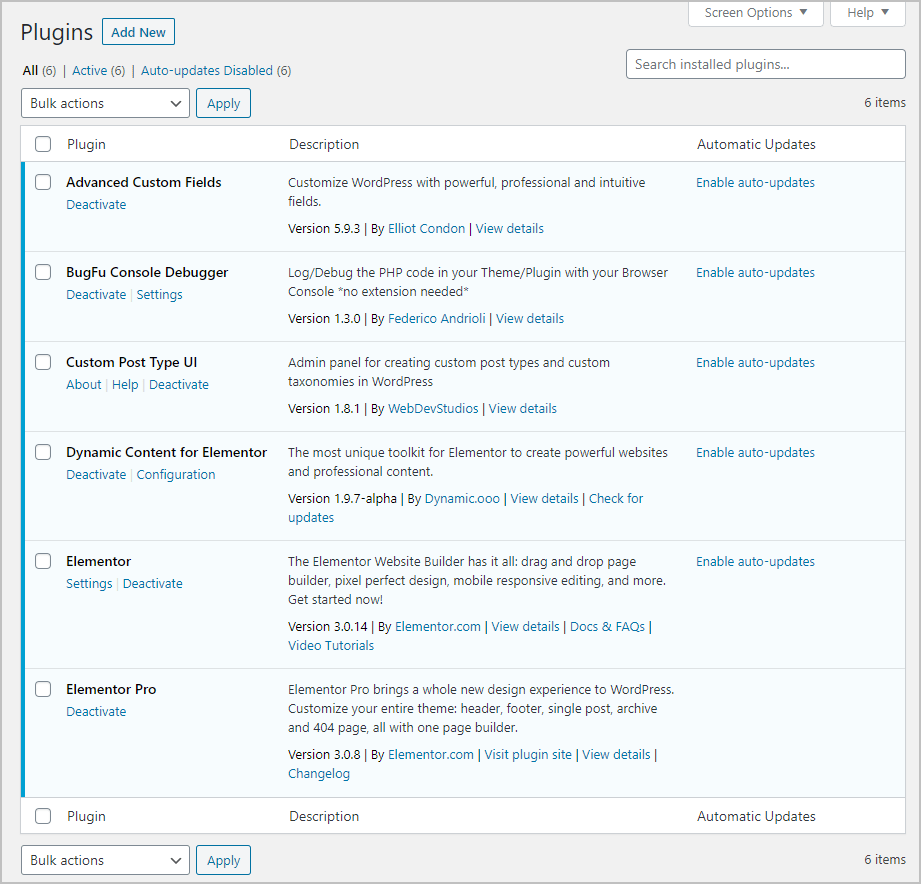
Installed Plugins
I have a test site using the Page Builder Framework theme and I have Custom Post Types UI (CPT-UI) and the free version of Advanced Custom Fields (ACF) installed for creating Custom Post Types. I also have Elementor core, Elementor Pro, and Dynamic Content for Elementor installed for creating pages. Elementor Pro isn’t used in this case. For this task I added the BugFu Console Debugger plugin. BugFu allows you to pass in a PHP variable and the plugin outputs the value into the Chrome console. I’ll show how that works as we go along.
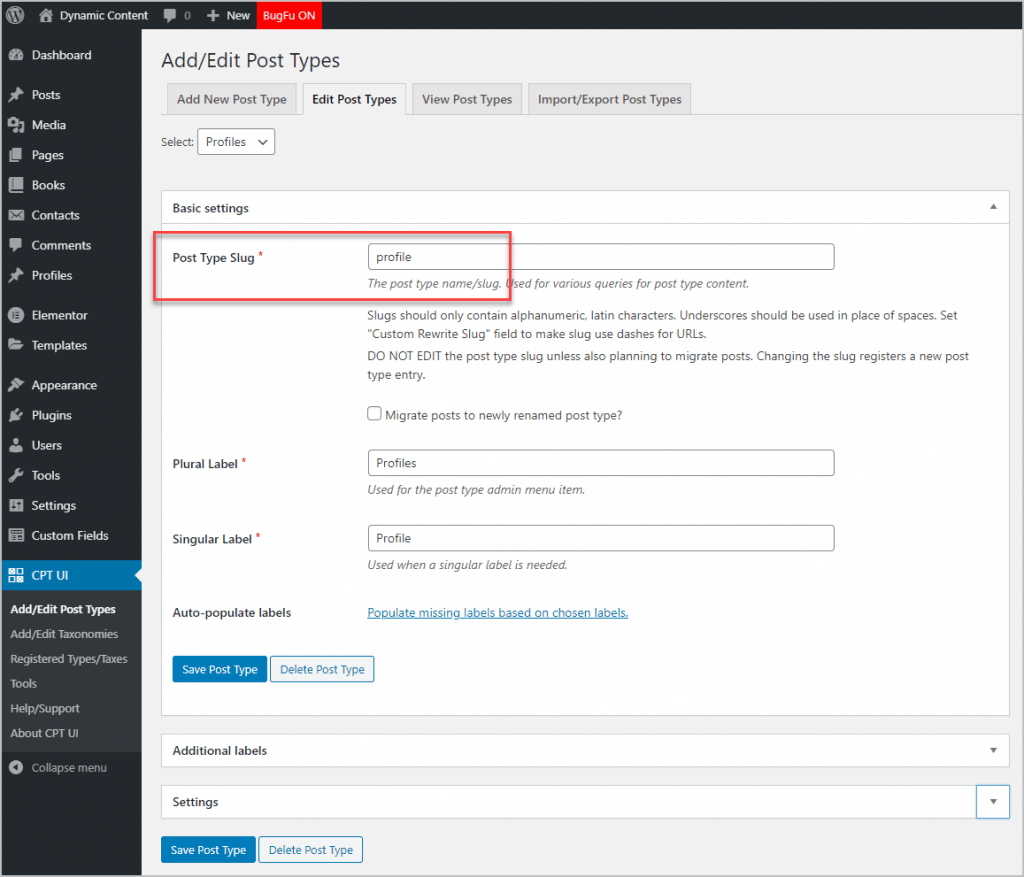
The Profile Custom Post Type
I used CPT-UI to create a minimal Profile Custom Post Type. Note the Post Type Slug of ‘profile’. This is the Custom Post Type name in the database.
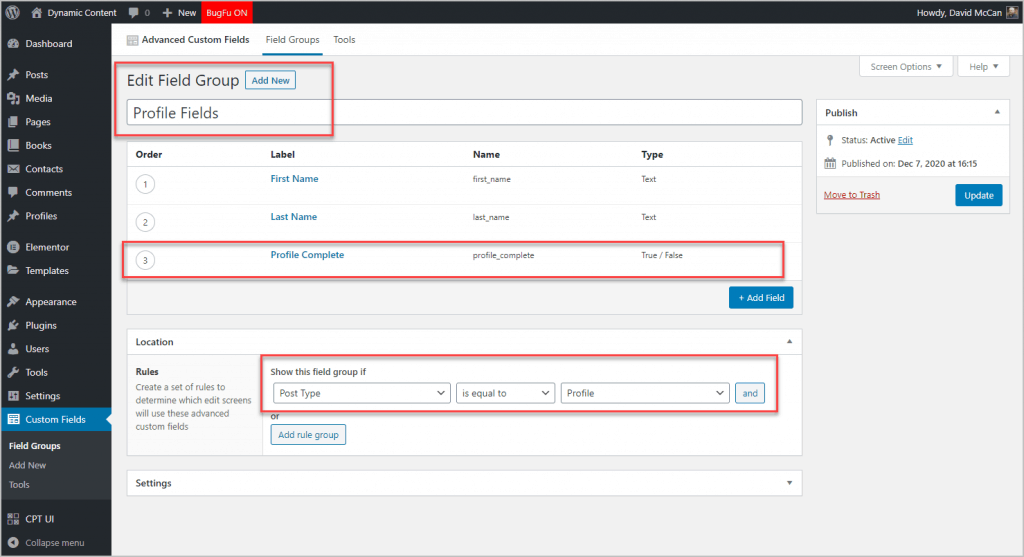
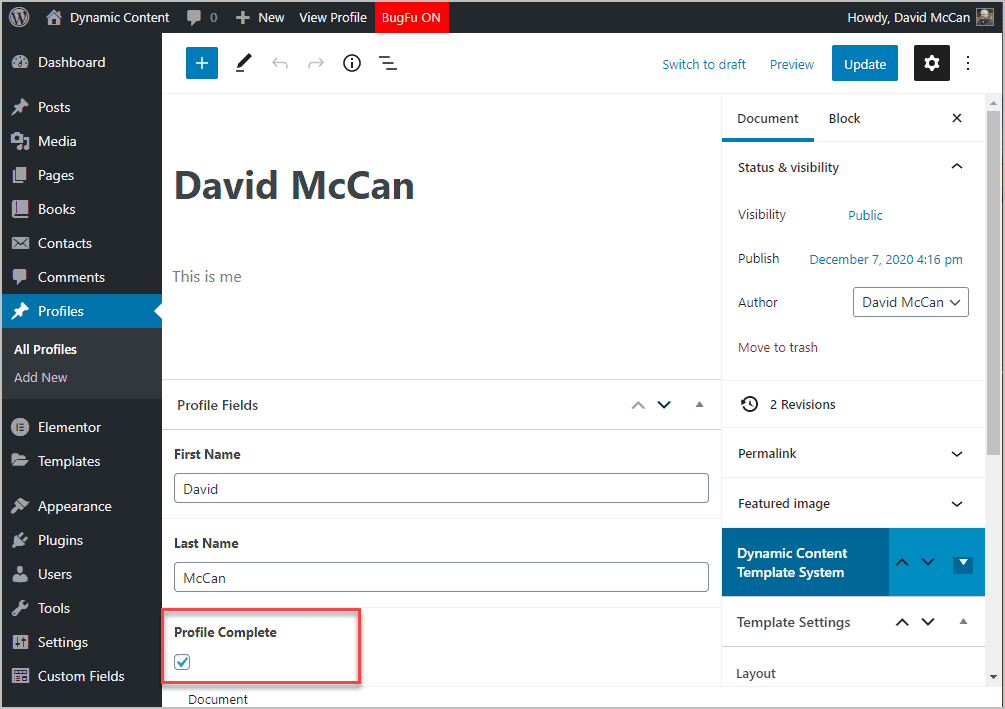
Next I used ACF to add fields to the the Profile Custom Post Type. I created a new field group called Profile Fields and assigned it to show on the edit screen for Profile records. I added three fields, First Name, Last Name, and Profile Complete. Note the Name of the Profile Complete field in the database is “profile_complete” and it is a True/False field.
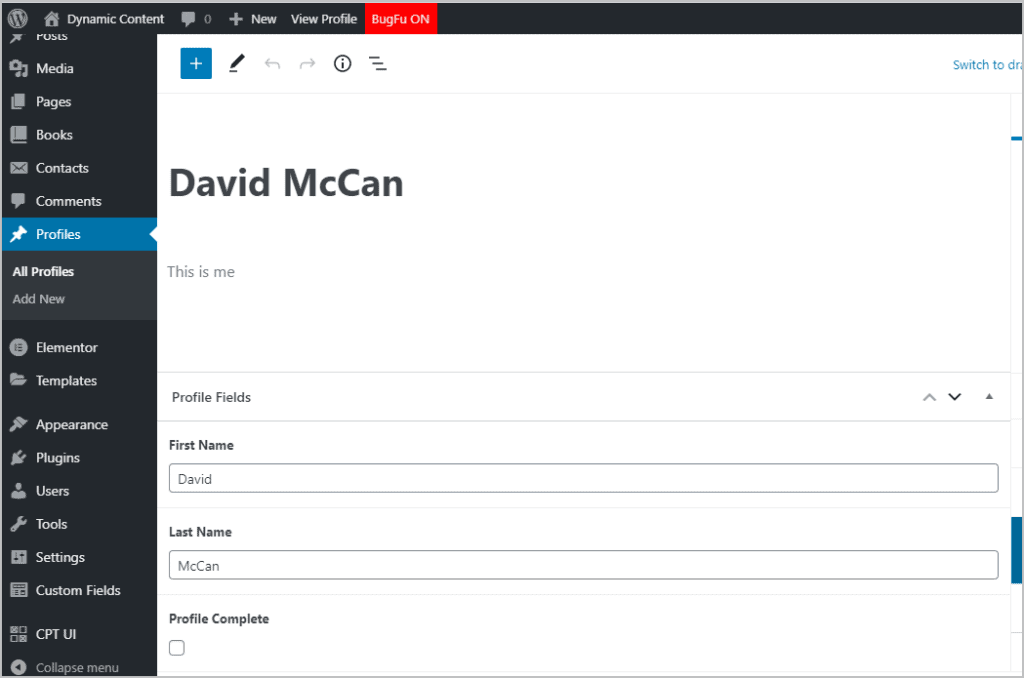
Here is a profile record in the editor. The Profile Complete Yes/No field shows as a checkbox and it is checked to show that all of the fields have values.
If you have not used CPT-UI and ACF before, I have a tutorial that shows how to do that on the WebTNG website.
Creating the Profile Test Page
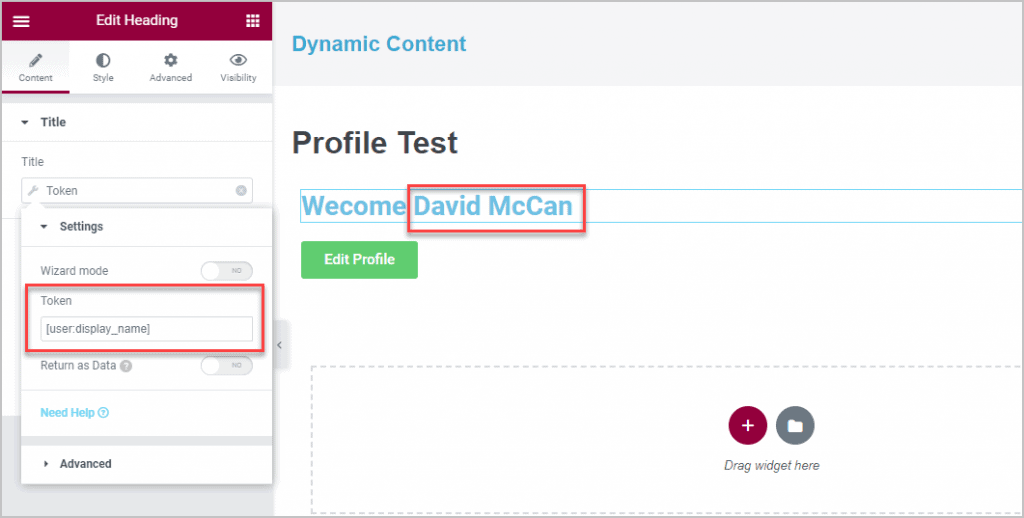
I created a new page titled Profile Test. I added a Heading widget and for the value I used a dynamic token to show the logged in user’s display name. I did this because matching the logged in user to their profile is part of the task, and so knowing who is logged in might be helpful.
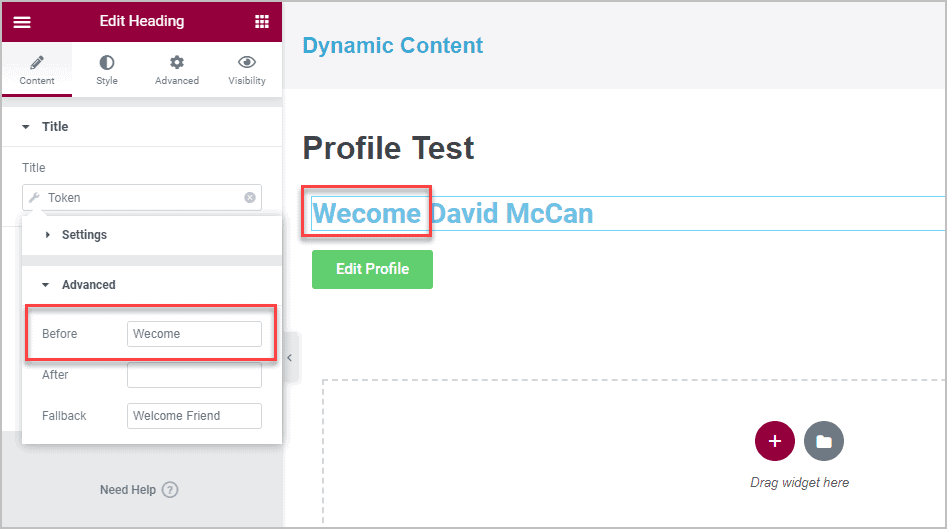
I added the prefix “Welcome ” using the Advanced tab. There is a fallback of “Welcome Friend.” It doesn’t hurt to have a fallback and could at times prevent an error. I also added the “Edit Profile” button. This is what we want to show or hide depending on the value of the “profile_complete” field.
Creating the Custom Display Condition
Getting Started
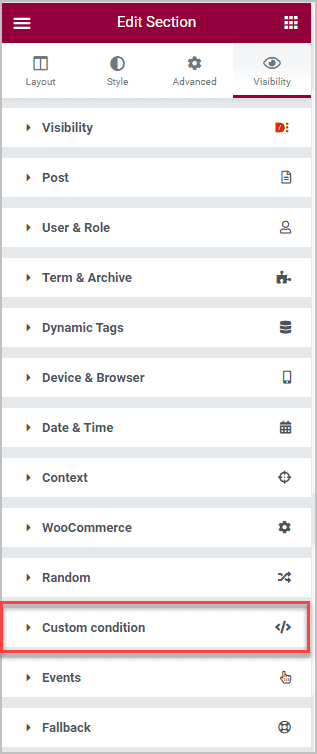
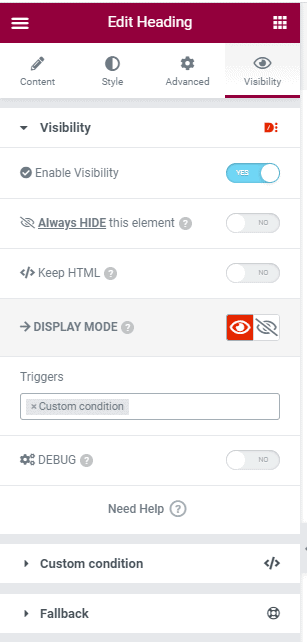
Dynamic Content for Elementor adds the Visibility tab into the Elementor Editor. To turn on conditional display options you need to toggle that on. I right clicked on the section containing the button, switched to the Visibility tab, and toggled on the button.

When you toggle it on then there is a list of possible triggers.
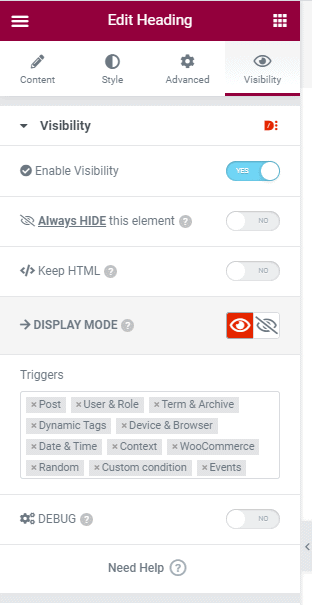
I removed the triggers I’m not using and the result is just the one panel (and the Fallback) was remaining.
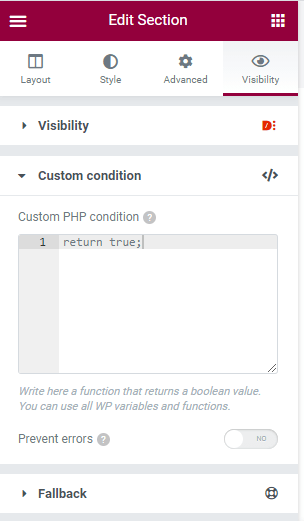
Opening up the Custom condition panel shows a text input area with the code “return true;”. The instructions say to write a function that returns a boolean (true/false) value. You can use all WP variables and functions. There is also a toggle there to Prevent errors. The instructions for that say that if you need to access the current page’s variables then you need to leave that disabled, so I did.
Pseudo Code Logic
When programming, people often suggest writing out the steps and logic ahead of time. So I listed out my plan:
return true to show the button or return false to hide the button
- Get the user id of the logged in user.
- Do a query to find out if the logged in user has a profile record
- If there is no profile record then return true to show the button
- If there is a profile record
- Then get the post ID of the profile record
- Do a query using the post ID to get the value of the “profile_complete” field
- If the value is true indicating the profile is complete then return false (don’t show the button).
- If the value is false then show the button by returning true
Putting Together the PHP Code
WordPress has been around for a long time and it is likely that any question we have has already been answered, so I did a Google search on “WordPress check if logged in user has posts”. The first result was an article on the WordPress StackExchange. Here is the question and answer:
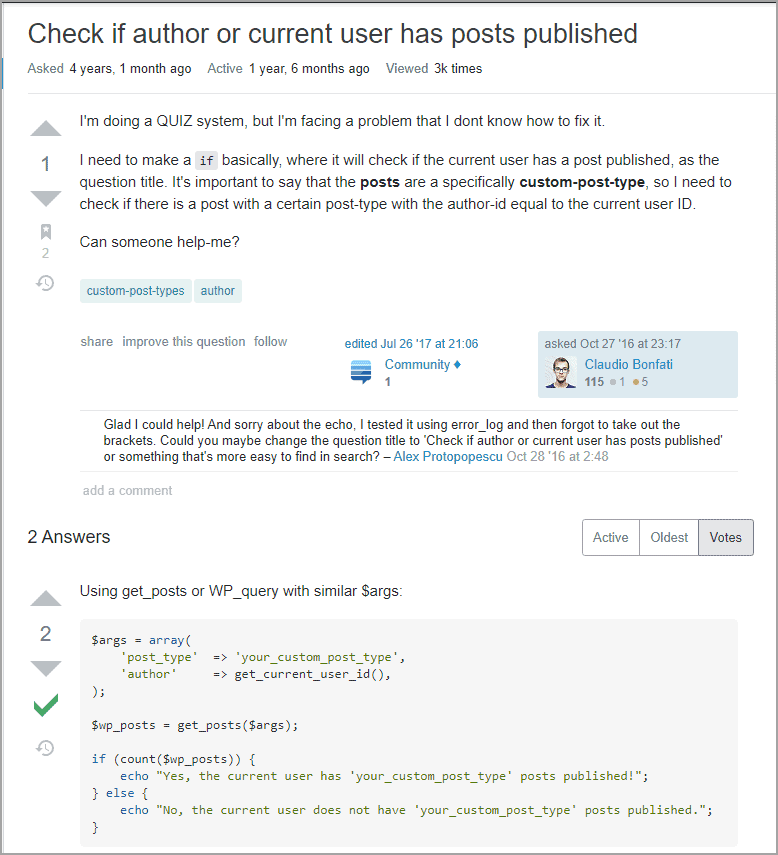
Wow, this is exactly what I need for the first steps! So I added this code to the Custom condition area:
$args = array(
    'post_type' => 'profile',
    'author'    => get_current_user_id(),
);

$wp_posts = get_posts($args);

BugFu::log($wp_posts);

return true;
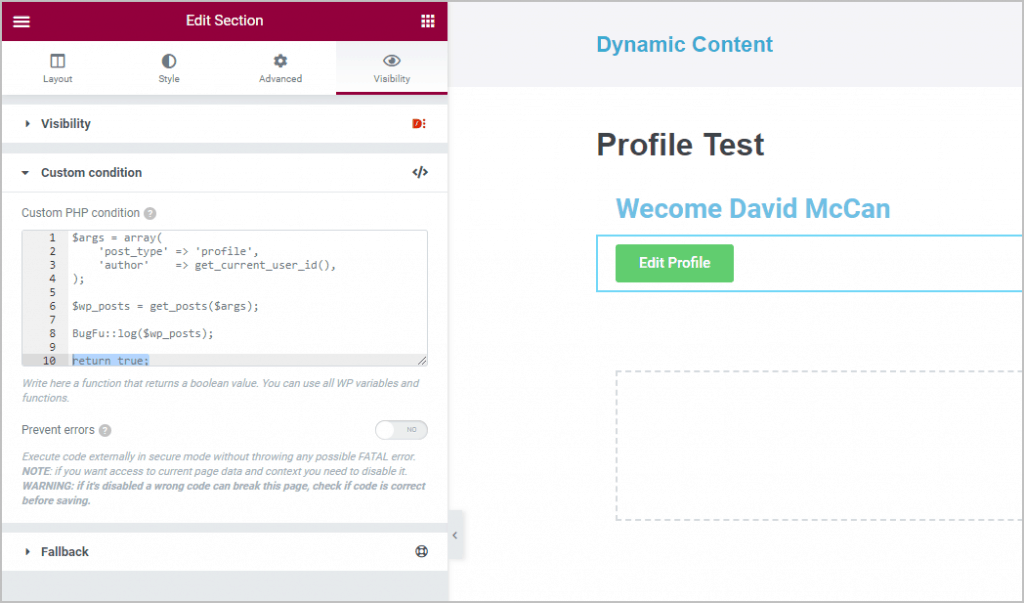
The first bit of code “$args” are the arguments that are going to be passed into the second bit, the “get_posts” function. Note that I changed the “your custom post type” to “profile” to match the name of our Custom Post Type in the database. Then there is a line using the BugFu plugin that is going to output the results of the “$wp_posts” query to the Chrome console so we can see that the query is working as expected. Finally, the instructions are to return a boolean, so I just return true for now. Here is the code in the editor window.
I saved and went to preview the page. Here is the page on the front-end together with the console dump of the PHP query. To see the Chrome console, you right-click on the page and then select “Inspect” from the context menu. Then you can select the “Console” tab.
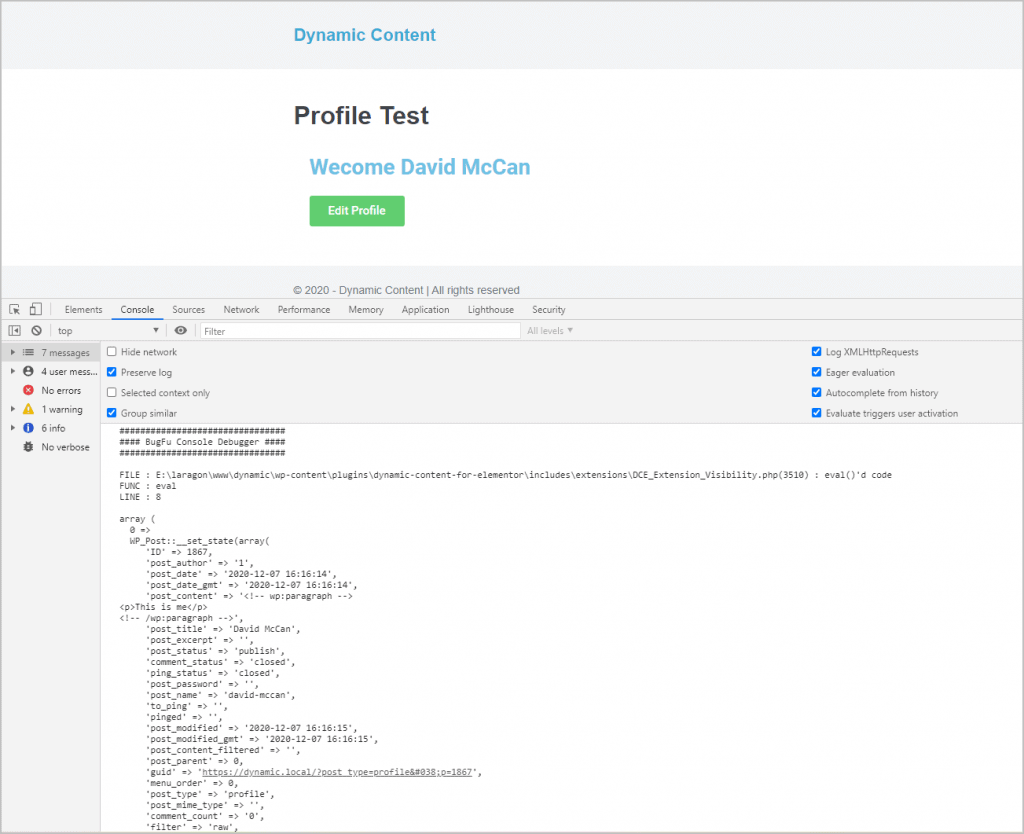
So we can see in the blue header that it is showing my name as the logged in user and in the dump from the query we see that it is picking up the profile record that I created (and showed above). Note that it doesn’t show custom fields by default.
We now need to do steps 2.2 from our pseudo code:
2. If there is a profile record
- Then get the post ID of the profile record
- Do a query using the post ID to get the value of the “profile_complete” field
- If the value is true indicating the profile is complete then return false (don’t show the button).
- If the value is false then show the button by returning true.
Again, doing a Google query, this time for “WordPress get post id from wp_query” I got some good results and the second one had several answers, this one was the one with the most upvotes. It says that you can pass in a “fields” parameter to specify which fields to return:
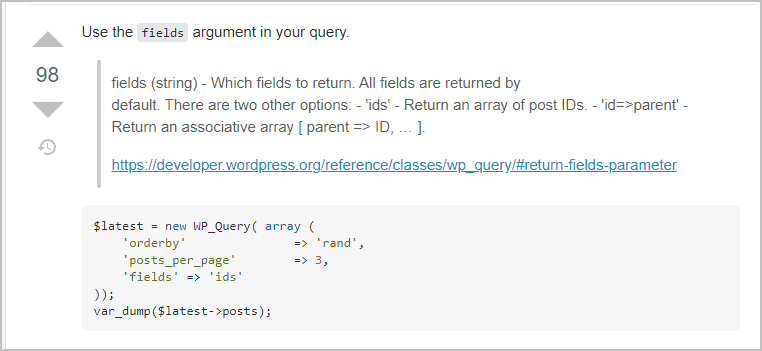
So I modified the query in the Custom condition to specify that I wanted the post ids returned:
$args = array(
'post_type' => 'profile',
'author' => get_current_user_id(),
'fields' => 'ids
);

$wp_posts = get_posts($args);
BugFu::log($wp_posts);
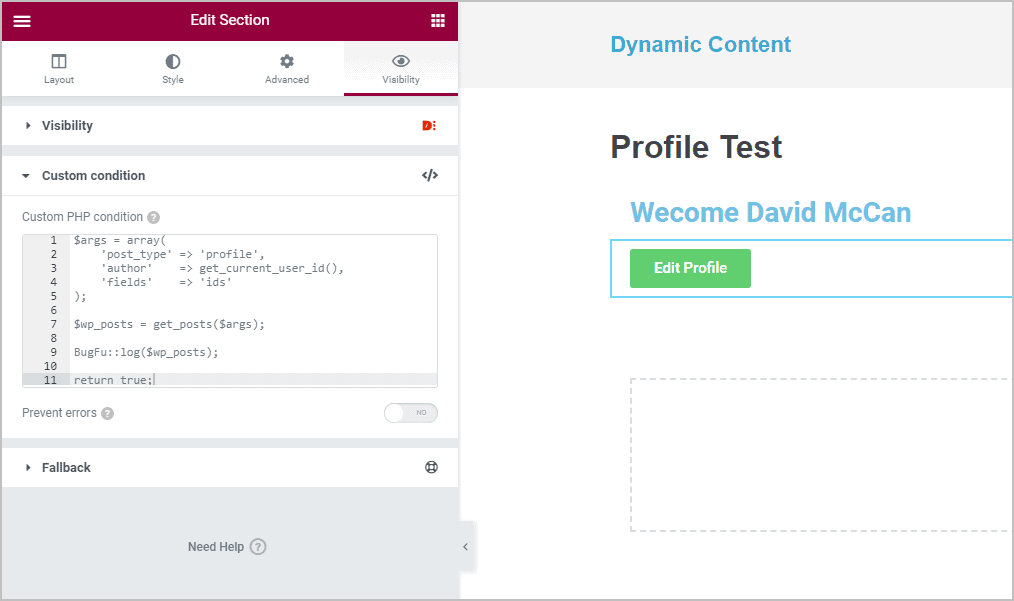
Here is the new query in the editor.
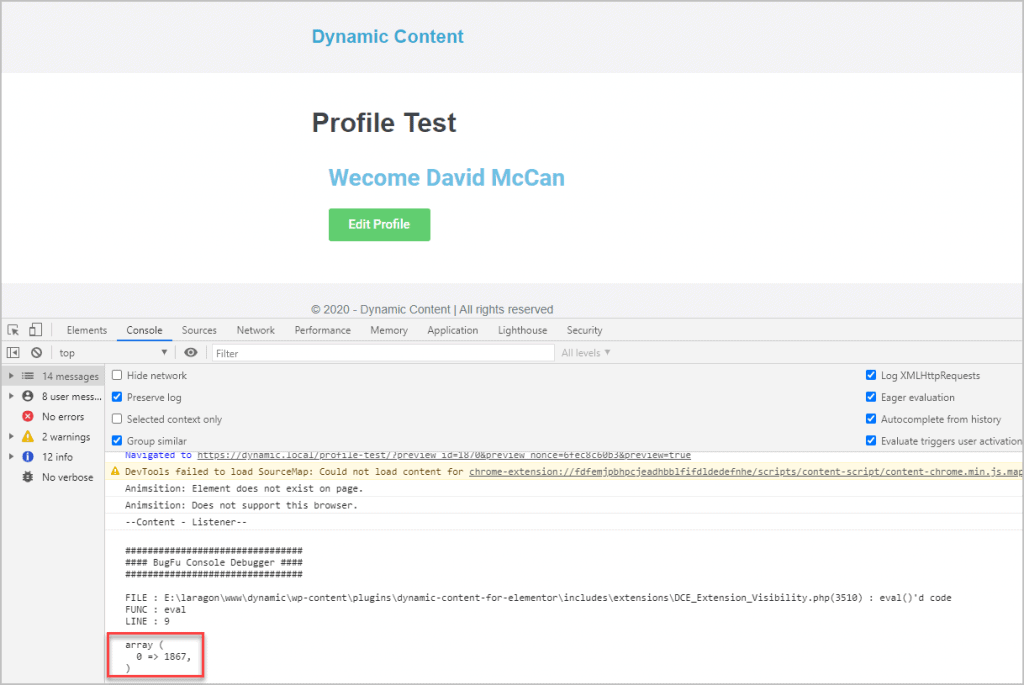
I saved the page and returned to the front-end version and did a refresh. Here is what was dumped in the Chrome console window. As we can see, an array is returned and the only item in the array is the post ID we are looking for. Great!
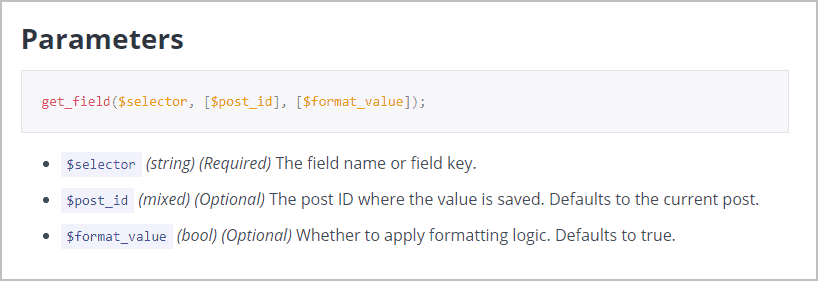
Now that we have the post ID of the profile record, we need to get the value of the ACF “profile_complete” field. I did another Google search (smile) for “how to get ACF field value”. The first result was from the Advanced Custom Fields documentation. ACF has a function called “get_field()”. Here is the documentation. The function takes 3 values: the field name, the post ID, and whether to apply formatting logic.
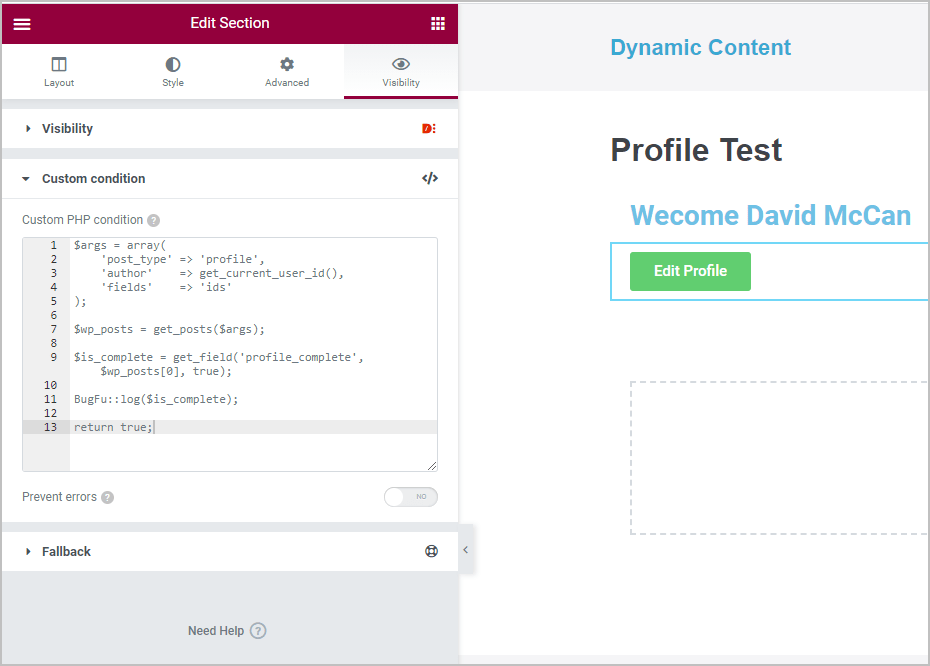
So here is the changed query. See that I filled in the database name of the ACF field and used array syntax to get the value at position “0”, which corresponds to what we saw in the previous version of the condition.
$args = array(
    'post_type' => 'profile',
    'author'    => get_current_user_id(),
    'fields'    => 'ids'
);

$wp_posts = get_posts($args);

$is_complete = get_field('profile_complete', $wp_posts[0], true);

BugFu::log($is_complete);

return true;
Here is the new query in the editor.
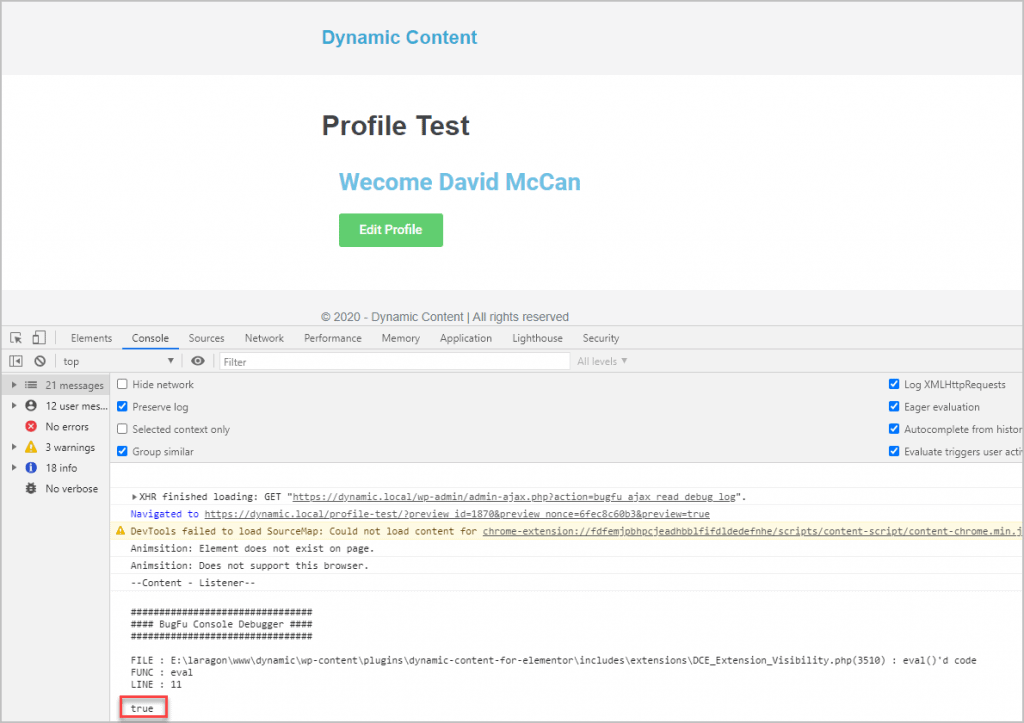
And the output on the front-end where we get true. So everything is working.
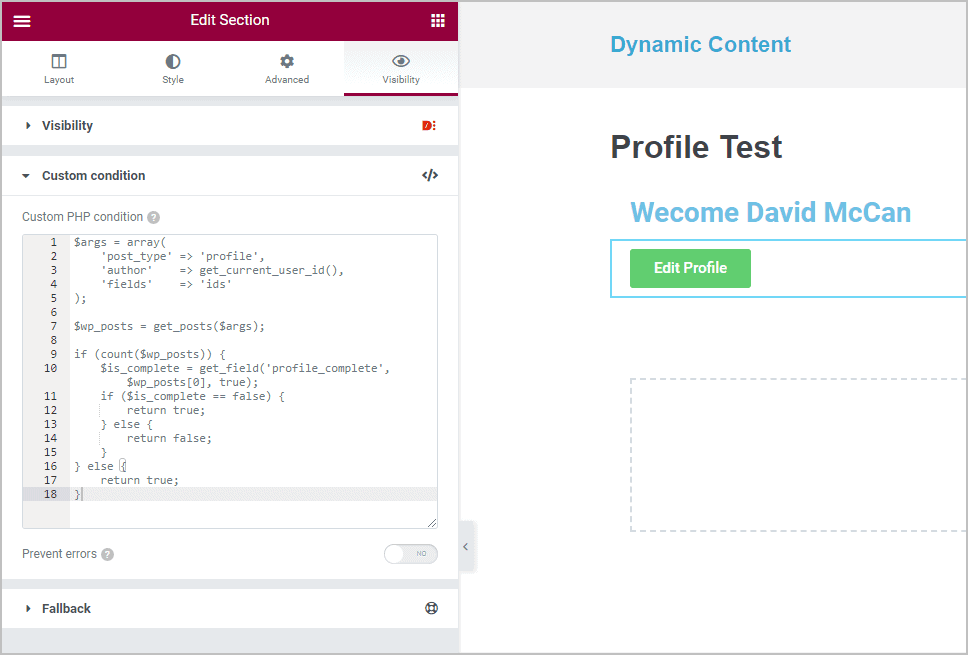
Now, for the final steps, to show and hide the button based on what is returned from our PHP code. I modified the code to add a check of the count to see if a profile record is found. If it is found then run our query to get the value of the “profile_complete” field and then another If/Else block to check that value.
$args = array(
    'post_type' => 'profile',
    'author'    => get_current_user_id(),
    'fields'    => 'ids'
);

$wp_posts = get_posts($args);

if (count($wp_posts)) {
    $is_complete = get_field('profile_complete', $wp_posts[0], true);
    if ($is_complete == false) {
        return true;
    } else {
        return false;
    }
} else {
    return true;
}
Here is the final version in the editor. Note I no longer need the BugFu variable dump.
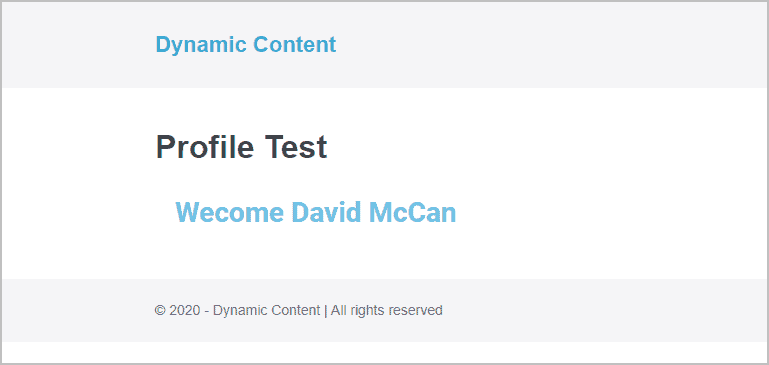
And here is the front-end. The button doesn’t show because the profile is complete.
Just to double check that everything is working, let’s go back to the profile in the editor and change the “profile_complete” field to uncheck it.
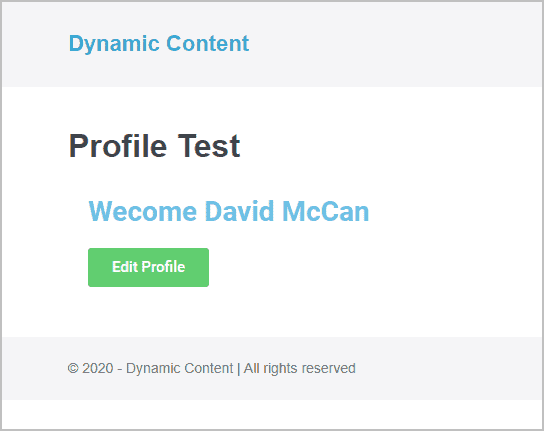
Now, if everything is working as expected, the button should show when viewing the test profile page, and it does!
Summary and Conclusions
The Custom condition option takes custom PHP code. As a programmer I was fairly confident that I could piece together some code that would do what was needed. If you are not a programmer then you will need to be willing to do a lot of research and testing to find code what works. That is why I showed using the BugFu plugin to output the results to the Chrome console.
Note that I built up the solution step by step. This made it manageable and I could confirm that each step was working before going onto the next one. The WordPress Codex is the ultimate list of all of the many built in WordPress functions. There are so many, and they sometimes have subtle differences, that I usually start by Googling, but then if I have any questions I go and check the Codex. For example, here is the top of the page for the “get_posts()” function.
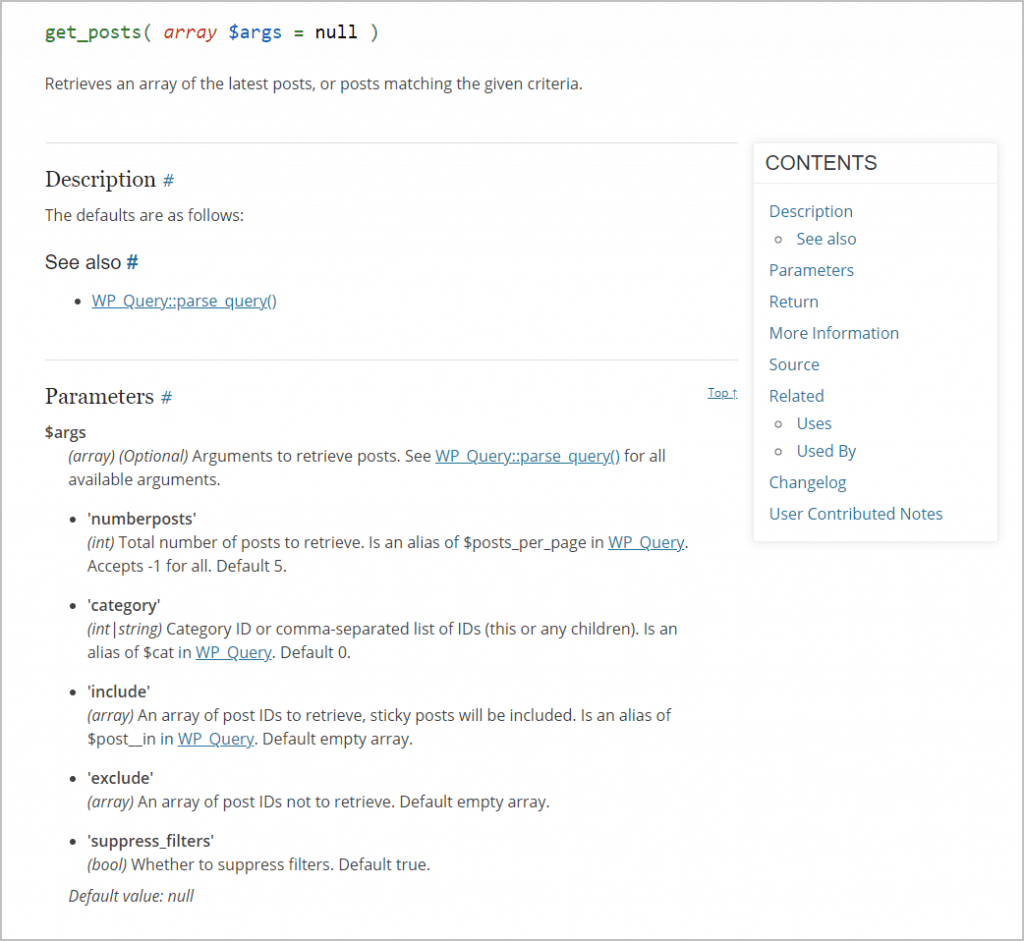
If you read down that page you will see that there are lots of options, such as to pass in a category, and there are also user added examples. I’m mentioning this because if you only rely on answers on StackExchange, you may miss some important information.
To bring it back to Dynamic Content for Elementor, I think of the Visibility extension as a power tool. It would be hard for a new WordPress user to understand it and even an experienced user can make a mistake and cause an error, especially when adding custom PHP code. However, you can see that by allowing us to create our own custom PHP condition we can create a display condition for most anything needed. This takes Elementor beyond being just a page builder and adds application-like functionality.
I hope you found this look at the Custom display condition of Dynamic Content for Elementor useful and that my step-by-step recreation of the process I took helps you when working on something similar. Did the steps make sense? Do you use a different process? Feel free to leave a comment or question below.





This is a really useful and we’ll explained tutorial which coincidentally helps with a similar issue I’m looking at. I look forward to other useful posts.
I’m glad you found it helpful. Thanks for letting me know.
This tutorial is really awesome and your explanation and describing ability is so nice. I have learned this Custom display condition thing for the first time from your post. Thanks for the tutorial and please keep it up.
You are welcome. Thank you for the positive feedback.
I’m trying to use this same method but within a Post Loop (Ele Custom Skin).
I have a field showing the PostID, so I know I can get it.
I want to check a ACF field within the post for True/False and if false show the button.
I thought I could get away without doing the
$args = array(
‘post_type’ => ‘family_members’,
$post->get_the_id() <<<< not sure what this should be
);
$wp_posts = get_posts($args);
part as I am already in the post, but I cannot work out how I can use the current PostID in the get_field('date_of_death') call.
If you are using Dynamic Content for Elementor then you don’t need Ele Custom Skin. You create a template and use it with the new Dynamic Posts widget.
If you are trying to code something manually then perhaps this info will help: https://www.advancedcustomfields.com/resource-category/loop-functions/
Hope this helps.
David
Thanks David,
I’m not sure it makes too much difference which loop utility I use, it’s just as I’m in the post, how I get the post I’d to use in the get-field() call
Regards Pete