
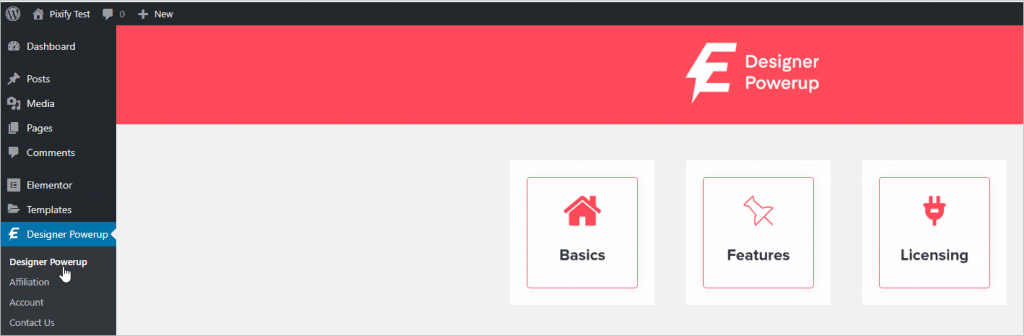
Designer Powerup for Elementor – A Tool for Designers
There are a large number of page builders available for WordPress, but the clear number one leader is Elementor. Elementor is used by site builders, freelancers, and agencies and is the preferred choice of many designers. Yet most of the addons released are widget packs. Some of these widget packs duplicate the functionality of each other and some of them are unique, but few of them focus on designers. Designer Powerup for Elementor is one of the exceptions. I was recently given a copy of Designer Powerup for Elementor to test and this is my unbiased review. I’m going to do a walk-through and then provide my thoughts and conclusions at the end.
Please note: I was given a single site, review only copy of the plugin in order to do this review. There were no requirements on what to say and I have tried to give an honest, balanced review.
Video Version
Install and Configuration
You install Designer Powerup the same way you do any WordPress plugin. When you activate it you see a page for the plugin, but one thing to note is that there are no settings.
Many Elementor addons have settings pages where you can turn on or off different features to avoid having extra resources loaded. I checked the front end of my test site and was pleased to see that no extra files from the plugin were being loaded, even on pages where it was being used. Any CSS resulting from the use of the plugin’s features were loaded in the page specific CSS file, so no bloat and settings to disable are not needed.
Feature Review
Quick Spacer
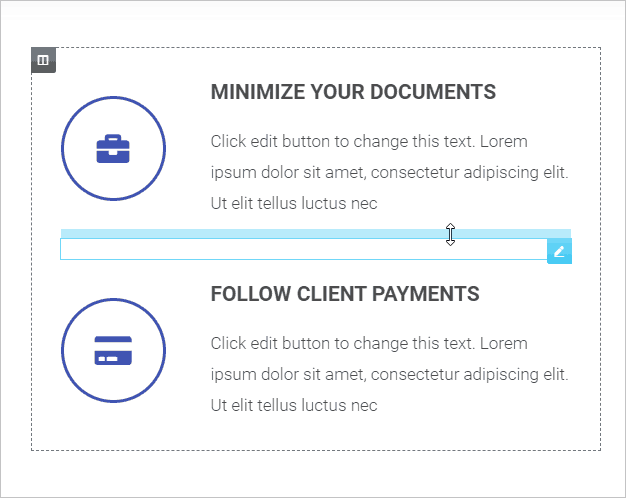
Quick Spacer is a brilliant enhancement to Elementor editing. By default, Elementor allows you to resize columns by dragging the column edge, but that is all.
With Designer Powerup, you can drag and resize everywhere. When you grab the side of an element, it shows the amount of space, with gray for padding and blue for margin. When you drag it the number of pixels in the settings panel are also updated.
There are some keyboard shortcuts that help get the most from the Quick Spacer:
- If you hold the SHIFT key while dragging the spacer, all four sides change together.
- If you hold the ALT key (Option key on Mac) while dragging then opposite sides will change together.
- You can clear all of the spacing by holding down the CTRL key (Cmd key on Mac) while dragging.
Quick Spacer is very intuitive and useful. It is a huge time saver.
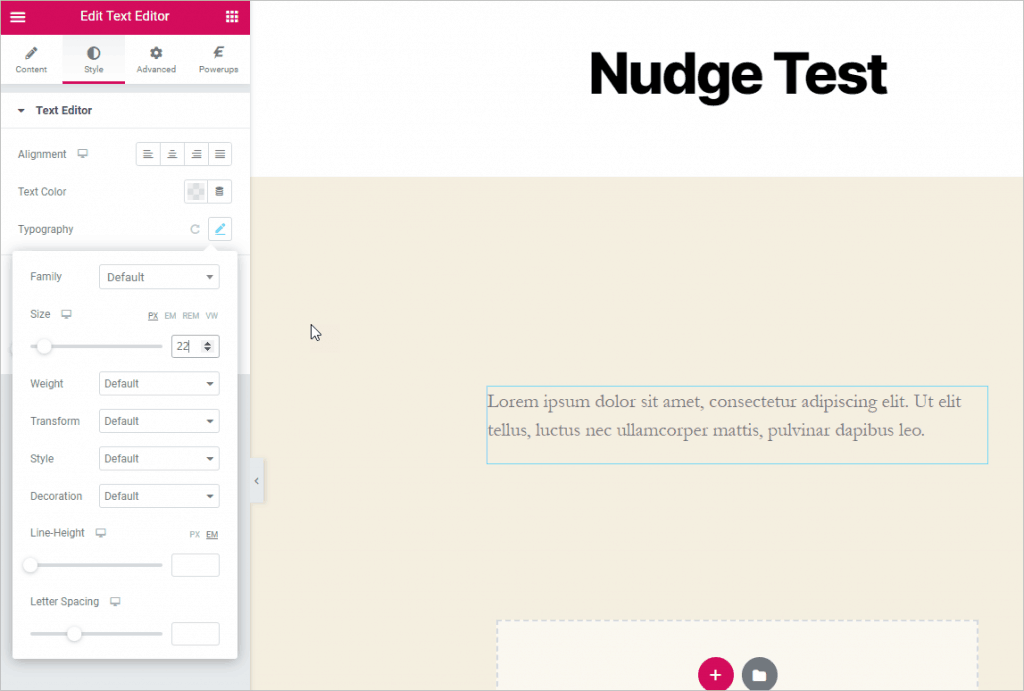
Value Nudge
This feature works with number values in the settings panels by increasing the click increments. Most controls normally increment by one. Designer Powerup Nudge is a keyboard shortcut that increments the controls by 10, or in controls that have decimals, such as line heights, it increments them by a full number. This is a convenience function that works by first putting the mouse cursor in a number settings box and then holding down the SHIFT key and using the keyboard up and down arrow keys to change the values.
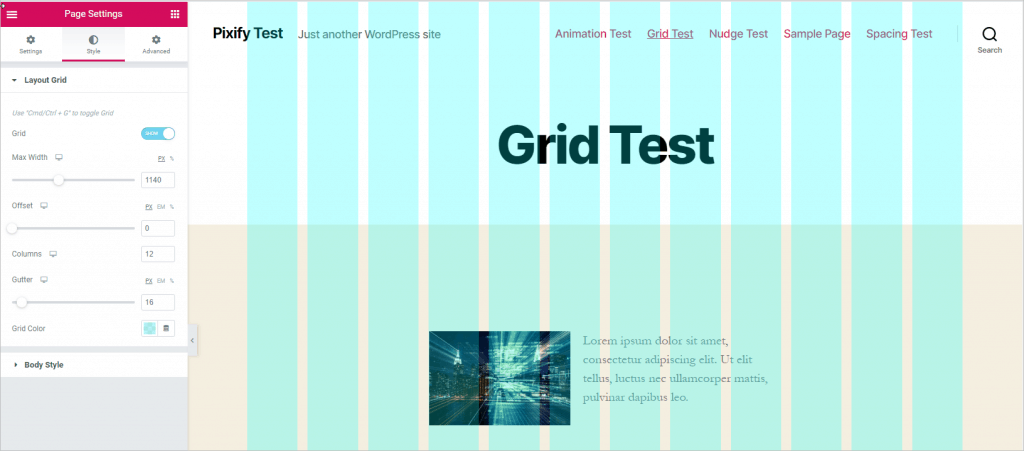
Layout Grid
Designer Powerup includes a grid overlay option. You can activate the grid by clicking on the gear icon in the lower left corner to get to the page options, and then going to the Style panel. There are options to set the number of columns and the alley size between them. This might be useful for designers who are creating bespoke templates or need pixel perfect layouts.
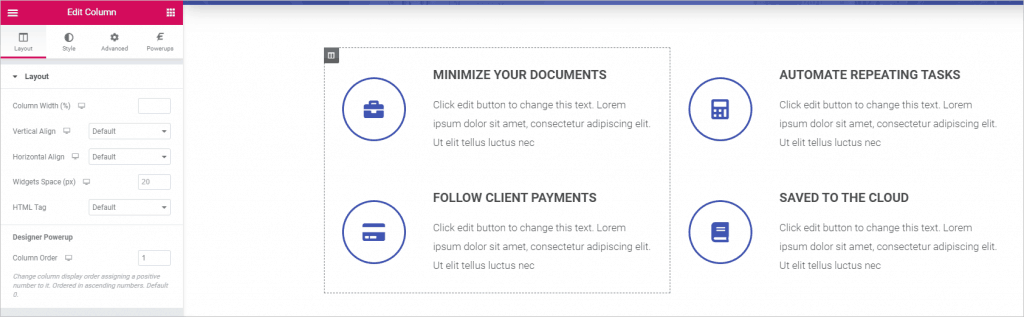
Column Order
Elementor normally allows you to set how many columns to show on desktop, tablet or mobile and if you want them shown or hidden. The default column order is from left to right. The Designer Powerup Column Order feature takes this a step further and lets you set the column order numerically, by device size. This is an extra level of layout control.
Shape Dividers
I’m sure you’ve seen some sites made with page builders that remind you of striped shirts from the nineties. To avoid that look, Elementor comes with a number of shape dividers that can be applied to sections and used to make the pages look less boxy. Designer Powerup adds 25 additional shape dividers.
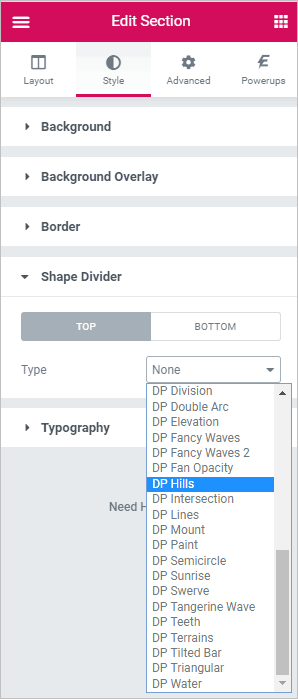
Here is the DP Paint section divider.

Blob Generator
Random shapes have become common in design to breakup the page and provide artistic flair. Design Powerup has a blob generator widget. A cool thing about this is that it generates an SVG which is extremely lightweight.

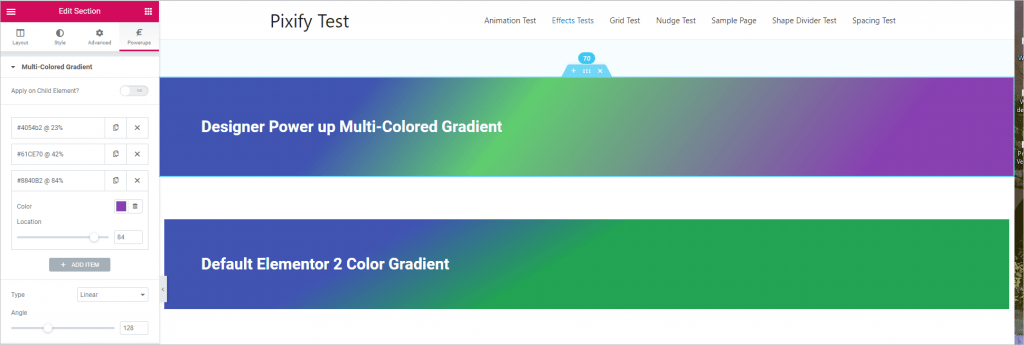
Multi-Color Gradient
Normally with Elementor you can have a two color gradient. Designer Powerup lets you add as many colors as you want.
Multi-Layer Shadow
Elementor allows you to add a box shadow around images. The Designer Powerup lets you add shadows to any element. Elementor allows you add one shadow effect to images. The Designer Powerup lets you add multiple shadow effects. Note that the Designer Powerup version seems to be a replacement for the Elementor box show effect and cannot be used in addition to it.
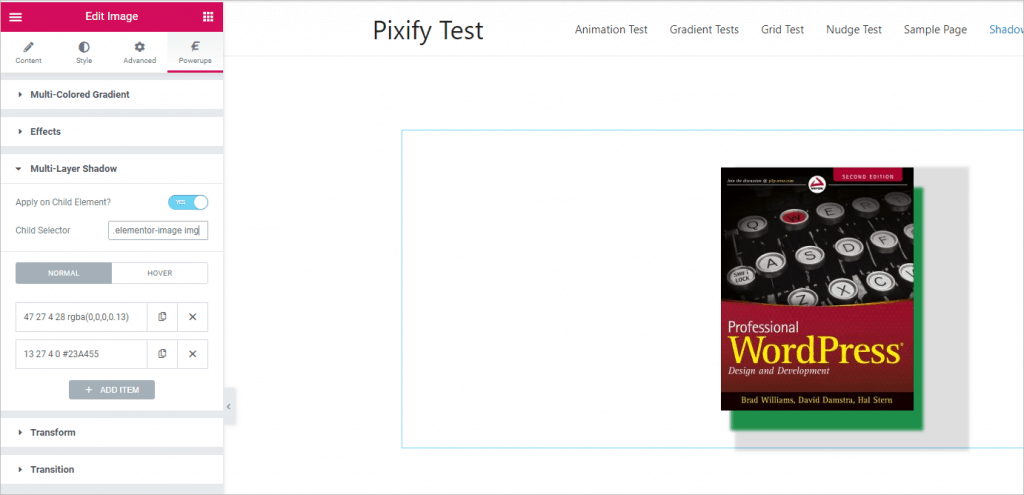
Elementor places all widget content inside of multiple container div elements to facilitate advanced placement and styling effects. With the Multi-Layer Shadow powerup, as with some of the other design effects, this can lead to a “what the heck” moment. For example, here is an image with two shadow effects applied.
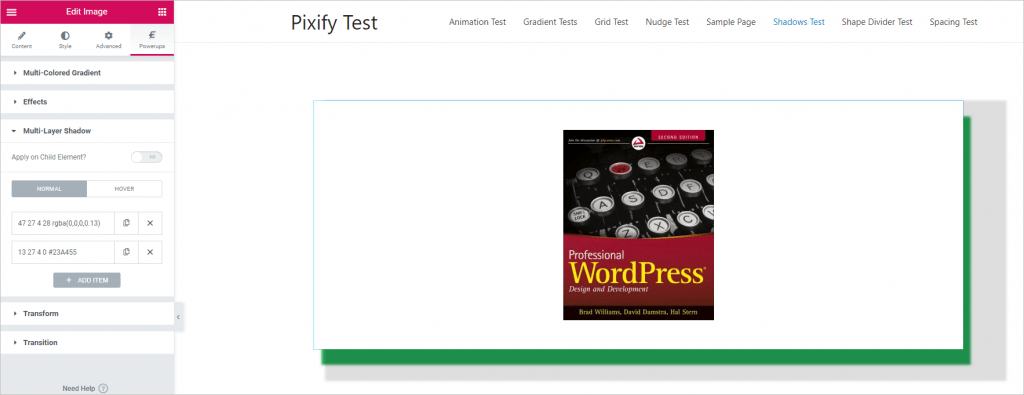
If you look at this book cover image, it is very flat and lifeless. Adding a shadow will help to lift it off the page. My expectation and intent was to put the shadows around the book cover image, but instead the shadows went around the container div. Several of the powerups have an option to apply the effect to the “child element,” or in this case the actual image. This might take a bit of trial and error to find the CSS selector to use. In this case, I toggled the option on and added “.elementor-image img” and the shadows got applied to the image.
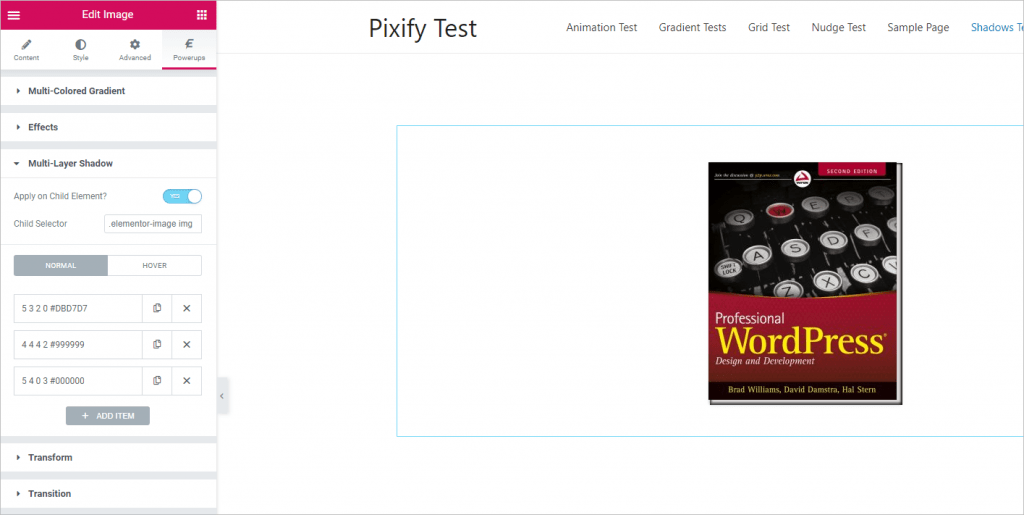
The green was just used so I could easily see that it was working. Here is my experiment to see if I can make the image look like a book with pages. It’s pretty close to what I wanted.
CSS Effects
Elementor comes with the ability to apply CSS filters to images. This is what that control looks like.
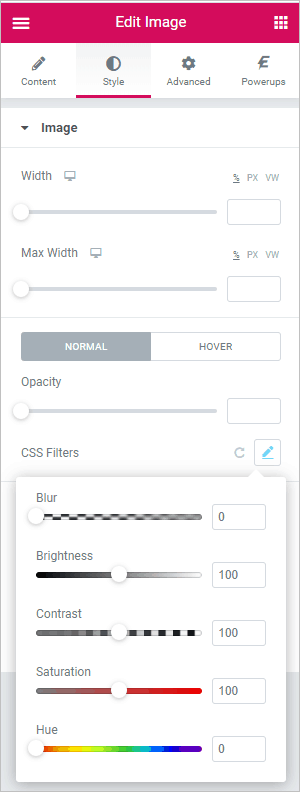
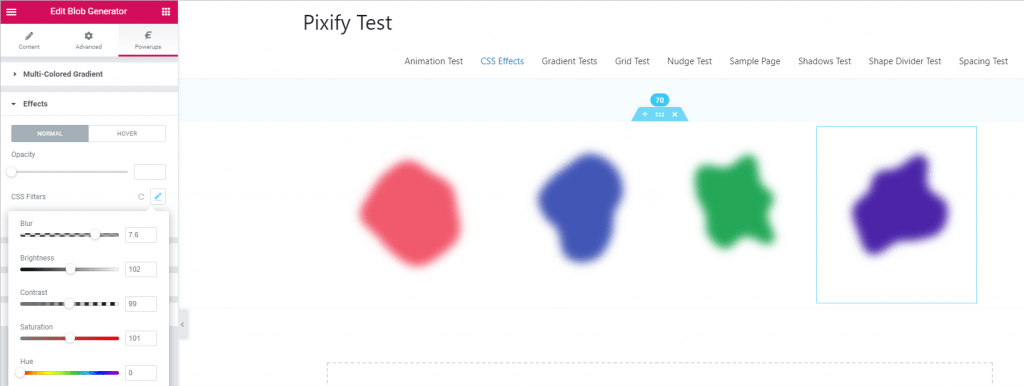
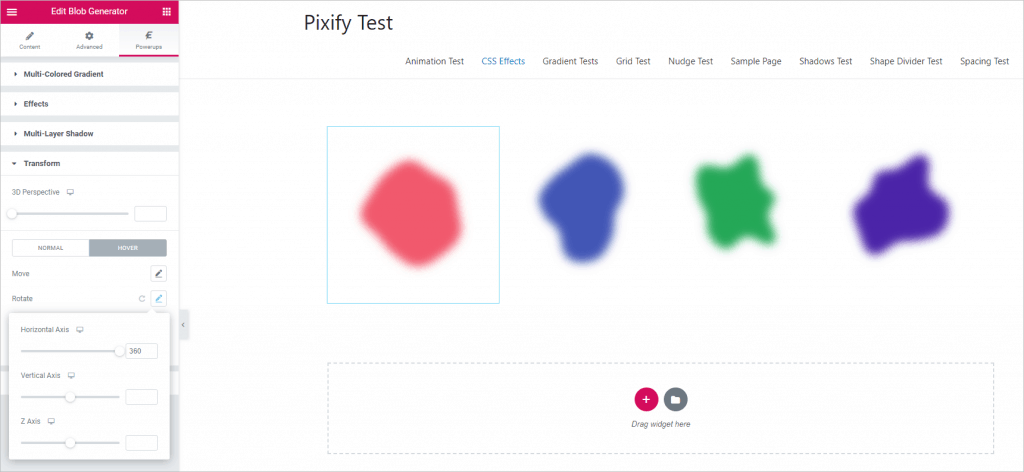
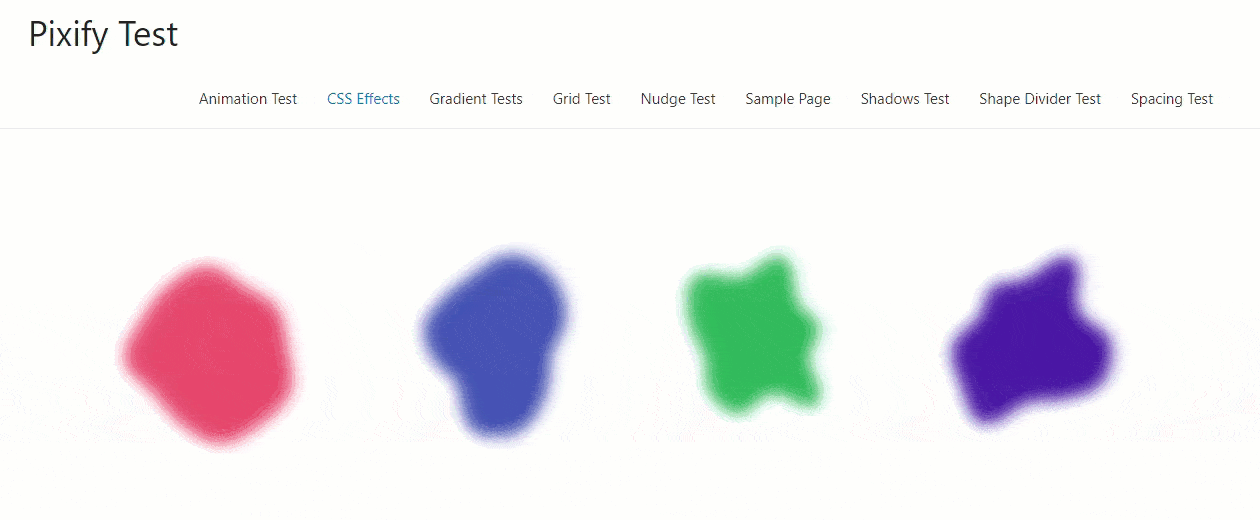
The CSS Effects Powerup allows you to apply those same Blur, Brightness, Contrast, Saturation, Hue and Opacity filters to any Elementor element, not just images. For example, I used the Blob widget to create four blobs and then applied the blur effect to them.
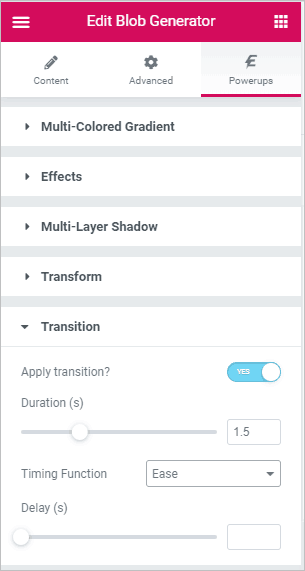
Transition Powerup
You may have noticed that some of the powerups have Hover options. These take effect when the user moves the mouse over an element or then moves it off. For example, the CSS Effect above has a Hover option. By default these are immediate, but if you want to make it like an animation, you can use the “Transition” powerup. This adds a duration and delay option and you can also apply ease in or ease out functions. So, Transition isn’t used on its own, but together with the Hover options of other powerups. Note that it replaces the default Elementor timings for mouse and appearance events.
Transform Powerup
The Transform powerup gives the ability to Move, Rotate, Scale and Skew an element. So to do two things at once, I thought I’d show a Transform Hover powerup together with the Transition from the screenshot above. Remember the blob already had a CSS Effect Blur applied, so for the Hover for that CSS Effect I set the blur to none. So, if you move the mouse over the pink blob the blur is removed.
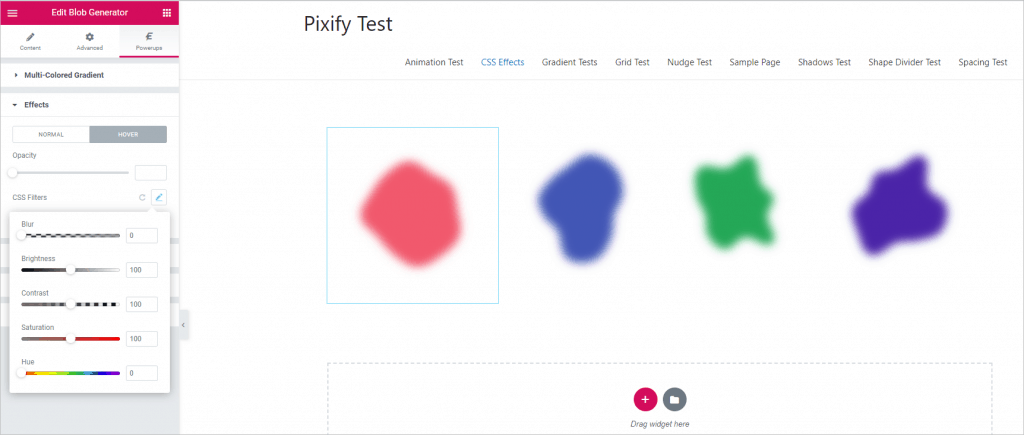
I then went into the Transition Rotate Hover settings area and set the blob to do a 360 when the mouse is moved over it.
Here is a GIF that shows the result. When you mouse over it turns in a circle and the blur is removed. Then when you move the mouse out it goes back.
Discussion and Conclusions
Possible Feature Request Ideas
These were mainly small things and new feature ideas that would add more to the plugin.
Menu Placement: When you install the Designer Powerup plugin it creates a top level menu item in the WordPress admin. However, there are no settings, so I’m not sure that it warrants a top level menu. Maybe it could be placed under the Elementor menu, as I’ve seen some addons do, or even under the Settings menu.
Grid Powerup: The Grid powerup is a pretty specialized feature that might be useful for designers who need absolute control over element placement. The grid has good options for controlling the number of columns, size, and alley areas, but there is not the ability to have horizontal guides. It seems that horizontal row guides would be just as valuable.
Animation Options: CSS Effects and Transforms have an option to animate on mouse hover, with a delay and duration setting. The “Normal” hover Transforms are just settings. I found myself wanting to these to be animations as well. For example, there is a Movement Transform which in normal mode just moves the element as if you used a margin or negative margin. It would be cool if this was an animation and then when you hovered the mouse over it you could change the direction.
Elementor Built-In VS Designer Powerup Features: It took a bit of experimentation to figure out that the Designer Powerup effects replace, and are not added to, the default Elementor options. This was mainly an issue in relation to the Transition setting replacing the default Elementor setting. My guess is that these hook into the Elementor features, and that may be one reason that the powerups are light-weight. However, I didn’t want to give up the built in Elementor Motion Effects (entrance and mouse).
Designer Powerup Strengths
Stability and Functionality: Designer Powerup is a relatively new plugin, but the features worked as intended and I didn’t encounter any bugs or crashes. The addon is made by the same group that makes the popular Smart Content Filter plugin, so Designer Powerup is made by an existing company that has been in business for a while.
It is Lightweight: I was pleased that the plugin didn’t seem to slow down the Elementor editor or add bloat to the front end. Things like the Blob widget creating SVG blobs, instead of images, is nice because SVGs are lightweight and scale well.
Documentation: Each of the features has a documentation page. While it would be nice if there were examples of each feature, the documentation was useful and helped in figuring out how to use them. There are videos for the features, but these seemed more like promotional rather than how-to videos.
Quick Spacers: The Quick Spacers is a killer feature. Adjusting margin and padding can be a pain, but this made it so much easier. It feels like a natural part of Elementor and once you use it you’ll never want to go back.
Originality and Audience: As I mentioned in the introduction, there are a lot of Elementor addons that provide duplicate widgets. Designer Powerup isn’t another cookie cutter addon. It adds new features that aren’t available elsewhere. Also, most Elementor addons mainly target site building and this is one of the few that is squarely focused on developers.
Conclusion
There are a few features, such as the Quick Spacer, that every user will want, but most of the features are targeting designers. Consequently, this is an Elementor addon that designers and those with design skills will want to look at closely. New site builders or those not using Elementor’s advanced design options may not not have the skills to use all of its features effectively. Designer Powerups is available for purchase for 1, 10, or 100 site packages, either on an annual subscription or a one time lifetime option. The packages are attractively priced.